I want a rich, warm, spiced pumpkin dessert right now, and I have everything except the energy to make a layered cake from scratch. That’s the honest truth that led me to this Easy Pumpkin Dump Cake with Vanilla Ice Cream. It wasn’t a grand plan or a family heirloom recipe. It was a Tuesday afternoon in early October, the kind where the air gets that specific crispness, and I was staring at a can of pumpkin puree in my pantry, feeling both ambitious and deeply lazy.
Here’s the thing about dump cakes—they feel almost like cheating. You dump ingredients into a pan, layer them without fuss, and bake. No creaming butter and sugar. No alternating dry and wet ingredients. No mixer required. The first time I made this, I actually laughed when I pulled it out of the oven. It looked like a proper fall dessert, all bubbly and golden, and I had barely broken a sweat. That moment, honestly, is when I knew this recipe was going to become a regular in my kitchen.
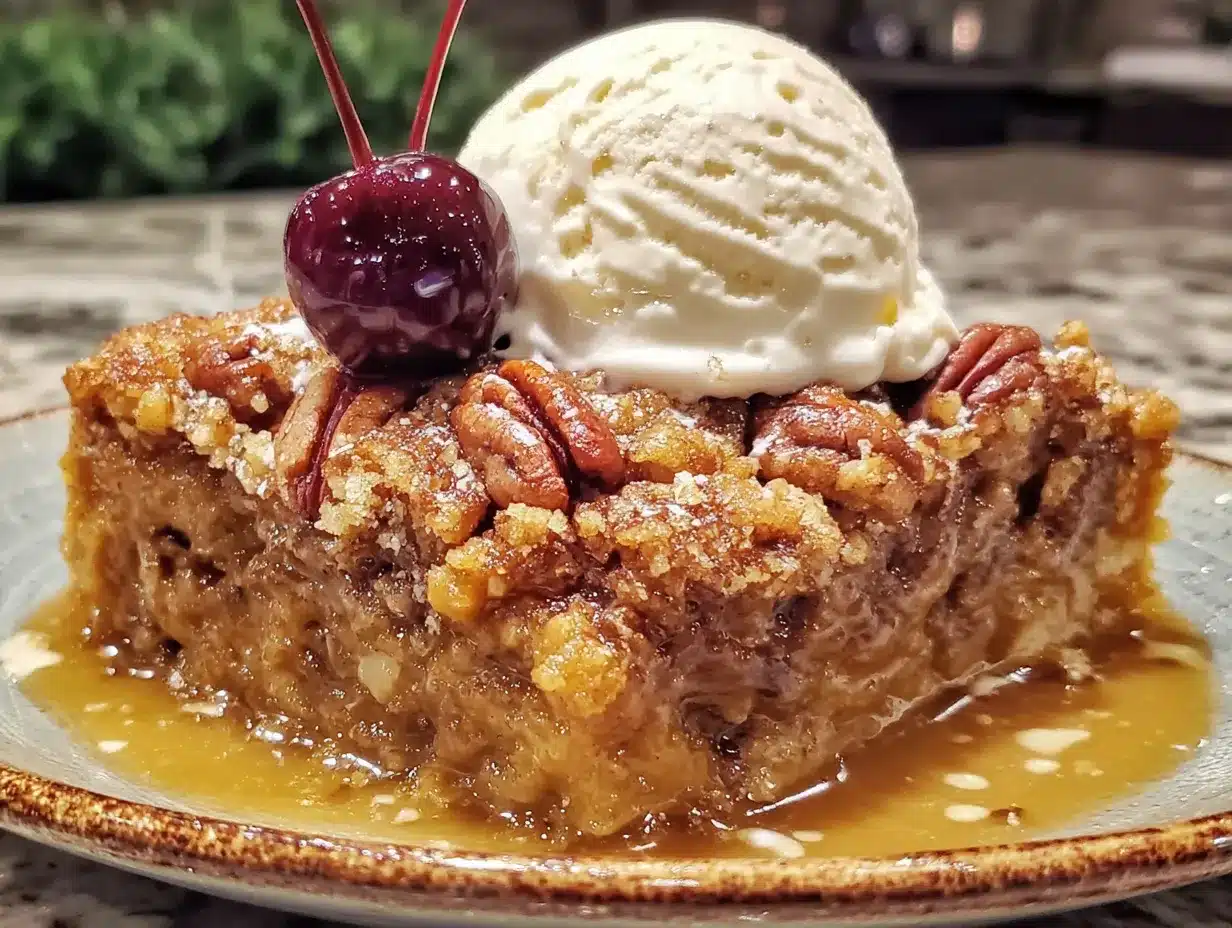
The combination is simple but devastatingly effective. A soft, almost pudding-like pumpkin layer forms on the bottom, while the top bakes into a crisp, buttery crumb topping. You scoop it warm, top it with a scoop of melting vanilla ice cream, and suddenly you have a dessert that tastes like you spent hours on it. I’ve served this to guests who asked for the recipe, assuming there was some complicated technique involved. I just smiled and said it was my “secret family recipe.” The secret is that it takes ten minutes of actual work.
This recipe has become my go-to for fall gatherings, last-minute dinner parties, and those quiet nights when I just want something sweet without a kitchen full of dirty bowls. It’s forgiving, adaptable, and genuinely delicious. Trust me, you’re going to want this in your back pocket.
Why You’ll Love This Recipe
Let me tell you why this Easy Pumpkin Dump Cake with Vanilla Ice Cream is about to become your new favorite fall dessert. I’ve tested this recipe more times than I care to count, tweaking the ratios and the baking times until it was absolutely perfect. Here’s what makes it stand out:
- 4 Ingredients Only : You read that right. Canned pumpkin, yellow cake mix, butter, and vanilla ice cream. That’s it. No eggs, no milk, no spices if you don’t have them (though I recommend them).
- 10 Minutes of Prep : This is not an exaggeration. You can have this in the oven faster than you can preheat it. It’s the perfect recipe for when you need a dessert but don’t have the bandwidth for a project.
- One Pan, Zero Fuss : Everything happens in a single 9×13 baking dish. No mixing bowls, no stand mixer, no extra cleanup. Just dump, spread, bake, and serve.
- Perfect for Fall Gatherings : Whether it’s Thanksgiving, a Friendsgiving potluck, or just a cozy Sunday dinner, this cake fits right in. It’s impressive enough for company but easy enough for a Tuesday night.
- Crowd-Pleaser Guaranteed : I’ve served this to kids, adults, picky eaters, and dessert snobs. Every single person has gone back for seconds. The combination of warm pumpkin and cold ice cream is universally loved.
What really sets this recipe apart from other pumpkin dump cakes is the texture. Many versions come out soggy or uneven. My method ensures a perfectly set pumpkin layer with a crispy, golden topping every single time. The secret is in how you layer the ingredients and the specific baking temperature. I learned this through trial and error—trust me, I’ve made the soggy version so you don’t have to.
This isn’t just another pumpkin dessert. This is the one that makes people close their eyes after the first bite. It’s comfort food at its finest—warm, spiced, creamy, and utterly satisfying. And the best part? You can make it with ingredients you probably already have in your pantry.
What Ingredients You Will Need
This recipe uses simple, pantry-friendly ingredients to create something truly magical. The beauty of this Easy Pumpkin Dump Cake with Vanilla Ice Cream is that each ingredient plays a specific role, and together they create a dessert that’s greater than the sum of its parts.
For the Pumpkin Layer
- 1 can (15 oz) pumpkin puree (not pumpkin pie filling—make sure you get pure pumpkin). I prefer Libby’s for its consistent texture and flavor, but any brand works. Look for cans that say “100% pure pumpkin” on the label.
- 1 can (12 oz) evaporated milk (adds richness and helps set the pumpkin layer without making it too heavy). You can substitute with half-and-half if needed, but the texture will be slightly less creamy.
- 3/4 cup granulated sugar (provides sweetness and helps the pumpkin layer set properly). You can reduce this to 1/2 cup if you prefer a less sweet dessert, but I find 3/4 cup balances the pumpkin flavor perfectly.
- 2 large eggs (helps bind the pumpkin layer and gives it structure). Make sure they’re at room temperature for best results.
- 2 teaspoons pumpkin pie spice (or a mix of 1 teaspoon cinnamon, 1/2 teaspoon nutmeg, 1/4 teaspoon ginger, and 1/4 teaspoon cloves). I use this blend from my pumpkin cinnamon rolls recipe and it’s perfection.
- 1 teaspoon vanilla extract (enhances all the warm flavors). Use pure vanilla extract if you have it.
- 1/4 teaspoon salt (balances the sweetness and brings out the pumpkin flavor). Don’t skip this—it makes a difference.
For the Topping
- 1 box (15.25 oz) yellow cake mix (dry, unprepared). I recommend Duncan Hines or Betty Crocker for consistent results. Do NOT use a “butter recipe” or “extra moist” variety—they can make the topping too dense.
- 1 cup unsalted butter, melted (2 sticks). Salted butter works too, just reduce the added salt in the pumpkin layer. I prefer using European-style butter like Kerrygold for a richer flavor.
- Optional: 1/2 cup chopped pecans or walnuts (adds wonderful crunch). I love the texture contrast, but it’s totally optional.
For Serving
- Vanilla ice cream (essential—do not skip this). The cold, creamy ice cream melting over the warm cake is what makes this dessert truly special. Use a good quality brand like Häagen-Dazs or make your own if you’re feeling ambitious.
That’s genuinely it. Four ingredients if you count the cake mix and butter as one each, plus the pumpkin and ice cream. The eggs, milk, and spices are pantry staples that most bakers already have on hand. This recipe was designed to be accessible, which is why I love it for last-minute dessert emergencies.
Equipment Needed
One of the best things about this Easy Pumpkin Dump Cake with Vanilla Ice Cream is how little equipment it requires. Here’s what you’ll need:
- 9×13-inch baking dish (glass or ceramic works best for even heat distribution). I use a Pyrex dish and it’s perfect. If you only have metal, reduce the baking time by 5-10 minutes and check early.
- Large mixing bowl (for whisking the pumpkin layer ingredients). Any medium-to-large bowl works.
- Whisk or fork (for combining the pumpkin mixture). No electric mixer needed here.
- Measuring cups and spoons (for accurate measurements). I cannot stress enough how important it is to measure precisely for this recipe.
- Spatula (for spreading the cake mix evenly). A rubber spatula works great.
- Cooling rack (optional but helpful for even cooling). If you don’t have one, just let the cake cool on the counter.
That’s it. No stand mixer, no hand mixer, no food processor. This is truly a one-bowl, one-pan recipe that makes cleanup a breeze. I’ve made this in a pinch using a fork and a glass baking dish, and it turned out perfectly every time.
Preparation Method
Let me walk you through this step by step. I’ve included all my little tips and tricks to ensure your Easy Pumpkin Dump Cake with Vanilla Ice Cream turns out perfectly every single time.
- Preheat your oven to 350°F (175°C). While it’s heating, lightly grease your 9×13 baking dish with butter or non-stick spray. I prefer butter for the flavor, but spray works fine. Make sure you get the corners well.
- Make the pumpkin layer. In your large mixing bowl, combine the pumpkin puree, evaporated milk, sugar, eggs, pumpkin pie spice, vanilla extract, and salt. Whisk until everything is smooth and well combined. Don’t overmix—just until there are no lumps. The mixture should be a beautiful orange color and smell like fall in a bowl. This takes about 2 minutes.
- Pour the pumpkin mixture into your prepared baking dish. Use your spatula to spread it evenly, making sure it reaches all the corners. The layer should be about 1/2 inch thick. Give the dish a gentle tap on the counter to release any air bubbles.
- Sprinkle the dry cake mix evenly over the pumpkin layer. This is the most important step. Open the box of yellow cake mix and sprinkle it evenly over the entire surface. Do NOT stir it in. Do NOT mix it. Just let it sit on top like a snowy blanket. Resist the urge to pat it down—you want it loose and even. This is what creates that magical crumb topping.
- Drizzle the melted butter over the cake mix. Pour the melted butter slowly and evenly over the entire surface of the cake mix. Try to cover as much of the dry mix as possible. Some spots will remain dry—that’s okay. The butter will soak through during baking. If you’re adding nuts, sprinkle them on top now.
- Bake for 45-50 minutes. Place the dish in the preheated oven and bake until the top is golden brown and the edges are bubbly. The cake is done when a toothpick inserted into the center comes out clean (though there will be some gooey pumpkin underneath the topping). The kitchen will smell absolutely incredible at this point.
- Let it cool for 10-15 minutes. This is crucial. If you serve it immediately, it will be too runny. If you wait too long, the ice cream won’t melt properly. Ten to fifteen minutes is the sweet spot. The cake will still be warm, the topping will be crispy, and the pumpkin layer will have set just enough.
- Serve warm with vanilla ice cream. Scoop a generous portion of the cake into a bowl and top with a scoop (or two) of vanilla ice cream. The ice cream should start melting immediately, creating a creamy sauce that mingles with the pumpkin layer. This is the moment you’ve been waiting for.
One thing I learned the hard way: don’t overbake this cake. The edges should be golden and bubbly, but the center should still have a slight jiggle when you pull it out. It will continue to set as it cools. Overbaking will result in a dry, tough topping and a pumpkin layer that’s too firm.
Cooking Tips & Techniques
After making this Easy Pumpkin Dump Cake with Vanilla Ice Cream more times than I can count, I’ve picked up a few tricks that make a real difference. Let me share what I’ve learned.
The biggest mistake people make is stirring the cake mix into the pumpkin layer. I did this the first time I made a dump cake, and the result was a dense, soggy mess. The entire point of a dump cake is that the dry cake mix sits on top and absorbs the butter, creating a crumbly, crispy topping. Leave it alone. Trust the process.
Use cold butter for a crispier topping. While the recipe calls for melted butter, I’ve experimented with slicing cold butter into thin pats and placing them over the cake mix. The result is an even crispier, more textured topping. If you have the extra two minutes, try this method. If not, melted butter works perfectly fine.
Don’t skip the salt. I know it seems like a small detail, but that 1/4 teaspoon of salt in the pumpkin layer makes all the difference. It balances the sweetness and enhances the pumpkin and spice flavors. Without it, the dessert can taste one-dimensional.
Timing is everything with the ice cream. I like to scoop the ice cream into bowls before I cut the cake. That way, the ice cream softens slightly while I’m serving, and it melts perfectly over the warm cake. If the ice cream is too hard, it won’t melt properly. If it’s too soft, it turns into soup. Aim for that perfect scoopable consistency.
Watch your oven carefully. Every oven runs differently. My first attempt at this recipe came out burnt on the edges because my oven runs hot. Start checking at the 40-minute mark. The top should be golden brown, not dark brown. If the edges are browning too quickly, tent the dish with foil for the last 10 minutes of baking.
Let it rest. I cannot stress this enough. The 10-15 minute rest period is not optional. It allows the pumpkin layer to set and the topping to crisp up. If you serve it immediately, you’ll end up with a soupy mess. Be patient—it’s worth the wait.
Variations & Adaptations
One of the best things about this Easy Pumpkin Dump Cake with Vanilla Ice Cream is how adaptable it is. Here are some of my favorite variations:
- Spiced-Up Version : Add an extra teaspoon of cinnamon and a pinch of cardamom to the pumpkin layer. The cardamom adds a warm, floral note that pairs beautifully with the pumpkin. I tried this on a whim last Thanksgiving, and it was a hit.
- Gluten-Free Option : Use a gluten-free yellow cake mix. I’ve tested this with King Arthur’s gluten-free yellow cake mix, and it works perfectly. The texture is slightly more crumbly, but the flavor is identical. Just make sure your pumpkin puree and evaporated milk are also gluten-free (they usually are).
- Dairy-Free Version : Substitute the butter with a plant-based butter alternative (I like Miyoko’s) and use a dairy-free vanilla ice cream for serving. The evaporated milk can be replaced with full-fat coconut milk for a rich, creamy texture. This version is surprisingly delicious—the coconut flavor complements the pumpkin beautifully.
- Pecan Streusel Topping : For extra crunch, mix 1/2 cup chopped pecans with 2 tablespoons of brown sugar and 1 tablespoon of melted butter, then sprinkle over the cake mix before baking. I’ve actually turned this into a full Pumpkin Dump Cake with Pecan Streusel recipe if you want the full details.
- Chocolate Lover’s Version : Use a chocolate cake mix instead of yellow. The chocolate and pumpkin combination is surprisingly good. I was skeptical the first time I tried it, but the warm, fudgy chocolate topping with the spiced pumpkin underneath is absolutely divine. Serve with vanilla ice cream as usual.
My personal favorite variation is the spiced-up version with a scoop of pumpkin spice cold foam on top instead of ice cream. It’s a little extra work, but for a special occasion, it’s absolutely worth it.
Serving & Storage Suggestions
This Easy Pumpkin Dump Cake with Vanilla Ice Cream is best served warm, but it’s still delicious at room temperature. Here’s how to make the most of it:
Serving Temperature : Aim for warm cake with cold ice cream. The temperature contrast is what makes this dessert so satisfying. If the cake has cooled completely, reheat individual portions in the microwave for 15-20 seconds before adding the ice cream.
Presentation Ideas : Serve in wide, shallow bowls so the ice cream has room to melt and create a sauce. Drizzle with a little caramel sauce or a sprinkle of cinnamon for an extra touch. A dollop of whipped cream on top of the ice cream never hurts either.
Complementary Dishes : This cake pairs beautifully with a cup of hot coffee or a glass of cold milk. For a full fall spread, serve it alongside slow cooker apple cider for a cozy, comforting dessert experience.
Storage Instructions : Cover the baking dish tightly with plastic wrap or aluminum foil and store in the refrigerator for up to 5 days. The topping will lose some of its crispness, but the flavor will actually improve as the spices meld together.
Reheating Methods : For best results, reheat individual portions in the microwave for 20-30 seconds. To restore some crispness to the topping, you can reheat in a 350°F oven for 10 minutes. Just be careful not to overheat, or the pumpkin layer will become runny again.
Freezer Instructions : This cake freezes beautifully. Allow it to cool completely, then wrap the entire dish (or individual portions) tightly in plastic wrap, followed by a layer of aluminum foil. Freeze for up to 3 months. Thaw overnight in the refrigerator and reheat as directed above. The texture won’t be quite as perfect as fresh, but it’s still delicious.
One thing I’ve noticed: the flavors actually deepen and improve after a day in the fridge. The spices meld together, and the pumpkin layer becomes even more luscious. So if you can resist eating it all in one sitting, the leftovers might be even better the next day.
Nutritional Information & Benefits
While this Easy Pumpkin Dump Cake with Vanilla Ice Cream is definitely a treat, it does have some redeeming qualities. Here’s what you should know:
Estimated Nutritional Values (per serving, with ice cream) :
- Calories: 420-480
- Fat: 22g
- Carbohydrates: 58g
- Protein: 6g
- Fiber: 3g
- Sugar: 38g
Health Benefits of Key Ingredients : Pumpkin is packed with vitamin A (over 200% of your daily needs per serving), which supports eye health and immune function. It’s also rich in fiber, which aids digestion and helps you feel full. The eggs provide high-quality protein, and the butter contains fat-soluble vitamins A, D, E, and K.
Dietary Considerations : This recipe can be made gluten-free and dairy-free with simple substitutions (see variations above). It’s naturally nut-free (unless you add nuts) and contains no artificial colors or flavors when made from scratch.
Potential Allergens : This recipe contains dairy (butter, evaporated milk, ice cream), eggs, and wheat (cake mix). If you have allergies, please check all ingredient labels carefully and use appropriate substitutions.
My Personal Wellness Perspective : I believe in balance. This is not a health food, and I’m not going to pretend it is. But I also believe that dessert made with real ingredients—pumpkin, butter, eggs—is infinitely better than anything processed or packaged. Enjoy this cake as a special treat, savor every bite, and don’t feel guilty about it. Life is too short for bad desserts.
Conclusion
This Easy Pumpkin Dump Cake with Vanilla Ice Cream has become my secret weapon for fall entertaining, and I have a feeling it’s going to become yours too. It’s the kind of recipe that makes you look like a hero in the kitchen without actually requiring any heroics. Four ingredients, ten minutes of prep, and you have a dessert that tastes like you spent hours on it.
What I love most about this recipe is how it brings people together. There’s something about the combination of warm, spiced pumpkin and cold, creamy ice cream that makes everyone at the table smile. I’ve served it at Thanksgiving dinners, Halloween parties, and quiet Tuesday nights, and it never fails to deliver that same moment of pure, uncomplicated joy.
I want you to make this recipe your own. Add more spice, throw in some nuts, experiment with different cake mix flavors. The beauty of a dump cake is that it’s forgiving and adaptable. Don’t be afraid to play around and find your perfect version.
When you make it—and I hope you do—come back and tell me how it turned out. Did you add anything? Change anything? Serve it with something unexpected? I genuinely want to know. Drop a comment below, share a photo, or tag me on social media. Nothing makes me happier than hearing about my recipes finding a home in your kitchen.
Now go preheat your oven. Fall is calling, and this cake is waiting.
Frequently Asked Questions
Can I use pumpkin pie filling instead of pumpkin puree?
No, I don’t recommend it. Pumpkin pie filling already contains sugar and spices, which will throw off the balance of this recipe. The result will be overly sweet and the texture will be different. Stick with 100% pure pumpkin puree for the best results.
Can I make this Easy Pumpkin Dump Cake ahead of time?
Absolutely. You can assemble the entire dish (minus the ice cream) up to 24 hours in advance and store it covered in the refrigerator. When you’re ready to bake, add about 10 minutes to the baking time since you’re starting from cold. You can also bake it completely, let it cool, and reheat individual portions as needed.
Why is my dump cake soggy in the middle?
This usually happens for one of two reasons: either you stirred the cake mix into the pumpkin layer (don’t do this!), or you didn’t bake it long enough. Make sure you’re sprinkling the dry cake mix evenly over the top and not mixing it in. Also, check that your oven is fully preheated and bake until the top is golden brown and the edges are bubbly.
Can I use a different flavor of cake mix?
Yes! Spice cake mix is a wonderful alternative that adds even more warm fall flavor. White cake mix works too, though the topping will be slightly less flavorful. I’ve even used chocolate cake mix for a fun twist—the chocolate and pumpkin combination is surprisingly delicious.
How do I get the topping to be extra crispy?
For the crispiest topping, try using cold butter sliced into thin pats instead of melted butter. Place the pats evenly over the cake mix. You can also broil the cake for the last 2-3 minutes of baking, but watch it carefully—it can burn quickly. Another trick is to let the cake cool completely on a wire rack, which allows steam to escape and keeps the topping crunchy.
Pin This Recipe!
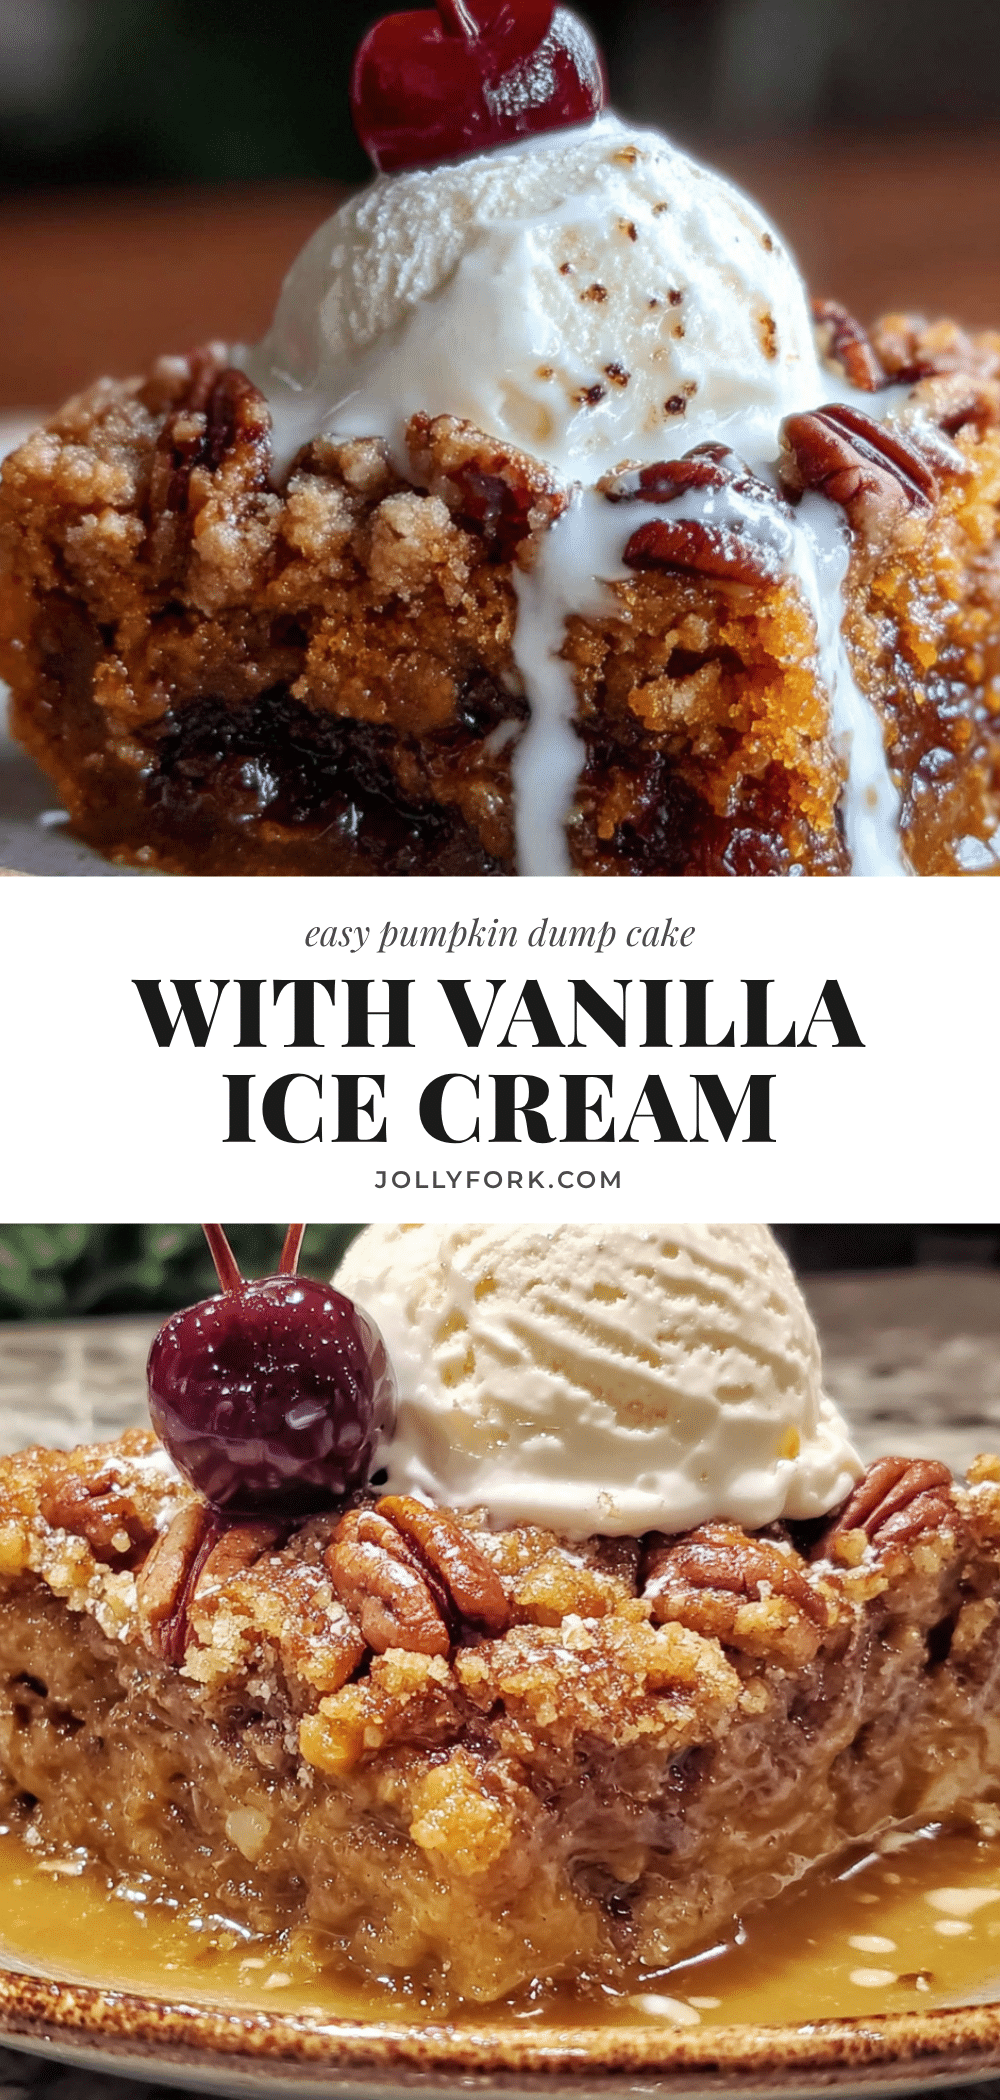
Easy Pumpkin Dump Cake with Vanilla Ice Cream (4-Ingredient Dessert)
A rich, warm, spiced pumpkin dessert that requires only 10 minutes of prep and 4 main ingredients. This dump cake features a soft, pudding-like pumpkin layer with a crisp, buttery crumb topping, served warm with melting vanilla ice cream.
- Prep Time: 10 minutes
- Cook Time: 45 minutes
- Total Time: 55 minutes
- Yield: 12 servings 1x
- Category: Dessert
- Cuisine: American
Ingredients
- 1 can (15 oz) pumpkin puree (not pumpkin pie filling)
- 1 can (12 oz) evaporated milk
- 3/4 cup granulated sugar
- 2 large eggs, at room temperature
- 2 teaspoons pumpkin pie spice (or 1 tsp cinnamon, 1/2 tsp nutmeg, 1/4 tsp ginger, 1/4 tsp cloves)
- 1 teaspoon vanilla extract
- 1/4 teaspoon salt
- 1 box (15.25 oz) yellow cake mix (dry, unprepared; not butter recipe or extra moist)
- 1 cup unsalted butter, melted (2 sticks)
- Optional: 1/2 cup chopped pecans or walnuts
- Vanilla ice cream, for serving
Instructions
- Preheat oven to 350°F (175°C). Lightly grease a 9×13-inch baking dish with butter or non-stick spray.
- In a large mixing bowl, combine pumpkin puree, evaporated milk, sugar, eggs, pumpkin pie spice, vanilla extract, and salt. Whisk until smooth and well combined (about 2 minutes).
- Pour the pumpkin mixture into the prepared baking dish and spread evenly. Tap the dish gently on the counter to release air bubbles.
- Sprinkle the dry cake mix evenly over the pumpkin layer. Do not stir or mix—leave it loose on top.
- Drizzle the melted butter slowly and evenly over the cake mix. If using nuts, sprinkle them on top now.
- Bake for 45-50 minutes, until the top is golden brown and the edges are bubbly. The center should still have a slight jiggle.
- Let the cake cool for 10-15 minutes before serving. This allows the pumpkin layer to set.
- Serve warm with a scoop of vanilla ice cream.
Notes
Do not stir the cake mix into the pumpkin layer—this creates a soggy texture. For a crispier topping, use cold butter sliced into thin pats instead of melted. Let the cake rest 10-15 minutes before serving to allow the pumpkin layer to set. Store leftovers covered in the refrigerator for up to 5 days; reheat individual portions in the microwave for 20-30 seconds.
Nutrition
- Serving Size: 1 serving (1/12 of c
- Calories: 450
- Sugar: 38
- Sodium: 380
- Fat: 22
- Saturated Fat: 13
- Carbohydrates: 58
- Fiber: 3
- Protein: 6
Keywords: pumpkin dump cake, easy pumpkin dessert, 4-ingredient dessert, fall dessert, pumpkin cake with ice cream, dump cake recipe


