I had this whole plan for a fancy Halloween spread one year. Like, Pinterest-worthy, with themed dips and carved vegetables and a cheese board shaped like a tombstone. It took about twenty minutes for that plan to fall apart completely—right around the time I realized the kids (and honestly, the adults) only cared about one thing on the table. The little wrapped-up hot dogs that looked like mummies. They vanished before I could even put out the dipping sauce. So the next year, I stopped fighting it. I leaned in hard. And you know what? These Easy Spooky Mummy Pigs in a Blanket became the whole party. They are the first thing to go, every single time, and they take almost no real effort to pull together. Which is exactly the kind of Halloween energy I can get behind.
There is something genuinely satisfying about making food that looks like it came from a monster’s lunchbox but tastes like pure, buttery, salty comfort. These mummies are just that—flaky crescent dough wrapped around juicy little sausages, with tiny mustard or ketchup eyes peeking out. They are cute without being complicated. Spooky without being scary. And they come together so fast you will have time to actually enjoy your own party instead of hiding in the kitchen. Honestly, this is the best Halloween appetizer for a reason.
Why You Will Love This Recipe
Let me tell you why these little guys steal the show every single time. I have tested this recipe through multiple Halloweens, a few random October movie nights, and even a “spooky snack” request from my niece in July. They never fail.
- Quick & Easy: You are looking at about 20 minutes from start to finish. That is faster than deciding what costume to wear.
- Simple Ingredients: Crescent dough, hot dogs or sausages, and something for the eyes. That is it. You probably have everything already.
- Perfect for Halloween Parties: Whether it is a classroom treat, a potluck, or your own front porch gathering, these fit right in with the spooky vibe.
- Crowd-Pleaser: Kids devour them. Adults sneak them. I have literally watched someone eat six without blinking.
- Unbelievably Delicious: The flaky, buttery dough wrapped around a warm, juicy sausage is comfort food perfection. Add a little dip, and you are in trouble.
What makes this recipe different from every other pigs-in-a-blanket out there? It is the wrapping technique. Most recipes just wrap the dough once and call it done. But for a true mummy look, you need to wrap the dough in thin, uneven strips, leaving a small gap for the “face.” That little gap makes all the difference. It gives the mummy personality. It makes people smile before they even take a bite. And it is the kind of detail that makes you look like a Halloween hero without any extra effort.
This is the recipe that makes you close your eyes after the first bite—not because it is fancy, but because it is exactly what you wanted. It is comfort food with a costume on. And honestly, that is the best kind of Halloween treat.
What Ingredients You Will Need
This recipe keeps things wonderfully simple. You do not need any specialty items or a trip to a fancy grocery store. Just a few pantry and fridge staples that come together in the most delightful way.
- 1 can (8 oz) refrigerated crescent roll dough: This is the backbone of the whole operation. I prefer Pillsbury for its consistent flakiness, but any brand works. Make sure it is the sheet-style crescent dough if you can find it—it saves you from having to press the perforated seams together. If you only have the perforated kind, just pinch the seams firmly and roll it out as one sheet.
- 10 to 12 cocktail sausages or mini hot dogs: These are the “mummies” themselves. I like using Lit’l Smokies for their size and flavor, but mini hot dogs work beautifully too. For a fancier version, try chicken or turkey sausages. The key is to use something fully cooked, so you are really just warming them through and crisping the dough.
- Mustard or ketchup (for the eyes): This is where the personality comes in. Yellow mustard gives a classic, slightly creepy look. Ketchup works for a more “bloodshot” vibe. I have also used sriracha for spicy mummies and even small dots of cream cheese for a milder option. Just a tiny dab on each “face” is all you need.
- Optional: Everything bagel seasoning or sesame seeds: Not necessary, but a sprinkle on top before baking adds a little extra texture and flavor. It makes the mummies look like they have been rolling around in a dusty tomb. In a good way.
- Optional: Dipping sauces: These mummies love a good dip. Ketchup, mustard, ranch, honey mustard, or even a spicy sriracha mayo all work wonderfully. I will get into serving suggestions later.
Ingredient Selection Tip: When choosing your crescent dough, look for a can that feels cold and firm in the store. If the dough is warm, it will be sticky and harder to work with. Same goes for the sausages—keep them refrigerated until you are ready to use them. Cold ingredients are easier to handle and bake up more evenly.
Substitution Guidance: For a gluten-free version, use gluten-free crescent dough or puff pastry sheets. For a dairy-free option, most crescent doughs are already dairy-free, but double-check the label. You can also swap the cocktail sausages for vegan sausages or even cheese-stuffed jalapeños for a vegetarian twist (just adjust the baking time).
Equipment Needed
You do not need a lot of fancy gear for this recipe, which is part of its charm. Here is what you will need:
- Baking sheet: A standard half-sheet pan works perfectly. Line it with parchment paper for easy cleanup—trust me on this one. The dough can get a little sticky, and parchment saves you from scrubbing.
- Sharp knife or pizza cutter: You will be cutting the crescent dough into thin strips. A pizza cutter makes this incredibly fast and easy. A sharp knife works just as well, just be careful not to tear the dough.
- Small bowl or plate: For holding your “eyes” (mustard or ketchup) and any optional toppings. It keeps things organized and prevents a mustard explosion on your counter.
- Pastry brush (optional): If you want to brush the mummies with an egg wash for extra golden color, a pastry brush is handy. But honestly, I skip this step most of the time. The dough browns beautifully on its own.
- Cooling rack: Not strictly necessary, but it helps the mummies stay crisp on the bottom. If you do not have one, just transfer them to a plate after a minute or two on the baking sheet.
Budget-Friendly Tip: Do not own a pizza cutter? A sharp knife works perfectly fine. And if you do not have a pastry brush, just use the back of a spoon to dab on an egg wash. Improvising is part of the fun.
Preparation Method
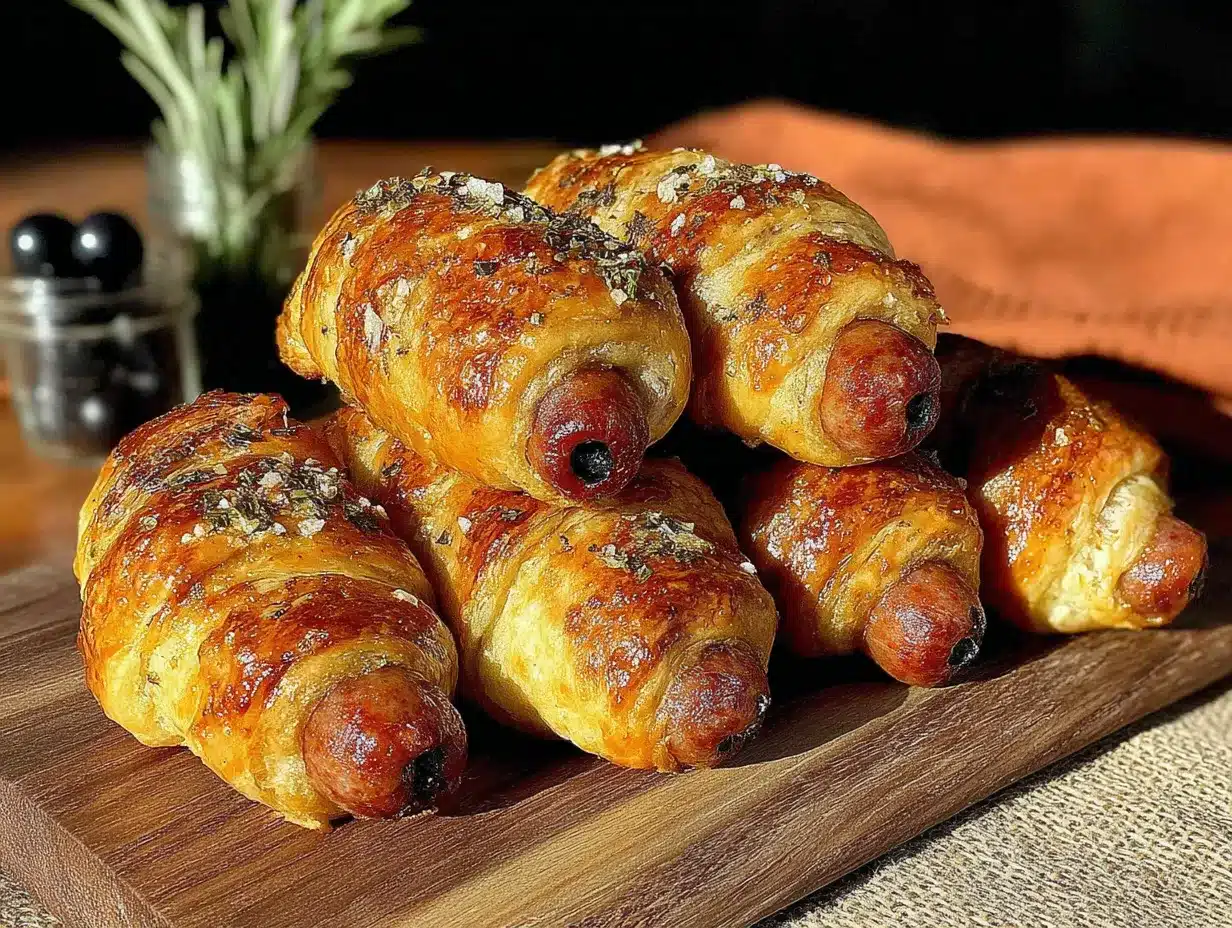
Alright, let us get to the fun part. This is where the mummies come to life. Follow these steps, and you will have a platter of adorable, delicious mummies in no time.
- Preheat your oven to 375°F (190°C). Line a baking sheet with parchment paper. This is non-negotiable for easy cleanup. While the oven heats, take your crescent dough out of the fridge and let it sit on the counter for about 5 minutes. You want it slightly softened but still cold to the touch.
- Unroll the crescent dough onto a clean cutting board. If you are using the perforated kind, pinch the seams together firmly to create one solid sheet. Use a rolling pin to gently smooth it out into an even rectangle, about 1/8-inch thick. Do not stress about perfection—a little unevenness adds character.
- Using a sharp knife or pizza cutter, cut the dough into thin strips. Aim for strips that are about 1/2-inch wide and as long as the dough sheet. You will need about 2 to 3 strips per mummy, depending on how tightly you wrap. I usually cut the whole sheet into 12 to 15 strips.
- Take one cocktail sausage or mini hot dog. Starting at one end, wrap a strip of dough around the sausage at a slight angle, leaving a small gap in the middle for the “face.” Continue wrapping, slightly overlapping the dough as you go, until the sausage is mostly covered. The gap should be about the size of a nickel—big enough to see the sausage and add eyes.
- Place the wrapped mummy on the prepared baking sheet, seam side down. Repeat with the remaining sausages, spacing them about 1 inch apart. You should get 10 to 12 mummies from one can of dough.
- If desired, brush the mummies with an egg wash (1 egg beaten with 1 tablespoon of water). This gives them a beautiful golden-brown finish. I usually skip it because I am lazy, but it does make them look extra polished. Sprinkle with everything bagel seasoning or sesame seeds if you are feeling fancy.
- Bake for 10 to 12 minutes, or until the dough is golden brown and puffed. The sausages are already cooked, so you are just warming them through and crisping the dough. Keep an eye on them after 10 minutes—ovens vary, and you do not want burnt mummies.
- Remove from the oven and let them cool on the baking sheet for 2 minutes. This allows the dough to set and prevents it from tearing when you move them. Transfer to a cooling rack or serving platter.
- Add the eyes while the mummies are still warm. Use a toothpick or the tip of a knife to dab a tiny amount of mustard or ketchup onto each “face.” Two dots per mummy. Do not overthink it—a little unevenness makes them look more like real mummies anyway.
- Serve immediately with your favorite dipping sauces. These are best enjoyed warm, when the dough is flaky and the sausage is juicy. They will not last long.
Sensory Cue: When the mummies are done, the kitchen will smell like buttery, toasty dough with a hint of savory sausage. The dough should be golden brown and slightly crisp to the touch. If you tap the top, it should feel firm, not soft or doughy.
Personal Tip: I have learned the hard way not to over-wrap the mummies. If you use too much dough, the center stays doughy and the sausage gets lost. Two or three thin strips is the sweet spot. And do not forget to leave that gap for the face—it is the whole point!
Cooking Tips & Techniques
I have made these mummies more times than I can count, and I have definitely made some mistakes along the way. Here are the lessons I learned so you do not have to repeat them.
Keep the dough cold. Warm dough is sticky, stretchy, and a nightmare to work with. If your kitchen is warm, pop the dough in the fridge for 10 minutes before cutting it into strips. It makes a world of difference.
Do not overthink the wrapping. The mummies are supposed to look a little messy. That is the charm. Uneven strips, slightly overlapping dough, a gap that is a little too big—it all adds to the spooky, handmade look. I once spent ten minutes trying to make each mummy perfectly symmetrical. They looked boring. The ones I threw together in a rush were the ones everyone loved.
Use a toothpick for the eyes. I have tried piping mustard from a squeeze bottle, dabbing it with a knife, and even using a tiny spoon. A toothpick is the best tool for the job. Dip the tip into the mustard or ketchup, then gently dot it onto the sausage. It gives you perfect control and tiny, adorable eyes.
Timing is everything. These mummies are best served immediately. If you are making them for a party, time the baking so they come out right when guests arrive. You can also prep them a few hours ahead—wrap the sausages, arrange them on the baking sheet, and refrigerate. Then bake right before serving. Just add a minute or two to the baking time if they are cold from the fridge.
Do not skip the parchment paper. I learned this one the hard way. The first time I made these, I baked them directly on the pan. The dough stuck, the mummies fell apart, and I spent twenty minutes scrubbing. Parchment paper saves you time, frustration, and a ruined pan.
Multitask like a pro. While the mummies are baking, set up your dipping sauces and arrange the serving platter. That way, the moment they come out of the oven, you are ready to serve. It makes you look incredibly organized, even if you are just barely keeping it together.
Variations & Adaptations
One of the best things about this recipe is how easy it is to change up. Here are some variations I have tried and loved.
Spicy Mummies: Use spicy Italian sausages or chorizo-style links instead of regular cocktail sausages. Add a dot of sriracha for the eyes instead of mustard. Serve with a cooling ranch or blue cheese dip. These are for the adults who want a little heat with their cute.
Cheesy Mummies: Before wrapping the sausage, cut a small slit lengthwise and stuff it with a strip of cheddar or mozzarella cheese. The cheese will melt and ooze out slightly as it bakes, giving the mummies a gooey, delicious surprise. Just be careful—the cheese gets hot!
Vegetarian Mummies: Swap the cocktail sausages for vegetarian cocktail sausages or even small pieces of firm tofu that have been marinated in soy sauce and smoked paprika. The dough and the wrapping technique stay exactly the same. They are just as cute and just as delicious.
Breakfast Mummies: Use breakfast sausage links instead of cocktail sausages. Serve them with a side of maple syrup for dipping. The sweet and savory combination is incredible, and they make a fun Halloween morning treat.
Puff Pastry Mummies: For an extra-flaky, indulgent version, use frozen puff pastry instead of crescent dough. Thaw the pastry, cut it into thin strips, and wrap as directed. Bake at 400°F (200°C) for 12 to 15 minutes, or until golden and puffed. They are a little more work, but the texture is unbeatable.
Personal Variation I Love: I once made a batch with smoked gouda cocktail sausages and used a mix of yellow mustard and sriracha for the eyes. The smoky, spicy, creamy combination was absolutely addictive. I served them with a side of easy slow cooker grape jelly meatballs for a full appetizer spread that disappeared in minutes.
Serving & Storage Suggestions
These mummies are best served warm, right out of the oven. The dough is flaky, the sausage is juicy, and the eyes are perfectly set. Arrange them on a platter in a single layer, with a small bowl of dipping sauce in the center. They look especially spooky on a black or dark-colored plate.
Complementary Dishes: These mummies pair beautifully with other Halloween treats. Serve them alongside easy Halloween mummy pizza for a full mummy-themed meal. Or add them to a Halloween pumpkin charcuterie board for a snack spread that will impress everyone.
Beverage Pairings: For the kids, serve with apple cider or a fizzy soda. For the adults, these mummies go great with a crisp lager, a dry cider, or even a smoky mezcal cocktail. The savory, buttery flavors hold up well to bold drinks.
Storage: If you have leftovers (unlikely, but possible), store them in an airtight container in the refrigerator for up to 3 days. The dough will soften slightly, but they are still delicious.
Reheating: The best way to reheat these mummies is in the oven or air fryer. Preheat to 350°F (175°C) and bake for 5 to 7 minutes, or until the dough crisps back up. Avoid the microwave—it makes the dough soggy and sad. If you are in a hurry, an air fryer at 350°F for 3 to 4 minutes works beautifully.
Flavor Development: Honestly, these are best fresh. The dough does not improve with time. But if you are making them ahead, prep them up to the baking step, refrigerate, and bake just before serving. That is the secret to perfect, stress-free mummies.
Nutritional Information & Benefits
Let us be real—these are not health food. They are a fun, indulgent Halloween treat. But here is a rough estimate of what you are looking at per mummy (based on 12 servings):
- Calories: Approximately 120-150 per mummy
- Protein: 4-5 grams
- Carbohydrates: 10-12 grams
- Fat: 8-10 grams
- Sodium: 350-400 mg
Health Benefits: The cocktail sausages provide a decent amount of protein, which helps keep you full. The crescent dough offers quick energy from carbohydrates. And honestly, the biggest benefit is the joy they bring to a Halloween party. Sometimes, food is about more than nutrients—it is about connection, fun, and making memories.
Dietary Considerations: This recipe is not gluten-free or dairy-free in its standard form, but both adaptations are easy to make (see Variations). It is also nut-free and egg-free (unless you add the egg wash). If you have specific allergies, always check the labels on your crescent dough and sausages.
Personal Wellness Perspective: I believe in balance. These mummies are a treat, and treats are meant to be enjoyed without guilt. Serve them alongside some veggie sticks or a fresh salad if you want to round out the meal. But honestly, on Halloween night, I say go all in.
Conclusion
These Easy Spooky Mummy Pigs in a Blanket are everything I want in a Halloween appetizer. They are quick, fun, and absolutely delicious. The flaky dough, the juicy sausage, the adorable little mustard eyes—it is a combination that never gets old. Every time I make them, people smile. And that is really the whole point, is not it?
I encourage you to make these your own. Play with the fillings, the dips, the eye colors. Make them spicy, cheesy, or breakfast-themed. The recipe is a starting point, not a rulebook. And if you come up with a variation you love, I would love to hear about it.
So go ahead—whip up a batch for your next Halloween party, movie night, or just because it is October and you feel like being a little spooky. Drop a comment below and let me know how they turned out. Share a photo if you are feeling brave. And most importantly, enjoy every single bite. Happy Halloween, friends!
Frequently Asked Questions
Can I make these mummy pigs in a blanket ahead of time?
Yes! You can wrap the sausages in the dough strips up to 24 hours in advance. Arrange them on the baking sheet, cover with plastic wrap, and refrigerate. Bake just before serving, adding 1-2 minutes to the baking time if they are cold from the fridge.
What if I do not have crescent roll dough?
No problem! You can use puff pastry, pizza dough, or even biscuit dough. Just roll it out thin, cut it into strips, and wrap as directed. Each dough will give a slightly different texture, but they all work beautifully.
How do I keep the mummies from unrolling during baking?
Make sure you place the mummies seam-side down on the baking sheet. The weight of the dough and the heat of the oven will seal the seam. If you are worried, you can also press the end of the dough strip gently against the sausage to help it stick.
Can I use something other than mustard or ketchup for the eyes?
Absolutely! Sriracha, sriracha mayo, cream cheese, sour cream, or even small dots of melted cheese all work. Get creative with it. I have even used black sesame seeds for a more “dead” eye look.
How do I make these gluten-free?
Use gluten-free crescent dough or puff pastry sheets. Most grocery stores carry them now. Also, double-check that your cocktail sausages are gluten-free—some brands use fillers that contain gluten. Serve with gluten-free dipping sauces, and you are good to go.
Pin This Recipe!
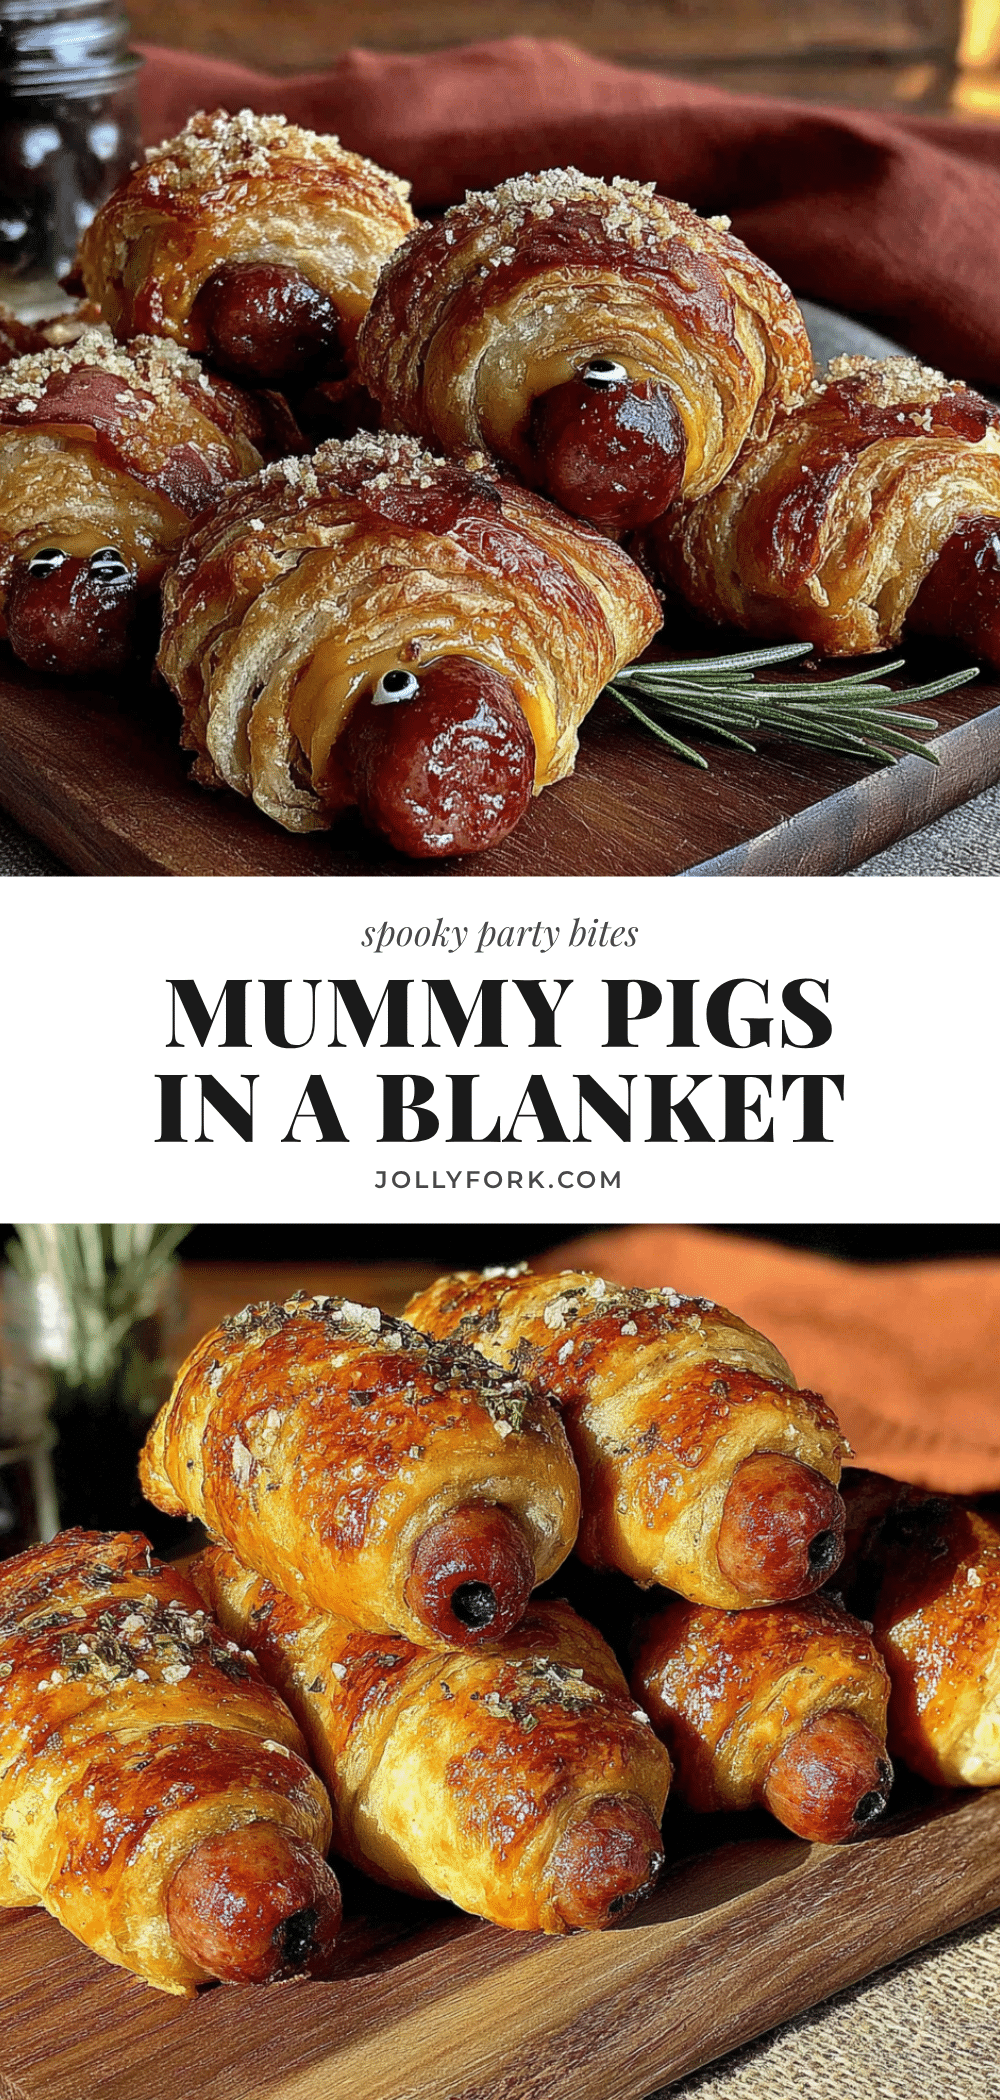
Easy Spooky Mummy Pigs in a Blanket (Best Halloween Appetizer)

Flaky crescent dough wrapped around juicy little sausages, with tiny mustard or ketchup eyes peeking out. These mummies are cute without being complicated, spooky without being scary, and come together so fast you’ll have time to enjoy your own party.
- Prep Time: 10 minutes
- Cook Time: 10-12 minutes
- Total Time: 20-22 minutes
- Yield: 10-12 mummies 1x
- Category: Appetizer
- Cuisine: American
Ingredients
- 1 can (8 oz) refrigerated crescent roll dough
- 10 to 12 cocktail sausages or mini hot dogs
- Mustard or ketchup (for the eyes)
- Optional: Everything bagel seasoning or sesame seeds
- Optional: Dipping sauces (ketchup, mustard, ranch, honey mustard, or spicy sriracha mayo)
Instructions
- Preheat your oven to 375°F (190°C). Line a baking sheet with parchment paper.
- Unroll the crescent dough onto a clean cutting board. If using perforated dough, pinch the seams together to create one solid sheet. Use a rolling pin to gently smooth it into an even rectangle, about 1/8-inch thick.
- Using a sharp knife or pizza cutter, cut the dough into thin strips about 1/2-inch wide. You’ll need about 2 to 3 strips per mummy.
- Take one cocktail sausage or mini hot dog. Starting at one end, wrap a strip of dough around the sausage at a slight angle, leaving a small gap in the middle for the ‘face.’ Continue wrapping, slightly overlapping the dough, until the sausage is mostly covered. The gap should be about the size of a nickel.
- Place the wrapped mummy on the prepared baking sheet, seam side down. Repeat with remaining sausages, spacing them about 1 inch apart.
- If desired, brush the mummies with an egg wash (1 egg beaten with 1 tablespoon of water). Sprinkle with everything bagel seasoning or sesame seeds if desired.
- Bake for 10 to 12 minutes, or until the dough is golden brown and puffed.
- Remove from the oven and let them cool on the baking sheet for 2 minutes. Transfer to a cooling rack or serving platter.
- Add the eyes while the mummies are still warm. Use a toothpick or the tip of a knife to dab a tiny amount of mustard or ketchup onto each ‘face.’ Two dots per mummy.
- Serve immediately with your favorite dipping sauces.
Notes
Keep the dough cold for easier handling. Do not over-wrap the mummies; 2-3 thin strips is the sweet spot. Use a toothpick for precise eye placement. Best served immediately; can be prepped ahead and baked just before serving.
Nutrition
- Serving Size: 1 mummy
- Calories: 120150
- Sugar: 23
- Sodium: 350400
- Fat: 810
- Saturated Fat: 23
- Carbohydrates: 1012
- Protein: 45
Keywords: Halloween appetizer, mummy pigs in a blanket, easy Halloween recipe, spooky snack, crescent roll appetizer


