My brother-in-law Mark did not trust sunflower seed butter in anything sweet. He said it tasted like “slightly sad cardboard” and refused to touch any recipe that called for it. I heard this opinion roughly seven times over the course of two family dinners. So when I started testing freezer-friendly lunch pockets for my kids, I made a batch with sunbutter just to prove a point—or maybe to quietly win a bet I never actually made out loud.
The first batch came out fine. Edible. Nothing special. But I kept tweaking—less jelly, a tighter seal on the edges, a quick egg wash on top—and somewhere around the fourth attempt, something clicked. The sunbutter turned creamy instead of gritty. The jelly caramelized just slightly against the dough. Mark ate one cold out of the freezer, then another, then asked if I had any more “of those sunflower pocket things.” That was the moment I knew these Easy Sunbutter and Jelly Freezer Lunch Pockets were not just a win for my lunchbox rotation. They were a genuine conversion experience.
These pockets solve the eternal school lunch problem: something that tastes good at room temperature, survives the morning commute in a backpack, and doesn’t require a microwave. The sunbutter stays soft even when cold, the jelly adds that nostalgic sweetness, and the whole thing fits in a little one’s hand. Honestly, I did not expect to love them this much. But here we are.
Why You’ll Love This Recipe
I have tested these pockets through three different dough recipes, two brands of sunbutter, and at least five jam varieties. This version is the one that stuck. Here is why it works:
- Freezer-Friendly & Portable: Make a batch on Sunday, grab one every morning. No thawing required—they defrost naturally by lunchtime.
- Nut-Free School Safe: Sunbutter is completely nut-free, making these perfect for classrooms and lunchboxes with allergy restrictions.
- Simple Ingredients: You likely already have flour, butter, jelly, and sunbutter in your pantry. No specialty trips needed.
- Kid-Approved & Parent-Loved: My kids call them “jelly pillows.” Mark calls them “that thing I was wrong about.” Both are accurate.
- Quick Assembly: From mixing to freezing, you are looking at about 30 minutes of active work. The oven does the rest.
What makes these different from other freezer pocket recipes is the dough. It is sturdy enough to hold up to freezing and reheating, but tender enough that a preschooler can bite through it without a struggle. I played with the fat ratio until the pockets stayed soft even straight from the freezer—no rock-hard edges, no sad dry corners.
These are the kind of pockets that make you feel like you have your life together. Even if the rest of the morning is chaos.
What Ingredients You Will Need
This recipe uses straightforward ingredients, but each one plays a specific role in texture and flavor. Here is what you need and why it matters.
For the Dough
- 2 ½ cups all-purpose flour (spooned and leveled—do not scoop directly from the bag or the dough gets dry)
- 1 tablespoon granulated sugar (just enough to balance the savory notes in the sunbutter)
- 1 teaspoon salt (use fine sea salt for even distribution)
- 1 tablespoon baking powder (make sure it is fresh—stale baking powder leads to flat pockets)
- ½ cup cold unsalted butter, cut into small cubes (I prefer Kerrygold for flavor, but any good-quality butter works)
- ¾ cup cold buttermilk (shake the carton before measuring; homemade buttermilk—milk plus a splash of vinegar—works perfectly)
- 1 large egg, beaten (for the egg wash; adds golden color and helps seal the edges)
For the Filling
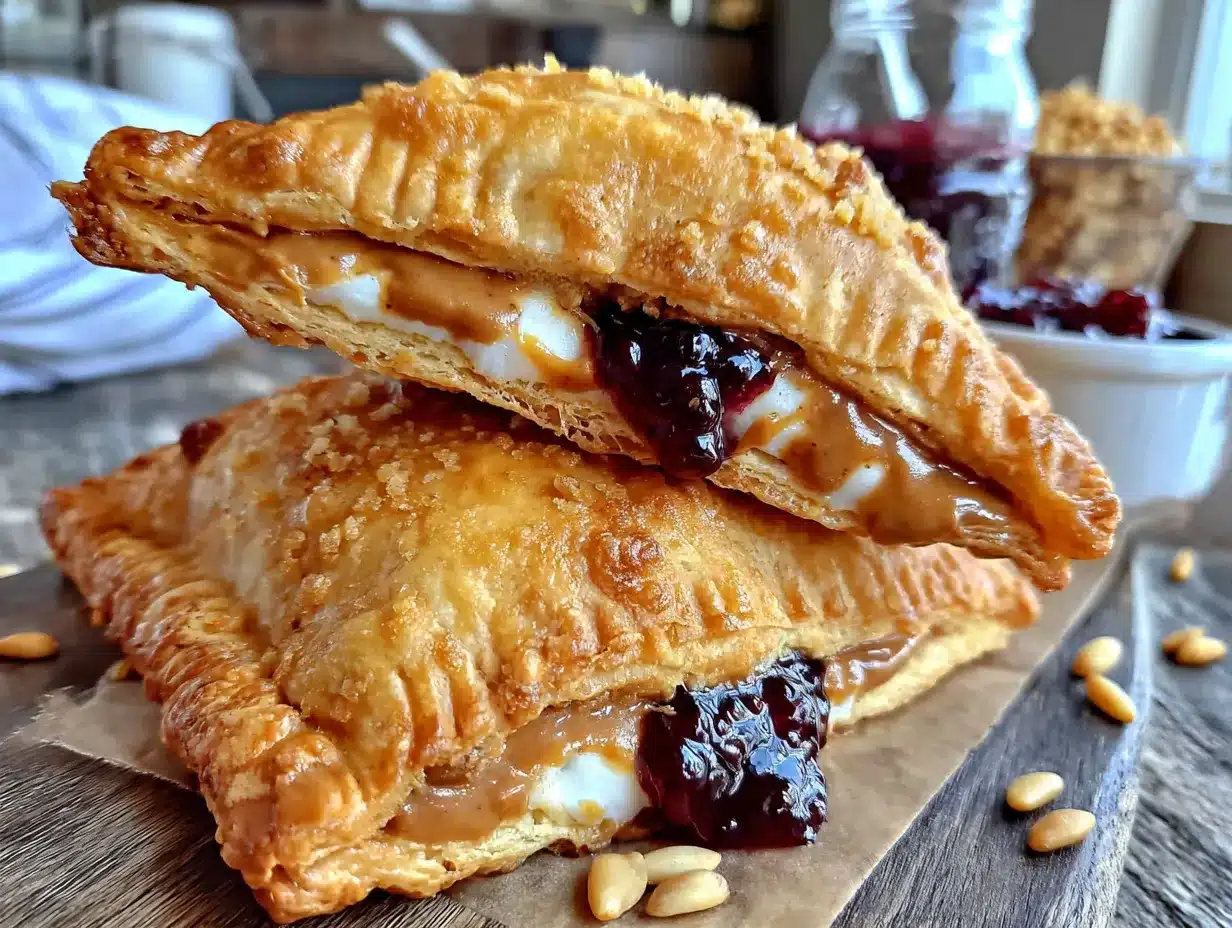
- ½ cup sunbutter (I recommend the creamy, no-stir variety—natural separation brands can get oily and make the pockets soggy)
- ½ cup fruit jelly or jam (strawberry and grape are classics, but raspberry and apricot are also excellent; avoid jelly with large fruit chunks as they create gaps)
Substitution Notes
You can swap the all-purpose flour with a 1:1 gluten-free baking blend if needed—just add an extra tablespoon of buttermilk to compensate for the drier texture. For a dairy-free version, use cold vegan butter and unsweetened oat milk mixed with a teaspoon of lemon juice in place of buttermilk. Sunbutter is the star here, so I do not recommend swapping it for another nut butter if you need the pockets to stay nut-free.
Equipment Needed
- Large mixing bowl (for combining dry ingredients and cutting in butter)
- Pastry cutter or two forks (for cutting butter into flour—a food processor works too, but pulse carefully to avoid overmixing)
- Rolling pin (a wine bottle works in a pinch, but a proper rolling pin gives you even thickness)
- Round cookie cutter or drinking glass (4-inch diameter is ideal; smaller works for mini pockets)
- Baking sheet (lined with parchment paper for easy cleanup)
- Pastry brush (for egg wash—a silicone brush is easiest to clean)
- Fork (for crimping edges and venting steam)
- Freezer-safe bag or container (for storing baked pockets)
I have made these with a flimsy rolling pin and a juice glass, and they still came out great. Do not stress about having fancy equipment.
Preparation Method
This process moves quickly once you start, so read through the steps before you begin. The dough comes together in under 10 minutes, and the assembly is straightforward once you get into a rhythm.
- Preheat your oven to 400°F (200°C). Line a baking sheet with parchment paper. This ensures the pockets release easily and the bottoms brown evenly.
- Make the dough: In a large bowl, whisk together the flour, sugar, salt, and baking powder. Add the cold butter cubes. Use a pastry cutter or two forks to cut the butter into the flour until the mixture resembles coarse meal with some pea-sized butter pieces remaining. This takes about 2 minutes. The butter pieces create flaky layers, so do not overwork it.
- Add the buttermilk: Pour the cold buttermilk into the flour mixture. Stir with a fork until a shaggy dough forms. It will look dry in spots—that is normal. Turn the dough onto a lightly floured surface and gently bring it together with your hands. Knead two or three times, just until it holds. Overkneading makes the dough tough.
- Roll and cut: Pat the dough into a rectangle about ½-inch thick. Use a rolling pin to roll it evenly to ¼-inch thickness. Cut out rounds using a 4-inch cookie cutter or the rim of a drinking glass. Gather the scraps, gently reroll, and cut additional rounds. You should get about 10 to 12 rounds total.
- Assemble the pockets: Place half the rounds on the prepared baking sheet. Spoon 1 tablespoon of sunbutter into the center of each round, leaving a ½-inch border around the edge. Top with 1 tablespoon of jelly. Do not overfill—excess filling leaks out during baking and creates sticky messes.
- Seal the pockets: Place a second dough round on top of each filled round. Press the edges firmly with your fingers to seal. Use a fork to crimp the edges all the way around—this creates a decorative edge and reinforces the seal. Cut two small slits on top of each pocket with a sharp knife to allow steam to escape.
- Apply egg wash: Brush the top of each pocket with the beaten egg. This gives the pockets that beautiful golden-brown finish. Sprinkle a tiny pinch of sugar on top if you want a slightly sweet crust.
- Bake: Bake for 18 to 22 minutes, until the pockets are golden brown and the filling is bubbling slightly through the steam vents. Rotate the baking sheet halfway through for even browning.
- Cool completely: Transfer the pockets to a wire rack and let them cool completely before freezing. If you freeze them while still warm, condensation forms inside the bag and makes the dough soggy.
- Freeze: Once cooled, place the pockets in a single layer in a freezer-safe bag or container. Press out as much air as possible before sealing. They keep for up to 3 months.
Cooking Tips & Techniques
I learned most of these the hard way—through lopsided pockets, leaky seals, and one particularly memorable incident involving a burned tongue and too-hot jelly.
- Keep everything cold: The butter and buttermilk need to be cold when they go into the dough. Warm butter melts into the flour instead of creating those flaky layers. If your kitchen is hot, pop the cut dough rounds into the fridge for 10 minutes before baking.
- Do not overfill: I know it is tempting to add extra sunbutter or jelly, but trust me—more filling means more leaks. Stick to 1 tablespoon of each. The pockets will taste perfectly balanced.
- Crimp firmly: Use the tines of a fork to press the edges together with intention. If the seal is weak, the pockets burst open in the oven and you end up with sunbutter puddles on the baking sheet.
- Vent the steam: Those two little slits on top are not optional. Without them, steam builds up inside and the pockets puff into round balloons that deflate into sad, wrinkled discs once they cool.
- Cool before freezing: This is non-negotiable. Warm pockets in a sealed bag create moisture, which leads to ice crystals and soggy dough. Let them sit on the counter for at least 30 minutes after baking.
Variations & Adaptations
Once you have the basic method down, feel free to play around. Here are some variations I have tested in my own kitchen.
- Flavor Swaps: Try sunbutter with honey instead of jelly for a less sweet option. Or use sunbutter with sliced banana inside—it gets soft and almost jammy during baking.
- Savory Version: Skip the sugar in the dough and fill the pockets with sunbutter and a drizzle of sriracha or a spoonful of pickled jalapeños. It sounds weird, but trust me—it works. If you love quick pickled flavors, you might also enjoy our Quick Sweet and Spicy Pickled Jalapeños for an extra kick.
- Gluten-Free Option: Use a 1:1 gluten-free baking blend. Add an extra tablespoon of buttermilk because gluten-free flours absorb more liquid. The texture will be slightly more tender, but the flavor holds up beautifully.
- Mini Pockets: Use a 2-inch cutter and reduce baking time to 12 to 14 minutes. These are perfect for little hands or lunchbox snacks.
- Jam Combinations: Strawberry-rhubarb, fig, and even spicy pepper jelly all work well. For a seasonal twist, try Cozy Spiced Peach Butter in place of jelly—it adds warm autumn flavor that pairs surprisingly well with sunbutter.
Serving & Storage Suggestions
These pockets are designed to be eaten cold or at room temperature, which makes them ideal for packed lunches. Here is how to serve and store them.
- Serving: Take a pocket straight from the freezer and pop it into a lunchbox. It will thaw completely by lunchtime and taste perfectly fresh. If you prefer them warm, microwave for 15 to 20 seconds—but watch out, the filling gets hot fast.
- Storage: Baked pockets stay fresh in the freezer for up to 3 months. Store them in a single layer in a freezer bag with the air pressed out. Do not refrigerate them after baking—the fridge dries out the dough and makes it stale.
- Reheating: For best texture, let the pocket thaw naturally. If you are in a hurry, microwave for 10 seconds on a plate. For a crispier exterior, reheat in a toaster oven at 350°F for 5 minutes.
- Pairing Ideas: Serve with fresh fruit, a handful of baby carrots, or a simple yogurt dip. For a heartier lunch, pair with a Fresh Strawberry Greek Yogurt Parfait Cup for a balanced meal that feels special.
Nutritional Information & Benefits
These pockets are a balanced option for busy mornings or lunchboxes. Here is the approximate nutrition for one pocket (based on 12 pockets per batch):
- Calories: 245
- Fat: 12g
- Carbohydrates: 30g
- Protein: 6g
- Fiber: 2g
- Sugar: 9g
Sunbutter is rich in vitamin E, magnesium, and healthy fats, which support heart health and sustained energy. The jelly provides a quick source of natural sugars for an energy boost. These pockets are naturally nut-free, making them safe for school environments. If you are watching sodium intake, use unsalted butter and reduce the added salt to ½ teaspoon.
Conclusion
These Easy Sunbutter and Jelly Freezer Lunch Pockets have become a staple in my weekly meal prep rotation. They solve the real problem of packing a lunch that is safe, satisfying, and actually enjoyable to eat at room temperature. The dough is forgiving, the filling is flexible, and the whole process takes less time than you think.
I love that I can make a double batch on a Sunday afternoon and have lunch sorted for two weeks. No morning scramble, no sad sandwiches, no complaints from the kids. Mark even asked me to bring a batch to our next family gathering—which, coming from a man who once declared sunbutter “the culinary equivalent of beige,” is the highest compliment I can imagine.
Try these pockets with your favorite jam and let me know how they turn out. Drop a comment below with your flavor combinations, or tag me in your lunchbox photos. I am always looking for new ideas to test in my kitchen.
Frequently Asked Questions
Can I use natural sunbutter that separates?
You can, but the texture will be oilier and the pockets may turn out slightly greasy. I recommend using a no-stir creamy sunbutter for the best results. If you only have the natural kind, stir it very thoroughly before measuring and expect a slightly softer filling.
Do I have to bake these before freezing?
Yes. Baking first sets the dough and creates a stable pocket that holds its shape during freezing. If you freeze unbaked pockets, the dough becomes gummy and the filling leaks during baking. Bake first, cool completely, then freeze.
Can I make these with a different nut or seed butter?
Absolutely. Almond butter, cashew butter, and tahini all work well. Just keep in mind that different butters have different fat contents, so the texture of the filling may vary slightly. If you are sending these to a nut-free school, stick with sunbutter.
How long do these last in the freezer?
Up to 3 months when stored properly in an airtight freezer bag. After that, the dough can develop freezer burn and the flavor starts to fade. Label your bag with the date so you know when you made them.
My pockets leaked in the oven. What went wrong?
Most likely one of three things: you overfilled them, you did not crimp the edges tightly enough, or you skipped the steam vents. Next time, measure the filling carefully, press the fork tines firmly into the dough, and always cut those two small slits on top.
Pin This Recipe!
Easy Sunbutter and Jelly Freezer Lunch Pockets
Nut-free, freezer-friendly lunch pockets with creamy sunbutter and sweet jelly, perfect for school lunches. They thaw naturally by lunchtime and require no reheating.
- Prep Time: 15 minutes
- Cook Time: 20 minutes
- Total Time: 35 minutes
- Yield: 10-12 pockets 1x
- Category: Lunch
- Cuisine: American
Ingredients
- 2 ½ cups all-purpose flour (spooned and leveled)
- 1 tablespoon granulated sugar
- 1 teaspoon fine sea salt
- 1 tablespoon baking powder (fresh)
- ½ cup cold unsalted butter, cut into small cubes
- ¾ cup cold buttermilk
- 1 large egg, beaten (for egg wash)
- ½ cup creamy no-stir sunbutter
- ½ cup fruit jelly or jam (strawberry, grape, raspberry, or apricot)
Instructions
- Preheat oven to 400°F (200°C). Line a baking sheet with parchment paper.
- Make the dough: In a large bowl, whisk together flour, sugar, salt, and baking powder. Add cold butter cubes. Use a pastry cutter or two forks to cut butter into flour until mixture resembles coarse meal with some pea-sized butter pieces remaining (about 2 minutes).
- Add buttermilk: Pour cold buttermilk into flour mixture. Stir with a fork until a shaggy dough forms. Turn onto a lightly floured surface and gently bring together with hands. Knead 2-3 times just until it holds.
- Roll and cut: Pat dough into a rectangle about ½-inch thick. Roll evenly to ¼-inch thickness. Cut out rounds using a 4-inch cookie cutter or drinking glass. Gather scraps, reroll, and cut additional rounds (about 10-12 total).
- Assemble pockets: Place half the rounds on prepared baking sheet. Spoon 1 tablespoon sunbutter into center of each, leaving ½-inch border. Top with 1 tablespoon jelly. Do not overfill.
- Seal pockets: Place a second dough round on top of each filled round. Press edges firmly with fingers to seal. Use a fork to crimp edges all around. Cut two small slits on top of each pocket with a sharp knife.
- Apply egg wash: Brush tops with beaten egg. Sprinkle a tiny pinch of sugar on top if desired.
- Bake: Bake for 18-22 minutes until golden brown and filling bubbles slightly through steam vents. Rotate baking sheet halfway through.
- Cool completely: Transfer to a wire rack and let cool completely before freezing (at least 30 minutes).
- Freeze: Place cooled pockets in a single layer in a freezer-safe bag or container. Press out air before sealing. Keep for up to 3 months.
Notes
Keep butter and buttermilk cold for flaky dough. Do not overfill pockets to prevent leaks. Crimp edges firmly and always cut steam vents. Cool completely before freezing to avoid soggy dough. For dairy-free, use cold vegan butter and oat milk with lemon juice. For gluten-free, use 1:1 gluten-free blend plus extra buttermilk.
Nutrition
- Serving Size: 1 pocket
- Calories: 245
- Sugar: 9
- Sodium: 280
- Fat: 12
- Saturated Fat: 6
- Carbohydrates: 30
- Fiber: 2
- Protein: 6
Keywords: sunbutter, jelly, freezer lunch pockets, nut-free, school lunch, kid-friendly, freezer meal, portable lunch


