My sinuses were staging a full-on rebellion. January in the Midwest is basically a six-week-long test of willpower, and my immune system had officially thrown in the towel. I was on my third cup of ginger tea, wrapped in a blanket that had seen better days, scrolling through old photos of summer tomatoes like some kind of vegetable-related masochist. That’s when my neighbor Linda knocked on the door holding a mason jar full of something that looked like swamp water and smelled like a farmacy exploded in her kitchen. “Drink this,” she said. “It’ll either cure you or make you cry.”
That jar was her homemade fire cider. And honestly? It did both. The first sip hit me like a freight train made of horseradish and garlic. My eyes watered, my nose cleared instantly, and I felt something shift in my chest. Within two days, I was upright again. I begged her for the recipe, tweaked it a bit over the next few months, and now I make a batch every single season. This homemade fire cider immunity tonic shots recipe is my go-to for staying ahead of cold season—and it’s way easier than you’d think (no fancy equipment, no weird techniques).
This isn’t some polished wellness guru thing. It’s messy, it’s pungent, and it works. I keep a jar in my fridge door at all times now. One shot in the morning, and I feel like I’ve got a tiny army of garlic cloves patrolling my bloodstream. You’ll see what I mean.
Why You’ll Love This Recipe
Let’s be honest—most wellness tonics taste like punishment. They’re either aggressively bitter or weirdly sweet in a way that makes you suspicious. Fire cider is different. It’s bold, yes, but it’s also surprisingly drinkable when you get the balance right. And the payoff is huge for such little effort.
- Quick & Easy : Active prep time is maybe twenty minutes. Then you just let it sit on your counter for a few weeks. That’s it. No stirring, no babysitting.
- Simple Ingredients : You probably already have most of these in your pantry—garlic, onion, ginger, horseradish, cayenne. The only thing you might need to hunt down is fresh turmeric (and even that’s optional).
- Perfect for Cold Season : This stuff is my secret weapon during flu season, allergy season, and basically any time the office sneeze-fest starts. One shot a day keeps the sniffles away.
- Crowd-Pleaser (Surprisingly) : I brought a jar to a potluck once as a joke. People actually asked for the recipe. It’s weirdly addictive once your taste buds adjust.
- Unbelievably Effective : The first time I felt a tickle in my throat and took a shot, the tickle was gone by morning. I’m not saying it’s magic. But I’m not saying it isn’t, either.
What makes this version different from all the others floating around the internet? I spent months tweaking the ratios. Most recipes are either too vinegary or too spicy. Mine hits that sweet spot where the honey balances the heat, the garlic adds depth without being overwhelming, and the horseradish clears your sinuses without making you question your life choices. Plus, I add a bit of black pepper to help your body absorb the turmeric better—a trick I picked up from a nutritionist friend. This isn’t just another fire cider recipe. It’s the one you’ll actually want to take every day.
What Ingredients You Will Need
This recipe uses simple, whole ingredients that each bring something specific to the table. Some are for flavor, some are for immune support, and some are just there to make you feel like a medieval apothecary (which is honestly half the fun). Here’s what you’ll need:
For the Base
- Raw apple cider vinegar – 2 cups (use one with the “mother” for maximum probiotic benefit. I like Bragg’s or Heinz organic.)
- Raw honey – ¼ cup, or more to taste (local honey is ideal for seasonal allergy support, but any raw honey works)
The Aromatics (The “Fire” Part)
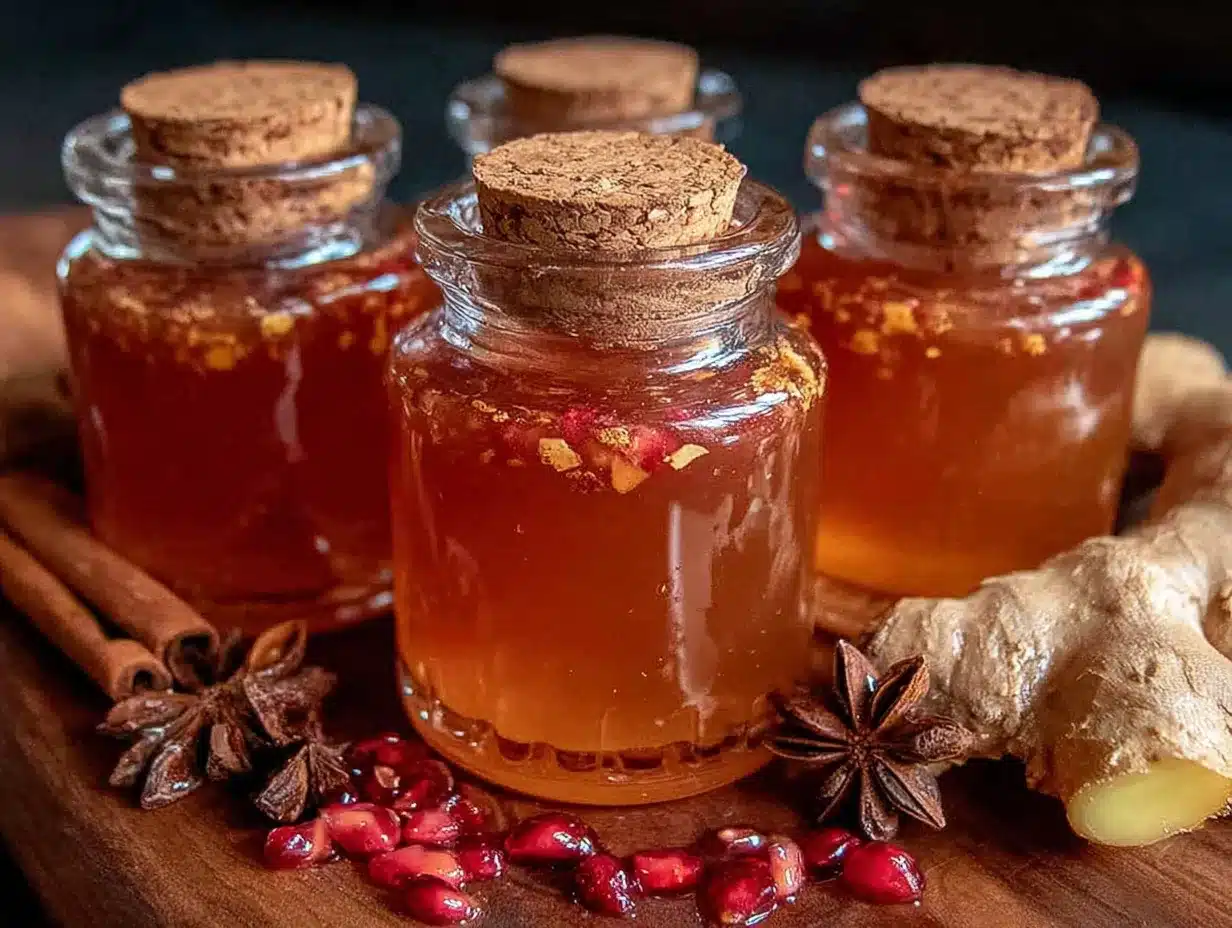
- Fresh garlic – 10 cloves, peeled and crushed (don’t chop too fine; you want big pieces so they infuse slowly)
- Fresh ginger root – a 3-inch piece, thinly sliced (no need to peel if you wash it well)
- Fresh turmeric root – a 2-inch piece, thinly sliced (optional but highly recommended. It stains everything yellow, so wear an apron!)
- Fresh horseradish root – a 2-inch piece, peeled and grated (this is the sinus-clearing powerhouse. If you can’t find fresh, use 2 tablespoons prepared horseradish)
- Medium yellow onion – ½ onion, roughly chopped (red onion works too, but yellow is milder)
The Heat & Spice
- Fresh jalapeño – 1 small pepper, sliced (remove seeds if you want less heat. Leave them in if you’re brave)
- Cayenne pepper – ½ teaspoon (or 1 whole dried cayenne pepper, crushed)
- Black peppercorns – 1 teaspoon, whole (helps with turmeric absorption. Don’t skip this!)
Optional Add-Ins
- Fresh rosemary sprig – 1 sprig (adds an earthy, piney note)
- Lemon peel – strips from 1 organic lemon (no pith—just the yellow part)
- Astragalus root – a few slices (traditional Chinese herb for immune support. I add this in winter batches)
Ingredient Tip: Look for firm, unblemished ginger and turmeric. If the ginger is shriveled, it’s past its prime and won’t infuse as well. For the horseradish, fresh is worlds better than jarred—it has a sharper, cleaner heat that really opens up your sinuses. I’ve used both, and the fresh version is noticeably more potent.
Equipment Needed
You don’t need much for this. That’s the beauty of it.
- A quart-sized mason jar (32-ounce) with a tight-fitting lid. I use a wide-mouth Ball jar because it’s easier to stuff ingredients in and fish them out later.
- A cutting board and sharp knife – nothing fancy. Just make sure your knife is sharp enough to slice ginger without crushing it.
- A vegetable peeler – for the ginger and turmeric if you choose to peel them. I don’t bother with the ginger, but turmeric skin can be a bit tough.
- A grater – for the horseradish root. A microplane works great, but a box grater is fine too. Just watch your fingers—horseradish is slippery.
- A small funnel – for pouring the vinegar into the jar without spilling it everywhere. Trust me on this one.
- Cheesecloth or a fine-mesh strainer – for straining the solids out after fermentation. I prefer cheesecloth because it catches more sediment.
- A clean bottle or jar for storage – a swing-top bottle is ideal, but any clean glass container works.
Budget-Friendly Tip: Don’t have a funnel? Roll a piece of parchment paper into a cone shape. Works like a charm. No cheesecloth? Use a clean, thin kitchen towel or even a coffee filter in a pinch.
Preparation Method
This is where the magic happens. The actual hands-on time is about 20 minutes. The rest is just waiting—which is honestly the hardest part.
- Prep your aromatics. Peel and crush the garlic cloves with the flat side of your knife. Slice the ginger and turmeric into thin coins (about ⅛-inch thick). Peel and grate the horseradish—be careful, the fumes are intense. Roughly chop the onion. Slice the jalapeño into thin rings (seeds in or out, your call).
- Layer everything in the jar. Start with the garlic and onion at the bottom. Then add the ginger, turmeric, horseradish, and jalapeño. Toss in the black peppercorns and cayenne. If you’re using rosemary or lemon peel, add those now too. Don’t pack it too tight—you want the vinegar to flow around everything.
- Pour in the apple cider vinegar. Use your funnel to pour the vinegar over the ingredients until they’re completely submerged. Leave about an inch of headspace at the top. The solids will float a bit, so use a clean spoon or chopstick to poke around and release any air bubbles.
- Seal and shake. Screw the lid on tightly. Give the jar a good shake. Then unscrew the lid slightly—just a quarter turn—to let any gas escape. This is important! Fermentation creates carbon dioxide, and if the lid is too tight, you might end up with a fizzy mess.
- Store in a cool, dark place. A kitchen cabinet works perfectly. Let it sit for 2 to 4 weeks. I usually go for 3 weeks—it’s the sweet spot where the flavors are bold but not overwhelming. Shake the jar gently every few days to redistribute the ingredients.
- Taste test. After 2 weeks, start tasting it. Use a clean spoon to dip in and try a small amount. If it’s strong enough for you (it should be pungent, spicy, and slightly sweet), it’s ready. If you want it more intense, let it go another week.
- Strain and bottle. Line a fine-mesh strainer with cheesecloth and set it over a large bowl or measuring cup. Pour the contents of the jar through the strainer. Let it drip for a few minutes, then gather the cheesecloth and squeeze out every last drop (wear gloves unless you want garlic-scented hands for a week).
- Add honey. Stir in the raw honey until it dissolves completely. Start with ¼ cup and add more if you want it sweeter. I usually end up around ⅓ cup—enough to balance the vinegar without masking the heat.
- Bottle and refrigerate. Pour the finished fire cider into a clean bottle or jar. Seal it and pop it in the fridge. It keeps for up to 6 months, though mine never lasts that long.
Sensory Cue: At the 2-week mark, the liquid should be deeply golden-amber, almost like iced tea. The smell should hit you with a sharp, vinegary punch followed by warm ginger and garlic notes. If it smells musty or off, toss it and start over—but that’s rare if you used clean equipment.
Cooking Tips & Techniques
I’ve made this recipe maybe fifteen times now, and I’ve learned a few things the hard way. Here are the tips I wish someone had told me the first time.
Don’t chop everything too small. I made that mistake early on. Tiny pieces break down too fast and turn your fire cider into a cloudy, sediment-heavy mess. Big chunks infuse slowly and strain out cleanly. Garlic cloves can stay whole if you crush them first.
Watch your horseradish fumes. The first time I grated fresh horseradish, I leaned over the bowl to smell it and immediately regretted my life choices. It’s potent. Grate it near an open window or under the stove vent. Your eyes will thank you.
Use a paper towel under the jar lid. Vinegar can corrode metal lids over time. I cut a small circle of parchment paper or wax paper and place it between the lid and the jar before screwing it on. Keeps the lid from rusting.
Don’t skip the black pepper. This is the tip my nutritionist friend drilled into me. Curcumin (the active compound in turmeric) has poor bioavailability on its own. Black pepper contains piperine, which boosts absorption by up to 2000%. It’s a tiny addition with a huge impact.
Label your jar. I know it sounds silly, but I once forgot a batch in the back of my cabinet for six weeks. It was still good, but the flavor was nuclear-strength. Write the date on the lid with a Sharpie so you know when it’s ready.
Multitasking Strategy: Prep this while you’re already doing kitchen stuff. I usually make fire cider while I’m waiting for water to boil or while my crispy brown sugar roasted sweet potato wedges are in the oven. The active time is short enough to fit into any cooking session.
Variations & Adaptations
One of the best things about fire cider is how customizable it is. Here are a few ways I’ve tweaked it over the years.
Milder Version
If you’re sensitive to heat, reduce the horseradish to 1 tablespoon and skip the jalapeño entirely. Use just a pinch of cayenne instead of half a teaspoon. The garlic and ginger still give you plenty of immune support without the burn.
Extra Herbal Kick
Add a few sprigs of fresh thyme, a star anise pod, or a cinnamon stick. I made a winter batch with cinnamon and clove once, and it tasted like a spicy chai tea shot. It was incredible.
No Turmeric Version
Fresh turmeric can be hard to find in some areas. You can substitute 1 teaspoon of dried turmeric powder, or just leave it out entirely. The recipe still works beautifully—turmeric is more of a bonus than a necessity.
Low-Sugar Adaptation
If you’re watching your sugar intake, reduce the honey to 1 tablespoon or swap it for a few drops of stevia. The flavor won’t be as rounded, but the immune benefits are still there.
Fermented Version
For a probiotic boost, let the mixture sit at room temperature for 4 weeks instead of 3. The natural fermentation kicks in and creates a slightly fizzy, even more gut-friendly tonic. Just make sure to burp the jar daily to release pressure.
I once made a batch with quick sweet and spicy pickled jalapeños instead of fresh ones, and it added a subtle tangy-sweet note that was surprisingly good. Don’t be afraid to experiment!
Serving & Storage Suggestions
Fire cider is meant to be taken as a shot—literally. I pour about 1 to 2 tablespoons into a small glass and down it in one go. It’s best taken first thing in the morning on an empty stomach, or at the first sign of a scratchy throat.
Serving Temperature: Serve it cold straight from the fridge. The chill helps mellow the heat a bit. If you’re feeling brave, you can take it at room temperature, but I find the cold version more pleasant.
How to Use It Beyond Shots: This stuff is surprisingly versatile. Drizzle it over roasted vegetables for a tangy kick. Add a splash to salad dressings. Use it as a marinade for chicken or pork. I’ve even added a tablespoon to my easy one-pan sausage and veggies dinner for an extra layer of flavor. It’s not just a wellness tonic—it’s a pantry ingredient.
Storage: Keep your fire cider in the refrigerator at all times. It stays good for up to 6 months. The flavor will mellow slightly over time, so I usually make a fresh batch every 3 months. I’ve kept a batch for 8 months before without any issues, but the flavor does start to fade after half a year.
Reheating Note: Don’t heat fire cider. The raw honey and live enzymes lose their benefits when heated. If you want it warm, add it to hot water like a tea—just don’t boil it.
Flavor Development: The first week in the fridge, the flavors are still sharp and separate. By week two, they start blending together into something more harmonious. By week three, it’s perfection. Give it time to marry.
Nutritional Information & Benefits
This isn’t a meal replacement or a magic bullet. But fire cider does offer some legit health benefits backed by both tradition and science.
| Nutrient | Per 1 Tbsp Serving (approx.) |
|---|---|
| Calories | 15-20 |
| Carbohydrates | 4g |
| Sugar | 3g (from honey) |
| Vitamin C | 2% DV (from lemon and onion) |
| Iron | 1% DV (from horseradish) |
Key Health Highlights: Garlic contains allicin, a compound with antimicrobial properties. Ginger and turmeric are both anti-inflammatory powerhouses. Horseradish is a natural decongestant—it contains glucosinolates that help thin mucus. Raw honey is a prebiotic and soothes sore throats. The apple cider vinegar supports digestion and gut health.
Dietary Considerations: This recipe is naturally gluten-free, dairy-free, and vegan if you swap the honey for maple syrup or agave. It contains no common allergens beyond potential sensitivities to garlic or horseradish. If you’re on blood-thinning medication, check with your doctor before consuming large amounts of ginger or turmeric.
My Wellness Perspective: I don’t think fire cider replaces a healthy lifestyle. But I do think it’s a fantastic addition to one. I take it during cold season, after travel, or anytime I’ve been around sick people. It’s not a cure—it’s support. And honestly, even if it’s just a placebo, the ritual of taking it makes me feel like I’m doing something proactive for my health. That counts for something.
Conclusion
This homemade fire cider immunity tonic shots recipe is one of those rare things that’s both incredibly simple and genuinely effective. It takes twenty minutes of active time, a handful of pantry staples, and a little patience. In return, you get a jar of liquid immune support that lasts for months and costs a fraction of what you’d pay for store-bought wellness shots.
I love this recipe because it’s not precious. It’s forgiving. You can tweak it based on what you have, what you like, and what your body needs. Some batches come out hotter. Some come out sweeter. They’re all good. That’s the kind of cooking I believe in—flexible, practical, and rooted in real ingredients.
So grab a jar, raid your produce drawer, and give it a try. Start with the basic recipe, then make it your own. Leave a comment below and tell me how your batch turned out—or what weird add-in you tried. I’m always looking for new ideas. And if you’re feeling generous, share this recipe with someone who could use a little immune boost this season. We could all use a little fire in our lives.
Frequently Asked Questions
Can I drink fire cider every day?
Yes, but start small. One tablespoon daily is plenty. Some people work up to two tablespoons, but more isn’t always better. Listen to your body—if it feels too intense, dial it back.
Do I have to use raw apple cider vinegar?
Ideally, yes. Raw vinegar with the “mother” contains beneficial bacteria and enzymes that support gut health. Regular distilled vinegar works in a pinch, but you lose some of the probiotic benefits.
How long does homemade fire cider last?
Up to 6 months in the refrigerator. The flavor will gradually mellow over time. If you see mold or smell anything off, toss it—but that’s extremely rare if you used clean equipment and kept it refrigerated.
Can I use dried herbs instead of fresh?
You can, but the flavor won’t be as vibrant. Dried ginger and turmeric work in a pinch—use about half the amount. Dried horseradish is harder to find and less potent, so I recommend sticking with fresh for that one.
Is fire cider safe for kids?
In very small amounts, yes. Start with a teaspoon diluted in water or juice. The heat can be intense for young palates, so taste-test it yourself first. I’d recommend the milder version (less horseradish and cayenne) for children under 10.
Pin This Recipe!
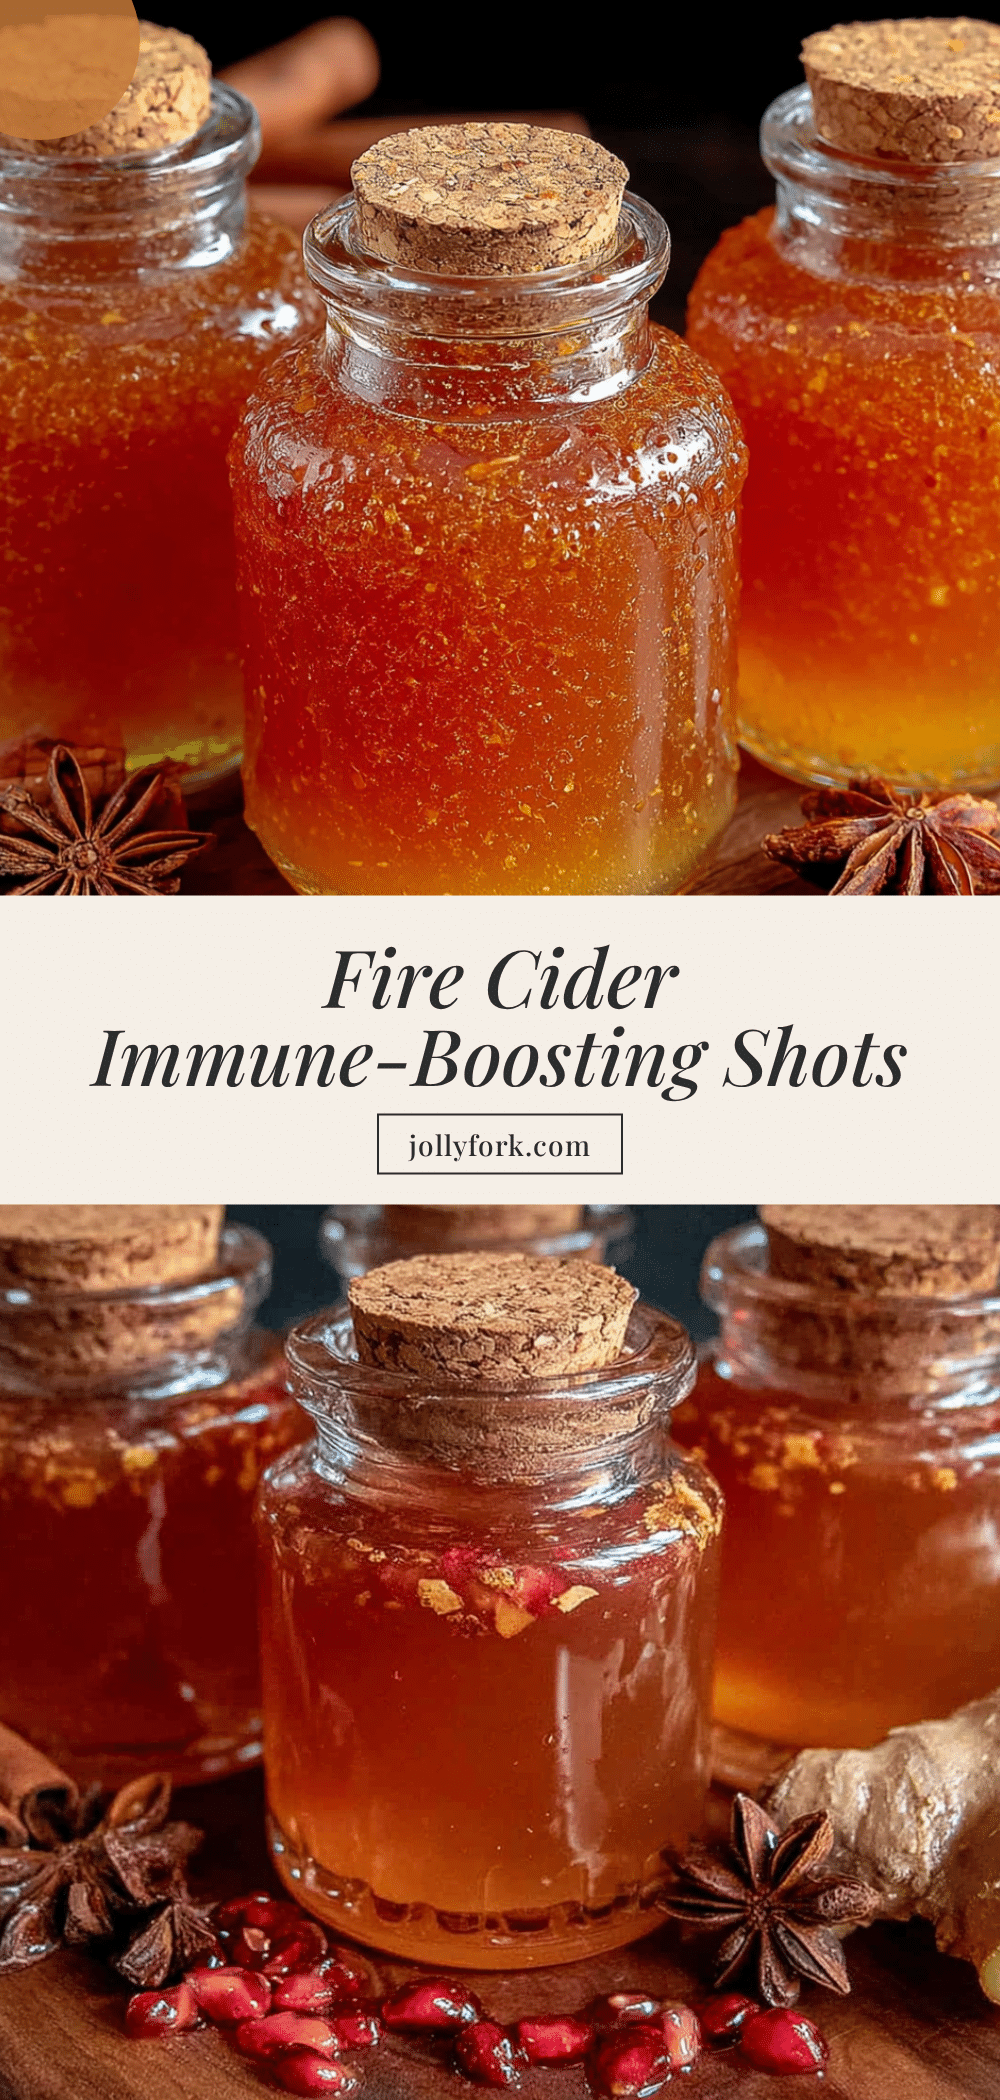
Homemade Fire Cider Immunity Tonic Shots: Easy Recipe
This homemade fire cider immunity tonic shots recipe is my go-to for staying ahead of cold season—it’s easy, pungent, and effective. A simple blend of apple cider vinegar, garlic, ginger, horseradish, and honey, it takes just 20 minutes of prep and a few weeks of steeping.
- Prep Time: 20 minutes
- Cook Time: 0 minutes
- Total Time: 2-4 weeks (steeping time) + 20 minutes active prep
- Yield: Approximately 2 cups (32 servings of 1 tablespoon each) 1x
- Category: Wellness Tonic
- Cuisine: American
Ingredients
- 2 cups raw apple cider vinegar (with the mother)
- ¼ cup raw honey (or more to taste)
- 10 cloves fresh garlic, peeled and crushed
- 3-inch piece fresh ginger root, thinly sliced
- 2-inch piece fresh turmeric root, thinly sliced (optional)
- 2-inch piece fresh horseradish root, peeled and grated
- ½ medium yellow onion, roughly chopped
- 1 small fresh jalapeño, sliced (seeds removed for less heat)
- ½ teaspoon cayenne pepper
- 1 teaspoon whole black peppercorns
- 1 sprig fresh rosemary (optional)
- Strips from 1 organic lemon peel (optional)
- A few slices astragalus root (optional)
Instructions
- Prep your aromatics: Peel and crush the garlic cloves with the flat side of your knife. Slice the ginger and turmeric into thin coins (about ⅛-inch thick). Peel and grate the horseradish. Roughly chop the onion. Slice the jalapeño into thin rings.
- Layer everything in a quart-sized mason jar: Start with the garlic and onion at the bottom. Then add the ginger, turmeric, horseradish, and jalapeño. Toss in the black peppercorns and cayenne. If using rosemary or lemon peel, add those now. Don’t pack too tight.
- Pour in the apple cider vinegar using a funnel until ingredients are completely submerged, leaving about an inch of headspace. Use a clean spoon or chopstick to release any air bubbles.
- Seal the jar tightly and shake well. Then unscrew the lid slightly (a quarter turn) to let gas escape.
- Store in a cool, dark place for 2 to 4 weeks. Shake gently every few days.
- After 2 weeks, start tasting. If strong enough, it’s ready. If you want more intensity, let it go another week.
- Strain the mixture through a fine-mesh strainer lined with cheesecloth into a large bowl or measuring cup. Squeeze out every last drop (wear gloves).
- Stir in the raw honey until dissolved. Start with ¼ cup and add more to taste.
- Pour the finished fire cider into a clean bottle or jar. Seal and refrigerate.
Notes
Don’t chop ingredients too small; big chunks infuse slowly and strain cleanly. Grate horseradish near an open window to avoid fumes. Place a paper towel or parchment paper under the jar lid to prevent rusting. Don’t skip the black pepper—it boosts turmeric absorption. Label your jar with the date. Fire cider keeps up to 6 months in the refrigerator. Do not heat it to preserve raw honey and live enzymes.
Nutrition
- Serving Size: 1 tablespoon
- Calories: 1520
- Sugar: 3
- Carbohydrates: 4
Keywords: fire cider, immunity tonic, wellness shots, homemade fire cider, immune support, apple cider vinegar, garlic, ginger, horseradish, cold season remedy


