I was standing in the frozen foods aisle at Kroger last November, staring at a twenty-pound bird like it was a math problem I couldn’t solve. The turkey was rock hard, the roasting pan was somewhere in the back of my garage under Christmas decorations, and I had exactly four hours before twelve people showed up at my door. That’s when my phone buzzed — my friend Jen, who runs a catering company, had texted me a single word: “Spatchcock.” I didn’t even know what that meant. But I googled it right there between the frozen peas and the ice cream, and honestly, my whole relationship with Thanksgiving dinner shifted in that moment.
The idea of cutting out a turkey’s backbone seemed terrifying at first. I mean, I’d never even broken down a whole chicken, and here I was about to take scissors to a bird that cost forty bucks. But desperation has a way of making you brave. I bought the turkey, drove home, and spent the next twenty minutes wrestling with kitchen shears and trying not to think about what I was doing. And you know what? It worked. The turkey cooked in half the time, the skin turned that deep golden brown you usually only see in magazine photos, and every single person at the table asked what I’d done differently.
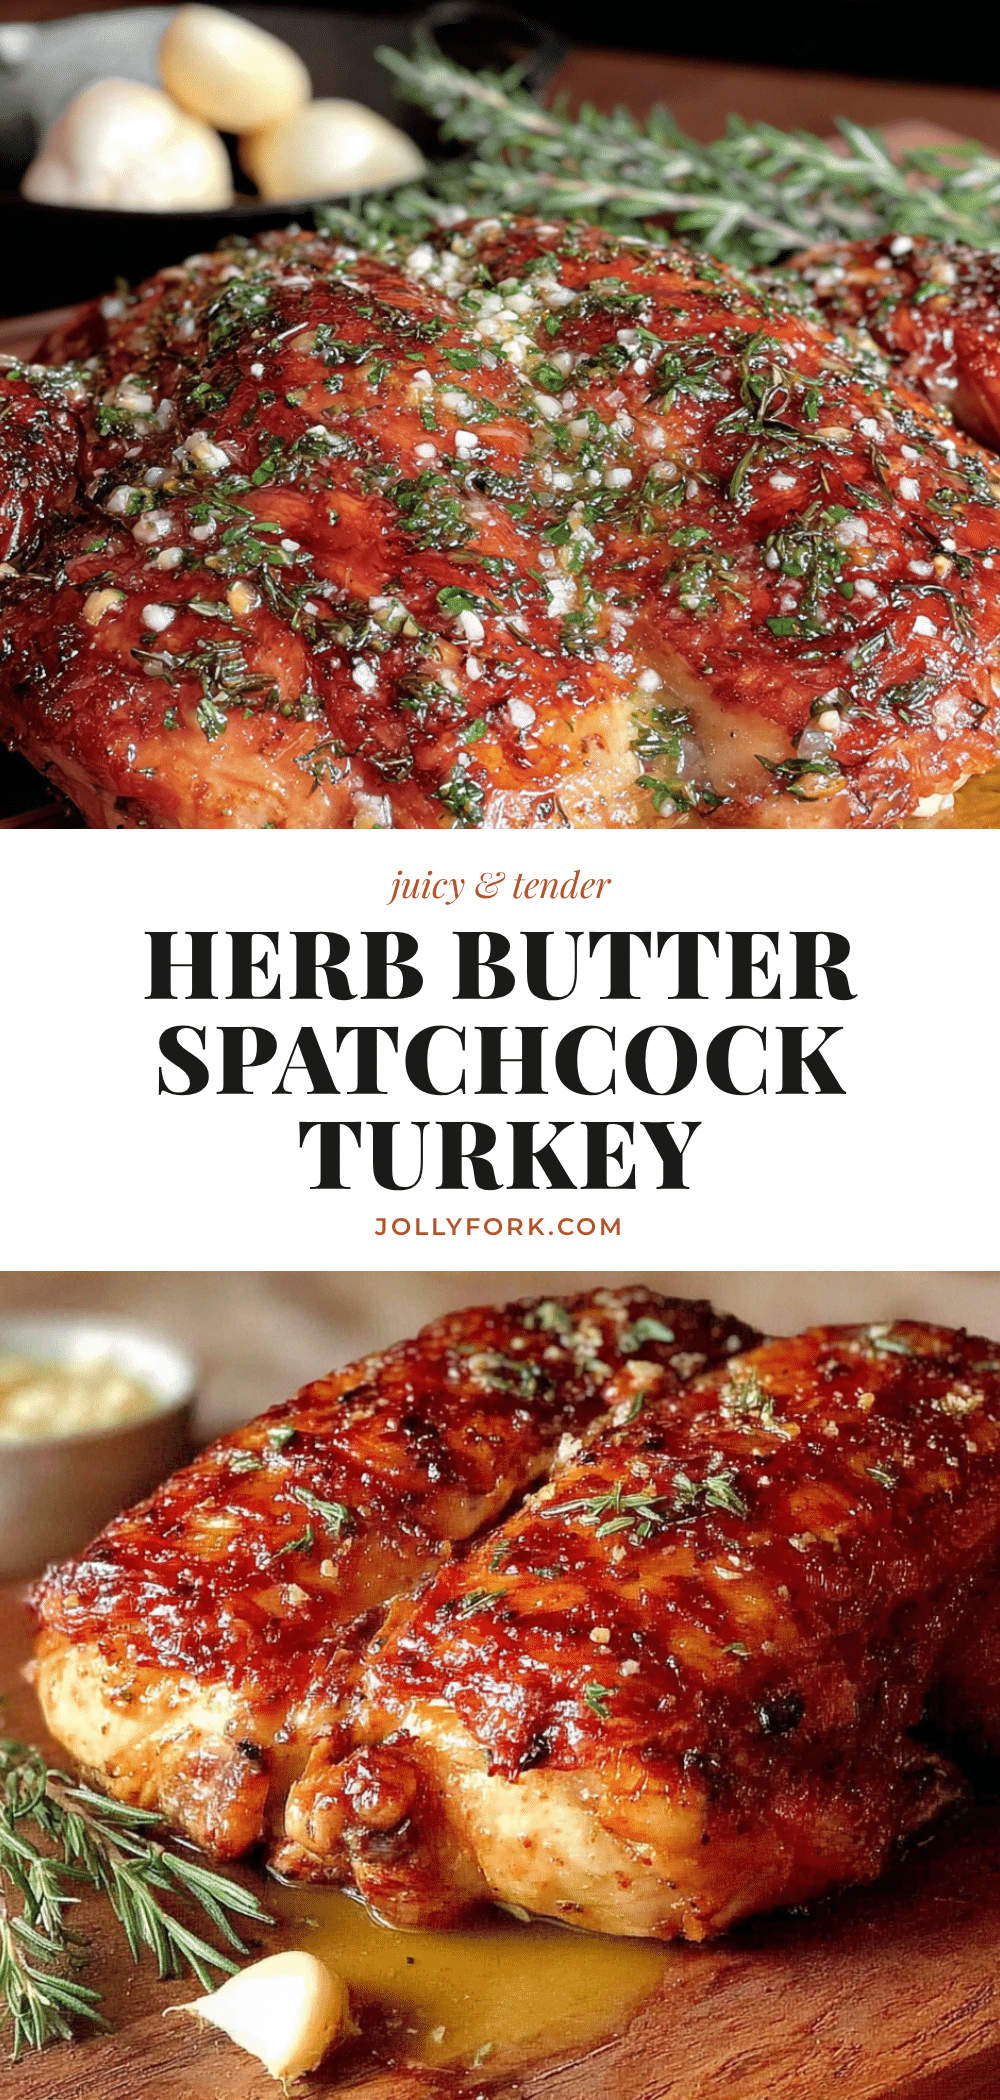
That was three years ago, and I haven’t roasted a whole turkey any other way since. This herb butter spatchcock turkey has become my go-to for every holiday gathering, and honestly, it’s ruined me for traditional roasting. The butter mixture — garlic, rosemary, thyme, a little lemon zest — seeps into every crevice, and because the bird lies flat, you get crispy skin everywhere, not just on the top. Maybe you’ve been there, standing over a pale, dry turkey wondering where you went wrong. Let me tell you, this method fixes all of that. It’s faster, juicier, and so much less stressful that you might actually enjoy hosting dinner for once.
Why You’ll Love This Recipe
I’ve tested this spatchcock turkey method at least a dozen times across different ovens, different bird sizes, and even different altitudes when I brought it to my sister’s place in Denver. It works every single time, and here’s why this version stands out from the hundreds of turkey recipes out there.
- Faster Cooking Time: A traditional whole turkey can take four to five hours. This spatchcock method cuts that down to about 90 minutes for a twelve-pound bird. That’s a game-changer when you’re juggling side dishes and hungry guests.
- Simple Ingredients: You don’t need any weird specialty items. Butter, fresh herbs, garlic, lemon, salt, pepper — that’s it. You probably have most of this stuff in your kitchen right now.
- Perfect for Holiday Hosting: Whether it’s Thanksgiving, Christmas, or a Sunday dinner that got out of hand, this turkey frees up your oven for all those casseroles and rolls. You can actually cook everything at once without losing your mind.
- Guaranteed Crowd-Pleaser: I’ve served this to everyone from my picky-eater nephew to my aunt who “doesn’t really like turkey.” They all went back for seconds. The dark meat stays moist, the white meat doesn’t dry out, and that herb butter crust is irresistible.
- Unbelievably Juicy: Because the bird cooks flat and evenly, you don’t get that dreaded dry breast meat while the thighs are still undercooked. Every single bite is tender and flavorful. It’s the kind of turkey that makes you close your eyes after that first taste.
What makes this recipe different is the technique. Most turkey recipes rely on brining or basting to keep things moist, but this method uses the bird’s own geometry to solve the problem. By removing the backbone and flattening it, you create a more uniform thickness, which means even heat distribution. The herb butter does the rest — it bastes the meat from the inside out as it melts, so you don’t have to keep opening the oven door every twenty minutes. It’s comfort food reimagined: faster, juicier, and with that same soul-soothing satisfaction you expect from a holiday centerpiece.
What Ingredients You Will Need
This recipe uses simple, wholesome ingredients that work together to create something truly special. Most of these are pantry staples or easy to find at any grocery store, which makes this approachable even for last-minute holiday planning.
For the Turkey
- 1 whole turkey (10-14 pounds), fully thawed and patted dry — I prefer a fresh bird from a local farm when I can get it, but frozen works great too. Just make sure it’s completely thawed in the fridge for three to four days.
- Kosher salt, about 1 tablespoon per 5 pounds of turkey — Diamond Crystal is my go-to because it’s less salty by volume than Morton’s, so you have more control.
- Freshly ground black pepper, about 2 teaspoons
For the Herb Butter
- 1 cup (2 sticks) unsalted butter, softened to room temperature — don’t microwave it; you want it spreadable, not melted. If you forget to take it out ahead of time, cut it into small cubes and let it sit for 15 minutes.
- 4 cloves garlic, minced finely — I use a microplane for this because it creates a paste that distributes evenly through the butter.
- 2 tablespoons fresh rosemary, chopped — strip the leaves from the woody stems first. Dried rosemary works in a pinch, but use half the amount.
- 2 tablespoons fresh thyme leaves, chopped — run your fingers down the stems to strip them quickly.
- 2 tablespoons fresh sage, chopped — this adds that classic Thanksgiving flavor that makes everyone nostalgic.
- Zest of 1 lemon — make sure you zest before you juice, and try to avoid the white pith, which is bitter.
- 1 tablespoon lemon juice, freshly squeezed
- 1 teaspoon salt
- 1/2 teaspoon black pepper
For the Aromatics (Optional but Recommended)
- 1 lemon, halved — place this in the cavity after spatchcocking for extra moisture and brightness.
- 4 sprigs fresh rosemary
- 6 sprigs fresh thyme
- 1 head garlic, cut in half crosswise — this roasts alongside the turkey and makes the most incredible spread for bread later.
I recommend using fresh herbs here — they really do make a difference in flavor intensity. But if you’re in a pinch, dried herbs work. Just use one-third of the amount called for, since dried herbs are more concentrated. For the butter, I use Kerrygold because it has a higher butterfat content, which means richer flavor and better browning. You can use any unsalted butter, just adjust the salt accordingly.
Equipment Needed
You don’t need a ton of fancy equipment for this, but a few key tools make the process much smoother. Here’s what I use every time.
- Kitchen shears — this is non-negotiable. You need sharp, sturdy shears to cut through the turkey’s backbone. I use the OXO Good Grips shears, and they’ve held up for years. If you don’t have shears, you can use a sharp chef’s knife, but it’s trickier and takes more effort.
- Large rimmed baking sheet — a half-sheet pan (18×13 inches) works perfectly. The rim catches any juices, and the flat surface helps with even cooking. I line mine with foil for easier cleanup.
- Wire rack — this sits inside the baking sheet and lifts the turkey off the surface, allowing hot air to circulate underneath. It makes the bottom skin crispy instead of soggy. If you don’t have one, you can use vegetables like carrots and celery as a makeshift rack.
- Instant-read thermometer — trust me, you need this. Guessing doneness leads to dry turkey. I use a Thermapen, but any reliable instant-read thermometer works. The breast should hit 155°F and the thigh should reach 165°F.
- Mixing bowl — for combining the herb butter ingredients.
- Paper towels — lots of them, for drying the turkey skin thoroughly. This step is crucial for crispy skin.
- Heavy-duty kitchen twine — optional, but I use it to tie the drumsticks together after spatchcocking, which helps them cook evenly.
If you don’t have kitchen shears, ask a neighbor or borrow from a friend — I’ve done that before and it saved me. You can also ask the butcher at your grocery store to spatchcock the turkey for you. Most will do it for free if you ask nicely.
Preparation Method
This process looks intimidating, but I promise it’s straightforward once you get past the cutting part. Take it step by step, and you’ll have a gorgeous bird ready for the oven in about twenty minutes.
Step 1: Prep the Turkey
Start by taking your turkey out of the fridge about 45 minutes before you plan to cook. This lets it come to room temperature slightly, which helps it cook more evenly. Remove any giblets and neck from the cavities — check both ends, because sometimes they hide the neck in the front cavity. Pat the entire turkey dry with paper towels, inside and out. I mean really dry. Any moisture on the skin will steam instead of crisp, and we want that golden brown crust.
Step 2: Spatchcock the Turkey
Place the turkey breast-side down on a cutting board. You’ll see the backbone running down the center. Using your kitchen shears, cut along one side of the backbone, starting from the tail end and working toward the neck. This takes some muscle — don’t be afraid to really lean into it. Then cut along the other side to remove the backbone completely. Save that backbone! It’s perfect for making stock later. Flip the turkey over and press down firmly on the breastbone with the heels of your hands until you hear a crack. The turkey should lie flat now. If it doesn’t, press a little harder — you’re not going to break anything important.
Step 3: Make the Herb Butter
In a medium bowl, combine the softened butter, minced garlic, chopped rosemary, thyme, sage, lemon zest, lemon juice, salt, and pepper. Mix until everything is evenly distributed. Taste a tiny bit — it should be savory and bright, with the herbs coming through clearly. If it tastes flat, add a pinch more salt.
Step 4: Season and Butter the Turkey
Season the underside of the turkey (the side that was facing down) with salt and pepper. Flip it over and place it on the wire rack inside your baking sheet. Using your fingers, gently loosen the skin over the breast meat and thighs, being careful not to tear it. Take about two-thirds of the herb butter and spread it directly onto the meat under the skin. Then spread the remaining butter all over the outside of the skin, getting into every nook and cranny. Don’t forget the drumsticks and wings. Season the outside generously with salt and pepper.
Step 5: Add Aromatics and Roast
Place the lemon halves, herb sprigs, and garlic halves in the cavity area around the turkey. Tuck the wing tips under the turkey so they don’t burn. If you want, tie the drumsticks together with kitchen twine to keep them from flopping open. Preheat your oven to 425°F. Yes, that’s higher than usual — the high heat is what gives you that crispy skin in less time. Roast the turkey for about 12-15 minutes per pound. For a 12-pound bird, that’s roughly 1 hour and 30 minutes to 1 hour and 45 minutes. Start checking the temperature at the 1-hour mark.
Step 6: Check for Doneness
Insert your instant-read thermometer into the thickest part of the breast, avoiding the bone. You’re looking for 155°F. For the thigh, aim for 165°F. The breast will continue cooking after you take it out (carryover cooking), so pulling it at 155°F ensures it stays juicy. If the skin is getting too dark before the meat is done, tent loosely with foil.
Step 7: Rest Before Carving
This step is crucial — don’t skip it. Let the turkey rest on the baking sheet for at least 20 minutes before carving. This allows the juices to redistribute throughout the meat. If you cut into it too soon, all those beautiful juices will run out onto the cutting board, and you’ll have dry meat. Use this time to make gravy with the pan drippings or finish up your side dishes.
Cooking Tips & Techniques
I’ve made this turkey enough times to have a few disasters along the way. Here are the lessons I learned the hard way so you don’t have to.
Don’t skip drying the skin. The first time I made this, I was in a hurry and left the skin a little damp. The skin came out pale and rubbery instead of crispy and golden. Pat it dry with paper towels, then let it sit uncovered in the fridge for a few hours if you have time. That air-drying step takes the crispiness to another level.
Use room temperature butter. Cold butter won’t spread under the skin, and melted butter will just run off. Softened butter creates a paste that sticks to the meat and melts slowly, basting the turkey from the inside. If you forgot to soften it, cut it into small cubes and let it sit for 15 minutes. You can also microwave it at 50% power in 5-second bursts, but be careful not to melt it.
Watch the dark spots. Because the turkey lies flat, the wing tips and drumstick ends can burn if they’re exposed. Tuck the wings under the bird, and if the drumsticks start looking too dark, cover them with small pieces of foil. I’ve had to do this a few times when my oven runs hot.
Let it rest properly. I once got impatient and carved the turkey after only 10 minutes of resting. The juices flooded the cutting board, and the meat was noticeably drier. Twenty minutes feels like forever when everyone’s hungry, but it makes a real difference. Use that time to warm up gravy or finish the mashed potatoes.
Make stock with the backbone. Don’t throw away that backbone! Toss it in a pot with some onion, carrot, celery, and water, and simmer for an hour. You’ll have homemade turkey stock that’s way better than anything from a box. I freeze mine in quart bags for soup later.
Variations & Adaptations
One of the best things about this recipe is how flexible it is. Here are some variations I’ve tried that turned out great.
Citrus-Herb Variation
Swap the lemon for an orange and add a tablespoon of orange zest to the herb butter. The sweetness pairs beautifully with the sage and thyme. I did this for a Christmas dinner once, and everyone thought I’d added some secret ingredient. The orange gives the turkey a subtle brightness that cuts through the richness.
Spicy Southwest Version
Add 1 teaspoon of smoked paprika, 1/2 teaspoon of cumin, and 1/4 teaspoon of cayenne to the herb butter. Replace the lemon with lime zest and juice. This version is fantastic if you’re serving the turkey with black beans, rice, or a spicy gravy. My brother-in-law requests this every year for his birthday dinner.
Garlic and Herb Butter Without Dairy
Use vegan butter or olive oil instead of regular butter. If using olive oil, mix it with the herbs and garlic to form a paste, then spread it under and over the skin. It won’t be quite as rich, but it still produces a beautifully browned turkey with great flavor. I’ve tested this with Earth Balance vegan butter, and it worked surprisingly well.
Herb-Infused Butter with Different Herbs
Don’t have rosemary or sage? Use what you have. Tarragon adds an anise-like flavor that’s lovely with turkey. Oregano works in a pinch. Even dried Italian seasoning can save the day — just use about 2 tablespoons. The key is to use enough herbs that you can taste them through the butter.
Serving & Storage Suggestions
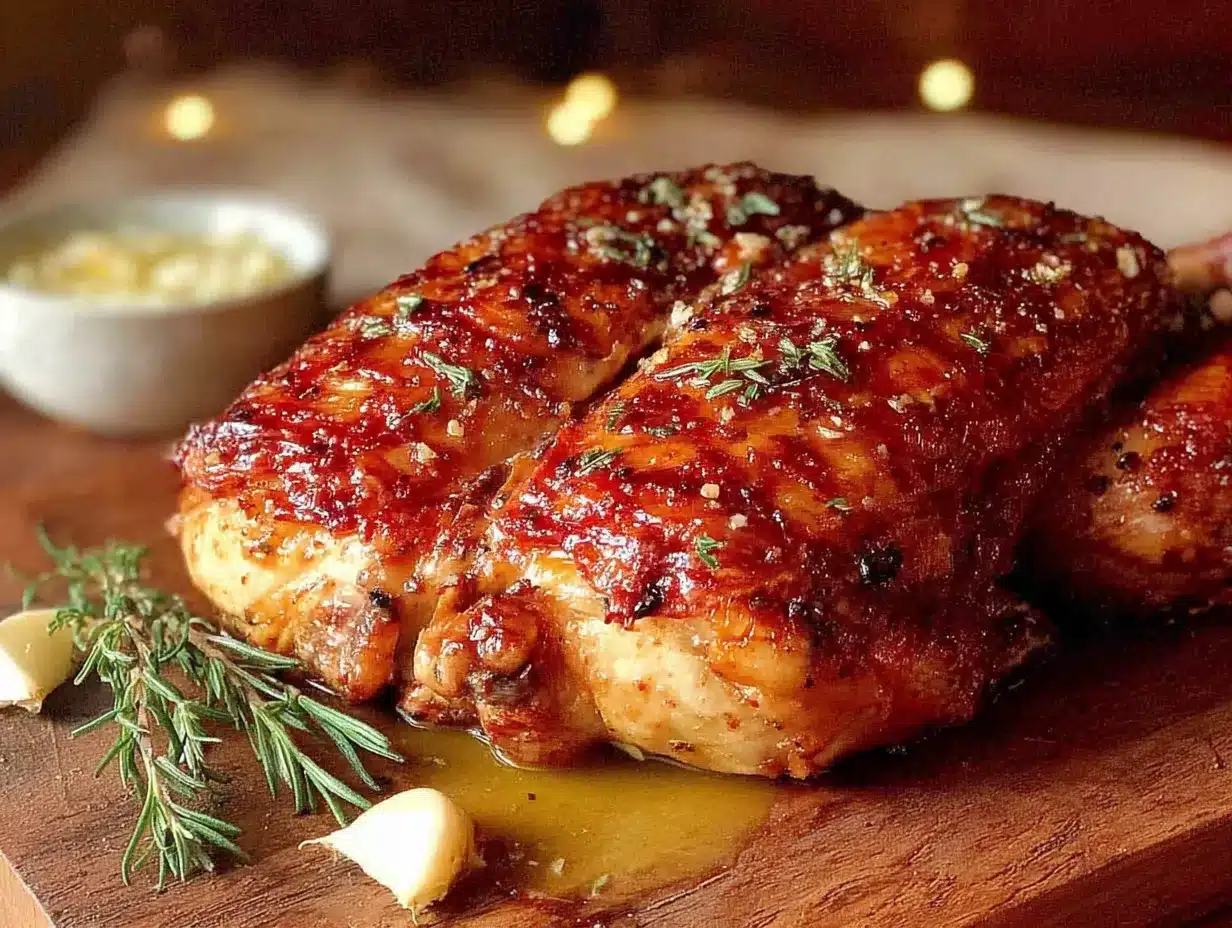
This turkey is best served hot, right after resting. Carve it by removing the legs and thighs first, then slicing the breast meat against the grain. Arrange the pieces on a warm platter and spoon some of the pan juices over the top. The presentation is stunning — all that golden skin and those visible herb flecks make it look like it came from a fancy restaurant.
For side dishes, I love serving this with roasted vegetables, mashed potatoes, and a simple green salad. The herb butter flavor pairs especially well with anything that has a little acidity, like a cranberry sauce or a vinaigrette. If you’re feeling extra, make a gravy from the pan drippings — just whisk in a little flour or cornstarch slurry and simmer until thickened.
Leftovers keep beautifully. Store carved turkey in an airtight container in the refrigerator for up to four days. To reheat, place the meat in a baking dish with a splash of broth or water, cover with foil, and warm in a 300°F oven for about 15 minutes. This prevents the meat from drying out. You can also freeze the turkey for up to three months — just wrap it tightly in plastic wrap and foil. Thaw in the fridge overnight before reheating.
The flavors actually deepen after a day or two in the fridge. I often make extra just so I can have turkey sandwiches the next day with a little cranberry mayo. The herb butter flavor infuses the meat so thoroughly that even cold leftovers taste amazing.
Nutritional Information & Benefits
Turkey is naturally lean and packed with protein, making it a great choice for a satisfying meal. A 4-ounce serving of roasted turkey breast (without skin) contains about 180 calories, 25 grams of protein, and only 8 grams of fat. The herbs in this recipe — rosemary, thyme, and sage — are rich in antioxidants and have anti-inflammatory properties. Garlic is known for its immune-boosting benefits, and lemon adds a dose of vitamin C.
Using butter does add some saturated fat, but you can easily reduce it by using less or swapping in olive oil. The key is that this recipe doesn’t require any added sugars or processed ingredients, so it fits well into a balanced, whole-foods diet. If you’re watching your sodium, use a salt-free herb blend and reduce the added salt.
This turkey is naturally gluten-free and low-carb, so it works for a variety of dietary needs. Just make sure any gravy or sides you serve are also gluten-free if that’s a concern. I’ve served this to guests with celiac disease, and they were thrilled to have a holiday main dish they could eat without worry.
Conclusion
Look, I get it — cooking a whole turkey is stressful. There’s pressure to get it right, especially if you’re hosting a holiday meal. But this spatchcock method takes so much of that pressure off. It’s faster, more forgiving, and honestly, the results are better than any traditional roast I’ve ever made. The herb butter keeps everything moist and flavorful, the crispy skin is absolutely addictive, and you’ll have your oven free for all those other dishes you need to make.
I hope you give this recipe a try, even if you’re nervous about the spatchcocking part. The first cut is the hardest, but once you do it, you’ll wonder why you ever roasted a turkey any other way. And if you come up with your own variation — maybe a different herb combo or a spice blend you love — I’d love to hear about it. Drop a comment below and tell me how it went. Happy cooking, and enjoy every bite of that beautiful, juicy turkey!
Frequently Asked Questions
Can I spatchcock a frozen turkey?
No, the turkey needs to be fully thawed before you can spatchcock it. Trying to cut through a partially frozen bird is dangerous and nearly impossible. Thaw your turkey in the refrigerator for 3-4 days, depending on size.
Do I need to brine the turkey first?
Not with this recipe. The herb butter and the spatchcock method keep the meat juicy without brining. If you want extra flavor, you can dry-brine the turkey overnight by rubbing it with salt and leaving it uncovered in the fridge, but it’s not necessary.
Can I use dried herbs instead of fresh?
Yes, but use about one-third of the amount. Dried herbs are more concentrated than fresh. For this recipe, use about 2 teaspoons each of dried rosemary, thyme, and sage instead of the fresh amounts listed.
How do I know when the turkey is done without a thermometer?
I really recommend using an instant-read thermometer for accuracy. But if you don’t have one, pierce the thickest part of the thigh with a knife — the juices should run clear, not pink. The meat should also feel firm to the touch and pull away from the bone easily.
Can I cook the turkey at a lower temperature?
You can, but you’ll lose the crispy skin benefit. If you need to cook at 350°F, expect the cooking time to increase by about 30-40 minutes. The skin won’t be as crispy, but the meat will still be juicy thanks to the herb butter.
Pin This Recipe!