The neighborhood cookie exchange was in twelve hours and I’d completely forgotten. I mean, I’d been picturing those perfectly decorated sugar cookies everyone else brings—the ones with the royal icing that looks like it was applied by a tiny robot. And me? I had a box of brownie mix, a block of cream cheese, and a vague memory of seeing something cute on Pinterest at 2 AM. Honestly, I was about to text my friend Sarah and say I had the flu. But then I spotted the green candy melts in the back of my pantry. And the pretzel sticks. And I thought—okay, what if I just… made it up?
So there I was at midnight, crumbling brownies into a bowl with my bare hands, cream cheese smeared on my favorite sweater. Let me tell you, it was not a glamorous moment. But somehow—between the frantic dipping and the sprinkles flying everywhere—these little trees started to look… cute. Really cute. I walked into that cookie exchange the next day with a platter of Lighter Christmas Tree Brownie Cake Pops, feeling like I’d shown up to a black-tie event in pajamas.
And you know what happened? They disappeared first. Before the French macarons. Before the gingerbread houses. People kept coming back for “just one more little tree.” Maybe you’ve been there—the panic of not having something “good enough” to bring, only to realize that simple, homemade, and a little bit imperfect is actually what everyone wants. These cake pops are that story on a stick. They’re lighter than traditional versions (less sugar, fewer calories), no-bake, and so ridiculously easy that you’ll actually enjoy making them. Which, let’s face it, is rare during the holiday chaos.
Why You’ll Love This Recipe
I’ve tested this recipe about seven times now—much to my neighbor’s delight—and I can tell you with confidence that these are the holiday treat you didn’t know you needed. Here’s why they work so well:
- Quick & Easy : From start to finish, you’re looking at about 30 minutes of active work. The hardest part is waiting for the chocolate to set.
- Simple Ingredients : Brownie mix, cream cheese, candy melts, and a few decorations. That’s it. No fancy baking equipment required.
- Perfect for Holiday Parties : They look impressive on a platter, but they’re actually the most low-stress thing you can bring to a cookie swap, office party, or family gathering.
- Crowd-Pleaser : Kids love the tree shape, adults love the brownie-and-cream-cheese combo, and everyone loves that they’re not too sweet.
- Unbelievably Delicious : The texture is this perfect mix of fudgy brownie and creamy cheesecake—wrapped in a thin chocolate shell. It’s comfort food that feels a little fancy.
What makes these different from every other cake pop recipe out there? First, they’re lighter. I cut the sugar by using a lower-sugar brownie mix and reducing the cream cheese. Second, the tree shape is just fun. It’s not some complicated piping situation—it’s a ball on a stick, dipped in green, with a pretzel trunk. Anyone can do this. And third, the flavor balance is spot on. The cream cheese cuts through the sweetness of the chocolate, so you get that rich, fudgy taste without feeling like you need a glass of water after every bite.
Honestly, this is the kind of recipe that makes you close your eyes after the first bite. It’s the holidays without the stress. It’s impressing people without breaking a sweat. And it’s proof that sometimes the best things come from panicking at midnight with whatever you have in your pantry.
What Ingredients You Will Need
This recipe uses simple, wholesome ingredients to deliver that rich, fudgy flavor without the usual sugar overload. Most of these are pantry staples or easy to find at any grocery store. Here’s what you’ll need:
For the Brownie Base
- 1 box (18 oz) lower-sugar brownie mix (I prefer Ghirardelli or Kodiak Cakes for a lighter option—they have great texture without being overly sweet)
- 1/3 cup unsweetened applesauce (replaces the oil and cuts calories—you won’t taste it, I promise)
- 1 large egg (room temperature works best for even mixing)
- 1/4 cup water
For the Cake Pop Filling
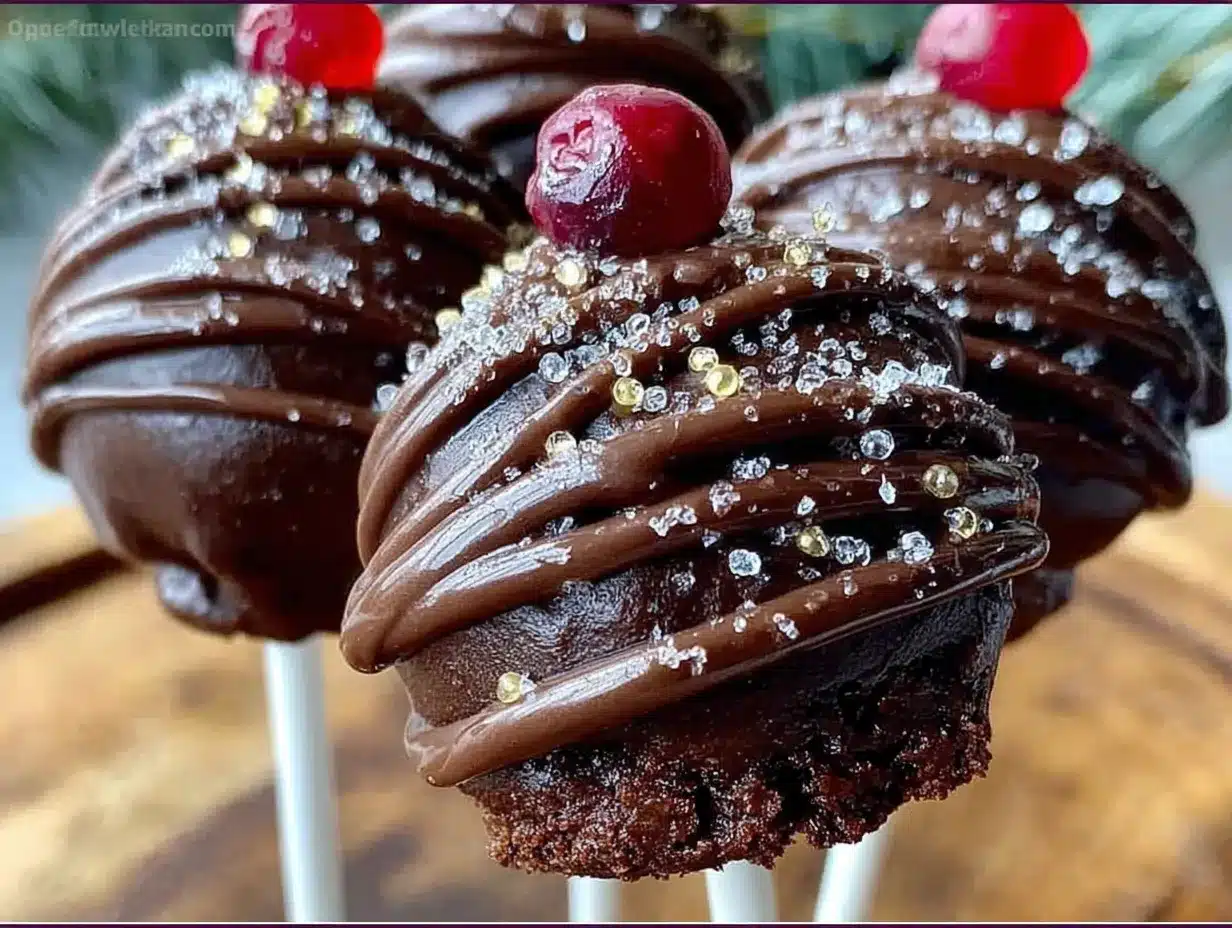
- 4 oz reduced-fat cream cheese, softened (Neufchâtel works great—it’s tangy and creamy but lower in fat)
- 2 tablespoons powdered sugar (just enough to sweeten—don’t go overboard)
- 1/2 teaspoon vanilla extract (pure, not imitation, for the best flavor)
For the Decoration
- 12 oz green candy melts (I like Wilton or Merckens—they melt smoothly and have a nice green color without needing food coloring)
- 1 tablespoon coconut oil (helps thin the candy melts for easier dipping)
- 24 pretzel sticks (broken in half—these become the tree trunks)
- Lollipop sticks (24 sticks, about 6 inches long)
- Sprinkles (star-shaped, red, and green—or whatever festive mix you have on hand)
- Optional: white candy melts for drizzling on top (like snow)
Ingredient Tips & Substitutions
If you want a gluten-free version, use a gluten-free brownie mix—just check that your candy melts are also certified gluten-free. For a dairy-free option, swap the cream cheese with a dairy-free cream cheese alternative and use dairy-free chocolate chips instead of candy melts (though the color won’t be as bright). And if you can’t find lower-sugar brownie mix, a regular box works fine—just reduce the powdered sugar in the filling to 1 tablespoon to keep things balanced.
I’ve made these with both regular and reduced-fat cream cheese, and honestly, the reduced-fat version works better here because it firms up more in the fridge. Full-fat cream cheese can make the filling a little too soft for rolling. So stick with the lighter option if you can.
Equipment Needed
You don’t need a fancy kitchen to pull these off. Here’s what you’ll actually use:
- 9×13 baking pan (for the brownies—any similar size works)
- Large mixing bowl (for crumbling the brownies and mixing the filling)
- Hand mixer or stand mixer (you can do this by hand, but a mixer makes the cream cheese filling silky smooth)
- Cookie scoop or tablespoon (for portioning the cake pop mixture evenly)
- Baking sheet lined with parchment paper (for setting the cake pops after dipping)
- Microwave-safe bowl (for melting the candy melts)
- Styrofoam block or cardboard box (to hold the cake pops upright while they set—I’ve used a shoebox with holes poked in it before, and it works fine)
- Lollipop sticks (available at craft stores or online—don’t skip these)
If you don’t have a cookie scoop, a regular tablespoon works—just make sure the portions are roughly the same size so your trees look uniform. And if you don’t have a Styrofoam block, a cardboard box with holes poked in the top is a perfectly acceptable substitute. I’ve done it. It’s not pretty, but it works.
Preparation Method
Step 1: Bake the Brownies
Preheat your oven to 350°F (175°C). Grease your 9×13 pan lightly with cooking spray. In a large bowl, mix the brownie mix, applesauce, egg, and water until just combined—don’t overmix, or the brownies will be tough. Pour the batter into the pan and spread it evenly. Bake for 18-22 minutes, or until a toothpick inserted in the center comes out with a few moist crumbs. You want them slightly underbaked for a fudgier texture. Let the brownies cool completely in the pan. This is important—if they’re even a little warm, the cream cheese will melt and you’ll have a sticky mess.
Step 2: Make the Filling
While the brownies cool, beat the softened cream cheese, powdered sugar, and vanilla extract together in a medium bowl until smooth and creamy. Use a hand mixer or stand mixer for about 2 minutes—you want it fluffy, not runny. Set this aside.
Step 3: Crumble and Mix
Once the brownies are completely cool, crumble them into a large bowl using your hands or a fork. You want fine crumbs—no big chunks. Add the cream cheese mixture to the crumbs and mix thoroughly. Use your hands—it’s messy but it’s the best way to make sure everything is evenly combined. The mixture should hold together when pressed. If it’s too dry, add a teaspoon of milk. If it’s too wet, add a tablespoon of cocoa powder.
Step 4: Form the Balls
Scoop out about 1 tablespoon of the mixture and roll it into a ball. Place each ball on a parchment-lined baking sheet. You should get about 24 balls. Once all the balls are formed, insert a lollipop stick into each one, pushing it about halfway through. Don’t push all the way through—you want the stick to be secure but not poking out the other side. Place the baking sheet in the refrigerator for at least 30 minutes. This is crucial—the balls need to be firm before dipping, or they’ll fall apart in the melted candy.
Step 5: Prepare the Candy Melts
While the balls chill, melt the green candy melts in a microwave-safe bowl. Microwave in 30-second intervals, stirring between each, until smooth. Add the coconut oil and stir until fully incorporated. The coconut oil thins the mixture, making it easier to dip. If the mixture seems too thick, add another teaspoon of coconut oil.
Step 6: Dip and Decorate
Remove the chilled cake balls from the fridge. Holding the lollipop stick, dip each ball into the melted candy, completely covering it. Gently tap the stick on the edge of the bowl to let excess drip off. Immediately place the dipped cake pop upright in your Styrofoam block or cardboard box. While the coating is still wet, press a pretzel stick half into the bottom of the cake pop to form the trunk. Add sprinkles on top for decorations. Repeat with all 24 cake pops.
Step 7: Set and Serve
Let the cake pops set at room temperature for about 15-20 minutes, or until the coating is firm. If you’re in a hurry, you can pop them in the fridge for 10 minutes. Once set, they’re ready to serve. If you want a snow effect, drizzle a little melted white candy melts over the top using a fork.
Cooking Tips & Techniques
I’ve made these cake pops enough times to have a few disasters under my belt—and here’s what I learned. First, don’t skip the chilling step. I once got impatient and tried to dip slightly-warm balls, and the candy coating cracked and slid right off. It was a mess. Thirty minutes in the fridge makes all the difference.
Second, if your candy melts are too thick, add a little more coconut oil—not water. Water will seize the chocolate and ruin it. I learned that the hard way when I was trying to thin some white chocolate and ended up with a grainy, clumpy disaster. Coconut oil is your friend here.
Third, when you’re dipping, don’t swirl the cake pop around in the candy. Just dip it straight in and pull it out. Twisting can cause the cake ball to fall off the stick. Trust me on this—I’ve had cake pops drop into the bowl more times than I’d like to admit.
Fourth, work in small batches. If you’re making 24 cake pops, only take 4-5 balls out of the fridge at a time. Keep the rest cold. The warmer they get, the harder they are to dip.
And finally, if you’re making these for a party, you can prepare the cake balls a day in advance and keep them in the fridge. Then just dip and decorate the day of. It spreads out the work and makes the process way less stressful.
Variations & Adaptations
One of the best things about this recipe is how easy it is to customize. Here are a few variations I’ve tried that turned out great:
Chocolate Peppermint
Add 1/2 teaspoon peppermint extract to the cream cheese filling and crush some candy canes to sprinkle on top instead of the regular sprinkles. The minty freshness pairs beautifully with the fudgy brownie.
Gluten-Free Version
Use a gluten-free brownie mix and check that your candy melts are gluten-free. I’ve used King Arthur Flour gluten-free brownie mix and it works perfectly—the texture is almost identical to regular brownies.
White Chocolate Snowflakes
Instead of green candy melts, use white chocolate and add a drop of blue food coloring for an icy blue look. Top with white nonpareils for a snowflake effect. These are gorgeous for a winter-themed party.
Vegan Option
Use a vegan brownie mix, replace the egg with a flax egg (1 tablespoon ground flaxseed + 3 tablespoons water), and use a dairy-free cream cheese alternative. For the coating, use dairy-free chocolate chips with a little coconut oil. The flavor is slightly different but still delicious.
Personally, I love the peppermint variation during December. It feels extra festive, and the crunch of the candy cane adds a nice texture contrast to the smooth coating.
Serving & Storage Suggestions
These cake pops are best served at room temperature—the coating is snappy and the inside is soft and fudgy. Arrange them on a platter with the pretzel trunks pointing outward for a cute “forest” look. They’re perfect for holiday parties, cookie exchanges, or even as a fun activity to do with kids.
For storage, keep them in an airtight container in the refrigerator for up to 5 days. The coating may develop a slight condensation if you take them straight from the fridge to room temperature, so let them sit out for about 10 minutes before serving. You can also freeze them for up to 2 months—just place them in a single layer in a freezer-safe container, separating layers with parchment paper. Thaw in the refrigerator overnight before serving.
One thing I love about these cake pops is that the flavors actually develop over time. The brownie and cream cheese meld together after a day or two, making them even richer. So if you can, make them a day ahead—they’ll taste even better.
They pair beautifully with a cup of hot cocoa or a warm mug of coffee. The contrast between the cold, creamy cake pop and the hot drink is just perfect.
Nutritional Information & Benefits
Here’s the approximate nutritional breakdown for one cake pop (based on 24 servings):
- Calories: 145
- Fat: 7g
- Saturated Fat: 4g
- Carbohydrates: 19g
- Sugar: 12g
- Fiber: 1g
- Protein: 2g
Compared to a traditional cake pop, this version has about 30% fewer calories and 40% less sugar. The applesauce replaces the oil, saving fat without sacrificing moisture. The reduced-fat cream cheese cuts saturated fat while keeping that tangy, creamy texture. And the lower-sugar brownie mix means you’re getting all the fudgy satisfaction without the sugar crash.
If you’re watching your sugar intake, you can also use a sugar-free brownie mix and skip the powdered sugar in the filling. The cake pops will be slightly less sweet, but the chocolate flavor still shines through.
These are also nut-free (as long as you check your chocolate coating) and can be made gluten-free with simple swaps. Always check labels if you’re serving someone with allergies.
Conclusion
Look, I know the holidays are chaotic. There’s the shopping, the wrapping, the endless planning. The last thing you need is a complicated recipe that requires a pastry degree and three days of prep. These Lighter Christmas Tree Brownie Cake Pops are the opposite of that. They’re forgiving. They’re fun. And they’re the kind of treat that makes people smile—not because they’re perfect, but because they’re made with love and a little bit of midnight panic.
I hope you give them a try. Customize them however you like—add peppermint, go gluten-free, make them vegan. The base recipe is solid, but the decorations are where you can make it your own. And if you do make them, I’d love to hear about it. Leave a comment below, share a photo on Pinterest, or tag me in your holiday spread. Honestly, seeing your creations is my favorite part of this whole thing.
So go ahead—embrace the chaos, crumble some brownies, and make yourself a little forest of cake pops. You’ve got this. And if you don’t? Well, there’s always next year.
Frequently Asked Questions
Can I use homemade brownies instead of a mix?
Absolutely. Use your favorite homemade brownie recipe—just make sure it’s fudgy, not cakey. A cakey brownie will make the cake pops dry and crumbly. I’ve used a from-scratch recipe before and it works great, just be sure to crumble it finely.
Why did my cake pops fall off the sticks?
This usually happens for two reasons: the balls weren’t chilled enough, or the candy coating was too thick. Make sure the balls are very cold before dipping, and thin your candy melts with coconut oil if needed. Also, don’t push the stick all the way through—just halfway.
Can I use white chocolate instead of candy melts?
You can, but white chocolate is trickier to work with. It’s more prone to seizing and doesn’t set as firmly. If you use white chocolate, add a teaspoon of coconut oil to thin it and work quickly. Candy melts are specifically designed for cake pops and are much easier to handle.
How far in advance can I make these?
You can make the cake balls up to 2 days in advance and keep them in the fridge. Then dip and decorate the day you plan to serve them. Fully decorated cake pops will keep for up to 5 days in the fridge, or 2 months in the freezer.
Can I make these without a lollipop stick?
Yes! You can skip the sticks entirely and serve them as cake balls. Just roll the mixture into balls, chill them, and dip them in the candy coating without the stick. Place them on parchment paper to set, and you’ll have cute little truffles instead of cake pops. They’re just as delicious.
Pin This Recipe!
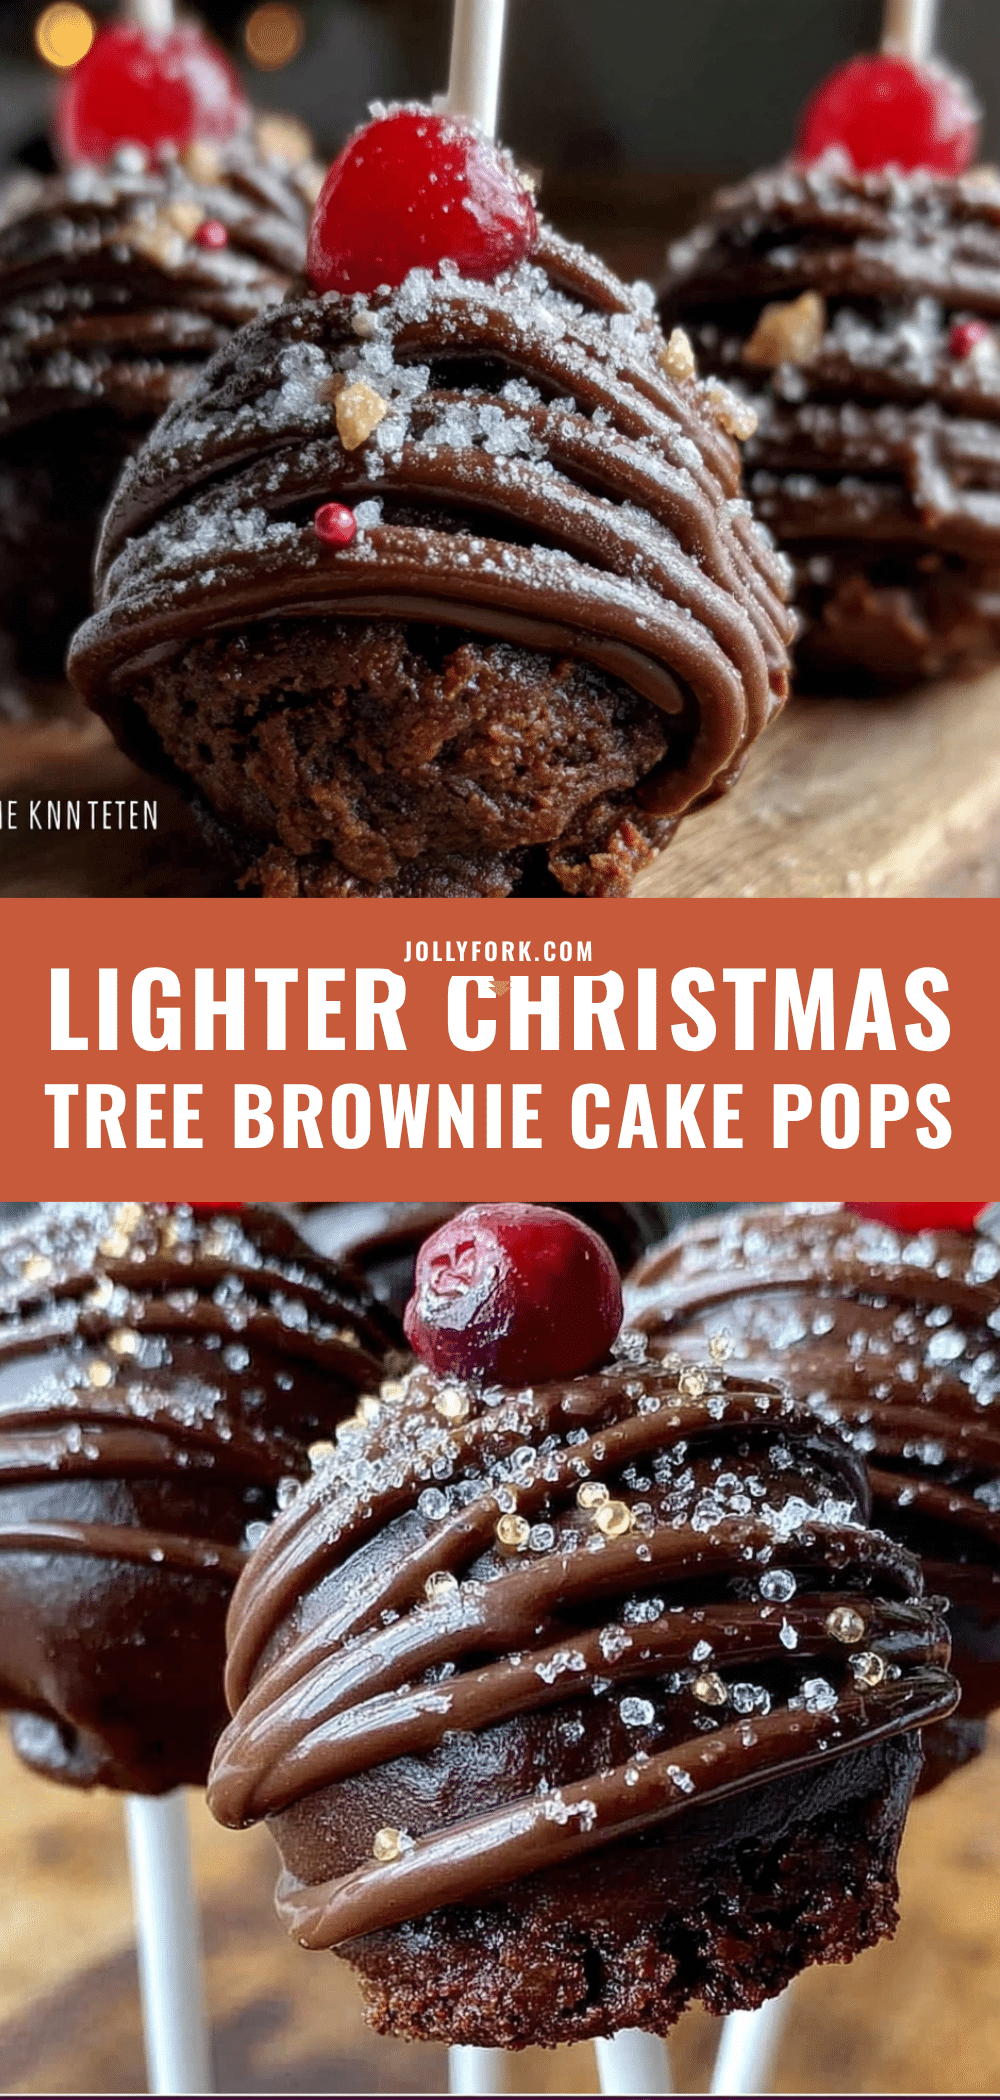
Lighter Christmas Tree Brownie Cake Pops – Easy No-Bake Treat
These no-bake Christmas tree cake pops are made with a lighter brownie and cream cheese filling, dipped in green candy melts with a pretzel trunk. They’re quick, easy, and perfect for holiday parties.
- Prep Time: 30 minutes
- Cook Time: 20 minutes
- Total Time: 50 minutes (plus 30 minutes chilling)
- Yield: 24 servings 1x
- Category: Dessert
- Cuisine: American
Ingredients
- 1 box (18 oz) lower-sugar brownie mix (e.g., Ghirardelli or Kodiak Cakes)
- 1/3 cup unsweetened applesauce
- 1 large egg, room temperature
- 1/4 cup water
- 4 oz reduced-fat cream cheese (Neufchâtel), softened
- 2 tablespoons powdered sugar
- 1/2 teaspoon vanilla extract (pure)
- 12 oz green candy melts (e.g., Wilton or Merckens)
- 1 tablespoon coconut oil
- 24 pretzel sticks, broken in half
- 24 lollipop sticks (about 6 inches long)
- Sprinkles (star-shaped, red, and green)
- Optional: white candy melts for drizzling
Instructions
- Preheat oven to 350°F (175°C). Grease a 9×13 baking pan lightly with cooking spray.
- In a large bowl, mix brownie mix, applesauce, egg, and water until just combined. Pour into pan and spread evenly.
- Bake for 18-22 minutes, until a toothpick inserted in center comes out with moist crumbs. Cool completely in pan.
- In a medium bowl, beat softened cream cheese, powdered sugar, and vanilla extract until smooth and creamy (about 2 minutes).
- Crumble cooled brownies into a large bowl into fine crumbs. Add cream cheese mixture and mix thoroughly with hands until mixture holds together when pressed.
- Scoop about 1 tablespoon of mixture and roll into a ball. Place on parchment-lined baking sheet. Repeat to make 24 balls.
- Insert a lollipop stick into each ball about halfway through. Refrigerate for at least 30 minutes until firm.
- Melt green candy melts in a microwave-safe bowl in 30-second intervals, stirring between each, until smooth. Stir in coconut oil.
- Remove chilled cake balls from fridge. Dip each ball into melted candy, covering completely. Tap stick on bowl edge to remove excess.
- Place dipped cake pop upright in a Styrofoam block or cardboard box. While coating is wet, press a pretzel stick half into bottom for trunk. Add sprinkles on top.
- Let set at room temperature for 15-20 minutes until firm. Optionally drizzle with melted white candy melts for a snow effect.
- Serve at room temperature.
Notes
Don’t skip chilling the cake balls before dipping—they need to be firm. If candy melts are too thick, add more coconut oil, not water. Work in small batches, keeping remaining balls cold. Cake pops can be made a day ahead and stored in the fridge; dip and decorate the day of serving.
Nutrition
- Serving Size: 1 cake pop
- Calories: 145
- Sugar: 12
- Fat: 7
- Saturated Fat: 4
- Carbohydrates: 19
- Fiber: 1
- Protein: 2
Keywords: Christmas tree cake pops, brownie cake pops, no-bake dessert, holiday treats, lighter cake pops, easy Christmas dessert


