This was supposed to be a fancy little chocolate mousse. I had this whole vision—silky, elegant, served in those tiny glass cups you barely get two bites out of. I was making it for a Halloween party, and I figured everyone else would bring the creepy stuff, so I’d bring the classy stuff. You know how that goes. I mean, I even bought the good chocolate. The expensive kind you hide from your own family.
But then the power went out. Halfway through tempering the eggs. There I was, standing in my dim kitchen, holding a whisk, staring at a bowl of chocolate that was supposed to be something it wasn’t anymore. And I had a bag of Oreos I’d bought for my nephew who was coming as a zombie astronaut. Honestly? I just started crushing them out of frustration. I dumped in some pudding mix I found in the back of the pantry, grabbed some cream cheese that was about to expire, and threw it all together in those little clear cups I had for the mousse. It looked like a mess. A delicious, chocolatey mess that had no business working.
I brought them anyway, because I had nothing else. And you know what? They were gone in ten minutes. People kept asking for the recipe, and I had to make something up on the spot because I hadn’t actually measured anything. That was three Halloweens ago. I’ve made these Spooky Easy Oreo Dirt Cups for Halloween every year since, and I’ve finally nailed down the exact measurements so you don’t have to guess like I did. They’re not fancy. They’re not elegant. But they are the thing everyone reaches for first. Maybe you’ve been there—a plan that fell apart and something better came out of it. That’s this recipe. It’s the happy accident that turned into a tradition.
Why You’ll Love This Recipe
Let me tell you why these little cups of chocolate chaos are worth your time. I’ve tested this about a dozen times now—different pudding brands, different ratios of cream cheese to Cool Whip, different ways of crushing the Oreos. I even tried making them with homemade pudding once, and honestly? Don’t. The boxed stuff works better here. Trust me on this.
- Quick & Easy: You can throw these together in about 15 minutes. No baking, no complicated steps, no tempering chocolate in a dark kitchen while you question your life choices.
- Simple Ingredients: Oreos, instant pudding, cream cheese, Cool Whip, and milk. That’s it. You probably have most of this stuff already.
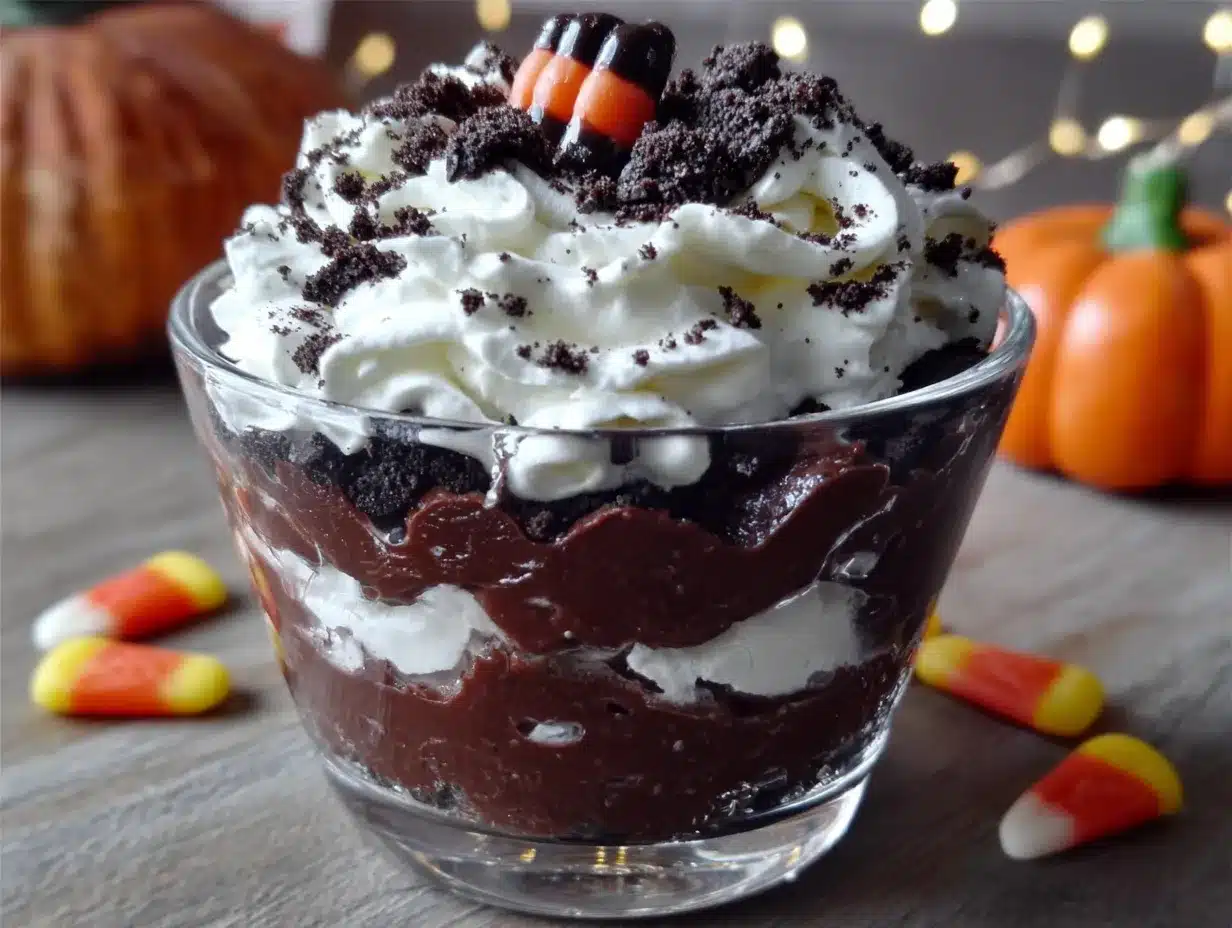
- Perfect for Halloween: They look exactly like little cups of dirt with worms crawling out. It’s creepy in the best way, and kids absolutely lose their minds over them.
- Crowd-Pleaser: I’ve brought these to Halloween parties, school events, and family gatherings. They disappear every single time. Adults try to play it cool, but I’ve caught more than one sneaking a second cup.
- Unbelievably Delicious: The texture is what gets you. The creamy pudding layer, the tangy cream cheese, and the crunchy Oreo dirt—it’s comfort food in a cup.
What makes these different from every other dirt cup recipe out there? It’s the cream cheese layer. Most recipes just layer pudding and crushed Oreos, but adding that cream cheese and Cool Whip mixture in the middle takes it from “kid snack” to “dessert everyone fights over.” It adds a richness and a slight tang that balances the sweetness perfectly. This isn’t just another version—it’s the one you’ll come back to year after year.
These Spooky Easy Oreo Dirt Cups for Halloween are the kind of dessert that makes you close your eyes after the first bite. It’s nostalgic and comforting, but with that little extra something that makes it feel special. Perfect for impressing a crowd without any stress, or turning a simple Halloween party into something memorable.
What Ingredients You Will Need
This recipe uses simple, pantry-friendly ingredients to create something that tastes way more complicated than it actually is. I’ve tested different brands and combinations, so I’ll share what works best.
For the Cream Layer
- 8 oz cream cheese, softened (I use Philadelphia—the full-fat version gives the best texture. Low-fat works but the filling won’t be as rich.)
- 1/2 cup granulated sugar (adjust to taste if you want it less sweet, but I find this amount balances the tangy cream cheese perfectly)
- 1 teaspoon vanilla extract (pure vanilla extract makes a difference here, but imitation works fine in a pinch)
- 8 oz Cool Whip, thawed (you can substitute with homemade whipped cream, but Cool Whip holds its structure better for layering and makes the texture lighter)
For the Pudding Layer
- 1 (3.9 oz) box instant chocolate pudding mix (I prefer Jell-O brand for consistency. Don’t use cook-and-serve—it won’t set properly for this recipe.)
- 2 cups cold milk (whole milk gives the creamiest pudding, but 2% works well too. I wouldn’t go below that or the pudding won’t be rich enough.)
For the Dirt and Decorations
- 1 (14.3 oz) package Oreo cookies (regular Oreos work best—double stuff makes the dirt too pale and not as dark. You’ll use the whole package.)
- Gummy worms, for decoration (about 2-3 per cup. I like the sour ones for extra flavor contrast.)
- Optional: small plastic Halloween decorations (like little tombstones or spiders for extra creepiness)
A quick note on the Oreos: you want to crush them until they look like actual dirt. Some people use a food processor, but I honestly prefer the old-fashioned method of putting them in a zip-top bag and smashing them with a rolling pin. It’s more satisfying, and you get a mix of fine crumbs and slightly bigger pieces that looks more realistic. Just remove the white filling first if you want a darker “dirt”—I leave it in because I like the sweetness, but it’s up to you.
If you’re making these for a school party or somewhere with nut allergies, you’re in luck—none of the standard ingredients contain nuts. Just double-check your specific brand of Oreos and pudding mix to be safe.
Equipment Needed
You don’t need much for these Spooky Easy Oreo Dirt Cups for Halloween, which is part of why I love them. Here’s what you’ll need:
- Small clear cups (I use 7-ounce plastic cups. The clear ones are important because you want people to see the layers. I found a pack of 50 at the grocery store for about $4.)
- Mixing bowls (you’ll need at least two—one for the cream cheese mixture and one for the pudding)
- Hand mixer or stand mixer (you can mix the cream cheese by hand if you’ve got strong arms, but a hand mixer makes it much easier to get that smooth, lump-free texture)
- Whisk (for the pudding)
- Rolling pin or food processor (for crushing the Oreos. I use a rolling pin and a zip-top bag because it’s more fun and I can control the texture better.)
- Measuring cups and spoons
- Spatula (a rubber spatula is best for scraping every last bit of that cream cheese mixture out of the bowl—trust me, you don’t want to waste any)
If you don’t have a hand mixer, you can absolutely do this by hand. Just make sure your cream cheese is really soft—like, leave it out for a good hour—and be prepared to whisk vigorously for a few minutes. It’s a good arm workout. I’ve done it that way when my hand mixer broke mid-recipe, and it worked fine. Just took a little longer.
Preparation Method
Alright, let’s get to it. This recipe makes about 8-10 cups depending on how full you fill them. I usually aim for 8 generous servings because nobody wants a tiny dirt cup.
Step 1: Crush the Oreos (5 minutes)
Take your entire package of Oreos and put them in a large zip-top bag. Don’t bother removing the cream filling—it adds to the “dirt” texture. Seal the bag, making sure to squeeze out as much air as possible. Now grab your rolling pin and go to town. I mean really get in there. Smash them until you have a mix of fine crumbs and small pebbly pieces. You want it to look like actual garden dirt. Set the bag aside.
Pro tip from someone who learned the hard way: don’t over-crush them into a powder. You want some texture. If you’re using a food processor, pulse it instead of letting it run continuously. About 10-12 short pulses should do it.
Step 2: Make the Cream Layer (5 minutes)
In a medium mixing bowl, beat the softened cream cheese with an electric hand mixer until it’s smooth and fluffy. This takes about 2 minutes. Scrape down the sides of the bowl with your spatula halfway through. Add the sugar and vanilla extract, and beat for another minute until everything is well combined and the sugar is dissolved.
Now fold in the thawed Cool Whip. I say “fold” but honestly, I just mix it on low speed until it’s combined. Don’t over-mix or you’ll deflate it too much. You want it light and airy. The mixture should look like a thick, creamy clouds. Set this aside while you make the pudding.
Step 3: Make the Pudding (5 minutes)
In a separate bowl, whisk together the instant chocolate pudding mix and cold milk. Whisk for about 2 minutes until it starts to thicken. It will be pretty thin at first, but don’t worry—it will set up in the fridge. Let it sit for 5 minutes to thicken slightly before you start layering.
Here’s something I figured out after a few batches: if you want a firmer pudding layer, use 1 3/4 cups of milk instead of 2. It makes the pudding a little thicker and easier to layer. I like it both ways, so it’s really a personal preference thing.
Step 4: Layer the Cups (10 minutes)
Now for the fun part. Grab your clear cups and start building. First, spoon about 2 tablespoons of crushed Oreos into the bottom of each cup. This is your “dirt” base. Press it down lightly with the back of a spoon.
Next, add a layer of the cream cheese mixture. I use about 3 tablespoons per cup, but you can adjust based on the size of your cups. Use a spoon or a piping bag if you want it neater—I usually just spoon it in and spread it gently.
Then add a layer of chocolate pudding. About 3 tablespoons again. Spread it gently so it doesn’t mix with the cream layer.
Finish with another layer of crushed Oreos on top. This is your “dirt” topping. Make sure it covers the pudding completely so you can’t see any brown. That’s the whole creepy illusion!
Step 5: Add the Worms and Chill (2 hours minimum)
Stick 2-3 gummy worms into each cup so they look like they’re crawling out of the dirt. Some should be poking out of the top, and you can even tuck one or two into the sides so it looks like they’re tunneling through. Place the cups in the refrigerator for at least 2 hours, but overnight is even better. This lets everything set up and the flavors meld together.
The first time I made these, I was impatient and served them after only 30 minutes. The pudding was still runny and the layers kind of slid into each other. They still tasted good, but they looked like a mess. Trust me on the chilling time. Your patience will be rewarded.
Cooking Tips & Techniques
I’ve made these Spooky Easy Oreo Dirt Cups for Halloween enough times to have learned a few things the hard way. Let me save you some trouble.
Room temperature cream cheese is non-negotiable. I know, I know—you’re in a hurry and you think you can just beat cold cream cheese until it smooths out. You can’t. You’ll end up with lumpy filling that never quite comes together. Leave it on the counter for at least an hour. If you forgot, here’s a trick: cut it into small cubes and microwave it for about 10-15 seconds. Not more. You want it soft, not melted.
Make sure your pudding is set before layering. I mentioned this earlier, but it’s worth repeating. If you layer too soon, the pudding will seep into your cream layer and you’ll lose that distinct stripe effect. Let the pudding sit for a full 5 minutes after whisking. It should be thick enough to hold its shape when you spoon it.
Crush the Oreos in batches if you’re making a double batch. I once tried to crush two packages in one bag and ended up with a mess of uneven crumbs. Do one bag at a time for consistent texture.
Use a piping bag for the cream layer if you want it Instagram-worthy. I don’t always bother, but when I’m bringing these to a party where people will see them before eating, I pipe the cream cheese mixture and the pudding. It gives you those perfect, clean layers. Just snip the tip off a zip-top bag and fill it with the mixture.
Don’t skip the chilling time. I already told you about my 30-minute disaster. These need at least 2 hours to set properly. The flavors develop, the textures firm up, and everything comes together. Make them the night before and you’ll thank yourself.
One mistake I still make: I always think I can get away with fewer Oreos than I need. You need the whole package. Trust me. If you run short, the dirt layer looks thin and sad. Buy an extra package just in case—you can eat the leftovers while you work.
Variations & Adaptations
These Spooky Easy Oreo Dirt Cups for Halloween are pretty forgiving, so feel free to play around. Here are some variations I’ve tried and loved.
Peanut Butter Dirt Cups: Add 1/2 cup of creamy peanut butter to the cream cheese mixture. Beat it in with the sugar and vanilla. It adds a whole new dimension of flavor and makes the cups even more decadent. Just make sure nobody has peanut allergies before you bring them to a party.
Mint Chocolate Dirt Cups: Use mint Oreos instead of regular ones, and add 1/2 teaspoon of peppermint extract to the cream cheese mixture. The chocolate and mint combination is perfect for Halloween, and the green-tinted cream layer looks extra creepy if you add a drop of green food coloring.
Gluten-Free Version: Use gluten-free chocolate sandwich cookies instead of regular Oreos. The texture is slightly different, but they work just fine. Make sure your pudding mix is also gluten-free—most are, but always check the label.
Dairy-Free Version: Use dairy-free cream cheese (I like Kite Hill), coconut whipped cream instead of Cool Whip, and a plant-based milk for the pudding. The texture will be a bit softer, so I recommend chilling them for at least 4 hours or overnight.
Pumpkin Spice Dirt Cups: This is my personal favorite fall variation. Add 1/2 cup of pumpkin puree and 1 teaspoon of pumpkin pie spice to the cream cheese mixture. Reduce the sugar to 1/3 cup. The pumpkin flavor pairs beautifully with the chocolate Oreo dirt, and it feels very on-theme for Halloween.
Individual Serving Jars: If you want to get fancy, use small mason jars instead of plastic cups. They look adorable and make great party favors. Just make sure to get the 4-ounce size so the portions are reasonable.
Serving & Storage Suggestions
These cups are best served cold, straight from the fridge. The contrast between the cold, creamy layers and the crunchy Oreo dirt is what makes them so satisfying. I usually pull them out about 10 minutes before serving so they’re not ice-cold, but that’s a personal preference.
Presentation tips: Arrange the cups on a platter or tray with some extra gummy worms scattered around. If you want to go all out, add a few plastic spiders or a little plastic tombstone to each cup. I found a pack of Halloween cupcake toppers at the dollar store that work perfectly. You can also sprinkle some orange and black sprinkles on top of the dirt for extra color.
What to serve with them: These are rich enough to stand alone, but they pair beautifully with a warm apple cider or a pumpkin spice latte. If you’re serving them at a party, they go great alongside a batch of pumpkin bars or some caramel apples for a full Halloween dessert spread.
Storage: These keep well in the refrigerator for up to 3 days. Just cover them with plastic wrap or put the lids on if your cups have them. The Oreo layer will soften over time, which honestly isn’t a bad thing—it starts to taste like a chocolate cheesecake. I actually prefer them on day two when everything has had time to meld together.
Freezing: You can freeze these, but the texture changes a bit. The cream layer gets icy and the Oreos get soggy when thawed. If you need to make them ahead, I’d stick to refrigerating them for up to 3 days. They’re actually better the next day, so making them the night before your party is ideal.
Reheating: Don’t. These are meant to be served cold. If someone tries to microwave them, stop them. It will not end well.
Nutritional Information & Benefits
Let’s be real—these are a treat, not a health food. But here’s the approximate nutritional breakdown for one cup (based on 8 servings):
| Nutrient | Amount per Serving |
|---|---|
| Calories | 420 |
| Total Fat | 22g |
| Saturated Fat | 12g |
| Cholesterol | 35mg |
| Sodium | 380mg |
| Total Carbohydrates | 52g |
| Dietary Fiber | 2g |
| Sugars | 38g |
| Protein | 6g |
Now, let’s talk about the silver lining. The cream cheese provides some calcium and protein, and the milk in the pudding adds more calcium and vitamin D. The Oreos? Well, they provide happiness, which I think counts for something. If you want to lighten them up a bit, you can use low-fat cream cheese and skim milk, but honestly? Halloween is one day. I say go for the full-fat version and enjoy every bite.
These are not suitable for vegans or those with dairy allergies unless you use the substitutions I mentioned earlier. They do contain gluten from the Oreos, so if that’s a concern, use gluten-free sandwich cookies. Always check labels for specific allergen information.
Conclusion
These Spooky Easy Oreo Dirt Cups for Halloween have become my go-to party dessert for a reason. They’re simple enough to throw together in 15 minutes, but they look like you spent way more effort than you actually did. Every time I bring them somewhere, someone asks for the recipe. And I love telling them the story of how I stumbled into making them by accident when my fancy mousse plan fell apart.
That’s the thing about cooking—sometimes the best recipes come from the moments when everything goes wrong. You grab the wrong ingredient, the power goes out, or you just don’t have the energy for something complicated. And what you make instead becomes the thing everyone remembers. These dirt cups are that for me. They’re not fancy or elegant, but they’re honest and delicious and a little bit silly. And honestly? That’s exactly what Halloween should be.
I’d love to hear how yours turn out! Leave a comment below and let me know if you tried any fun variations—the pumpkin spice version is especially good, and I’m always looking for new ideas. Share this recipe with your Halloween party planning group, and tag me in your photos. Happy Halloween, and happy accidental cooking!
Frequently Asked Questions
Can I make these Spooky Easy Oreo Dirt Cups for Halloween ahead of time?
Absolutely! In fact, they’re better when made the night before. The layers have time to set properly and the flavors meld together beautifully. Just add the gummy worms right before serving so they don’t get too soft.
Can I use homemade whipped cream instead of Cool Whip?
You can, but the texture will be different. Homemade whipped cream is less stable and can deflate over time, making the cream layer less firm. If you want to use it, make sure to stabilize it with a tablespoon of powdered sugar and whip it to stiff peaks.
How do I get the layers to look so clean?
The key is patience and the right tools. Let your pudding set for a full 5 minutes before layering. Use a piping bag for both the cream layer and the pudding layer. And don’t rush—gently spoon or pipe each layer so they don’t mix together.
Can I use a different type of cookie for the dirt?
Sure! Chocolate wafer cookies, gluten-free sandwich cookies, or even crushed chocolate graham crackers work well. Just keep in mind that different cookies will give you different textures and levels of sweetness. Oreos are the gold standard for a reason, though.
How long do these keep in the fridge?
They’ll keep for up to 3 days in the refrigerator. The Oreo layer will soften over time, which some people actually prefer. If you want them to stay crunchy, add the top layer of crushed Oreos right before serving.
Pin This Recipe!
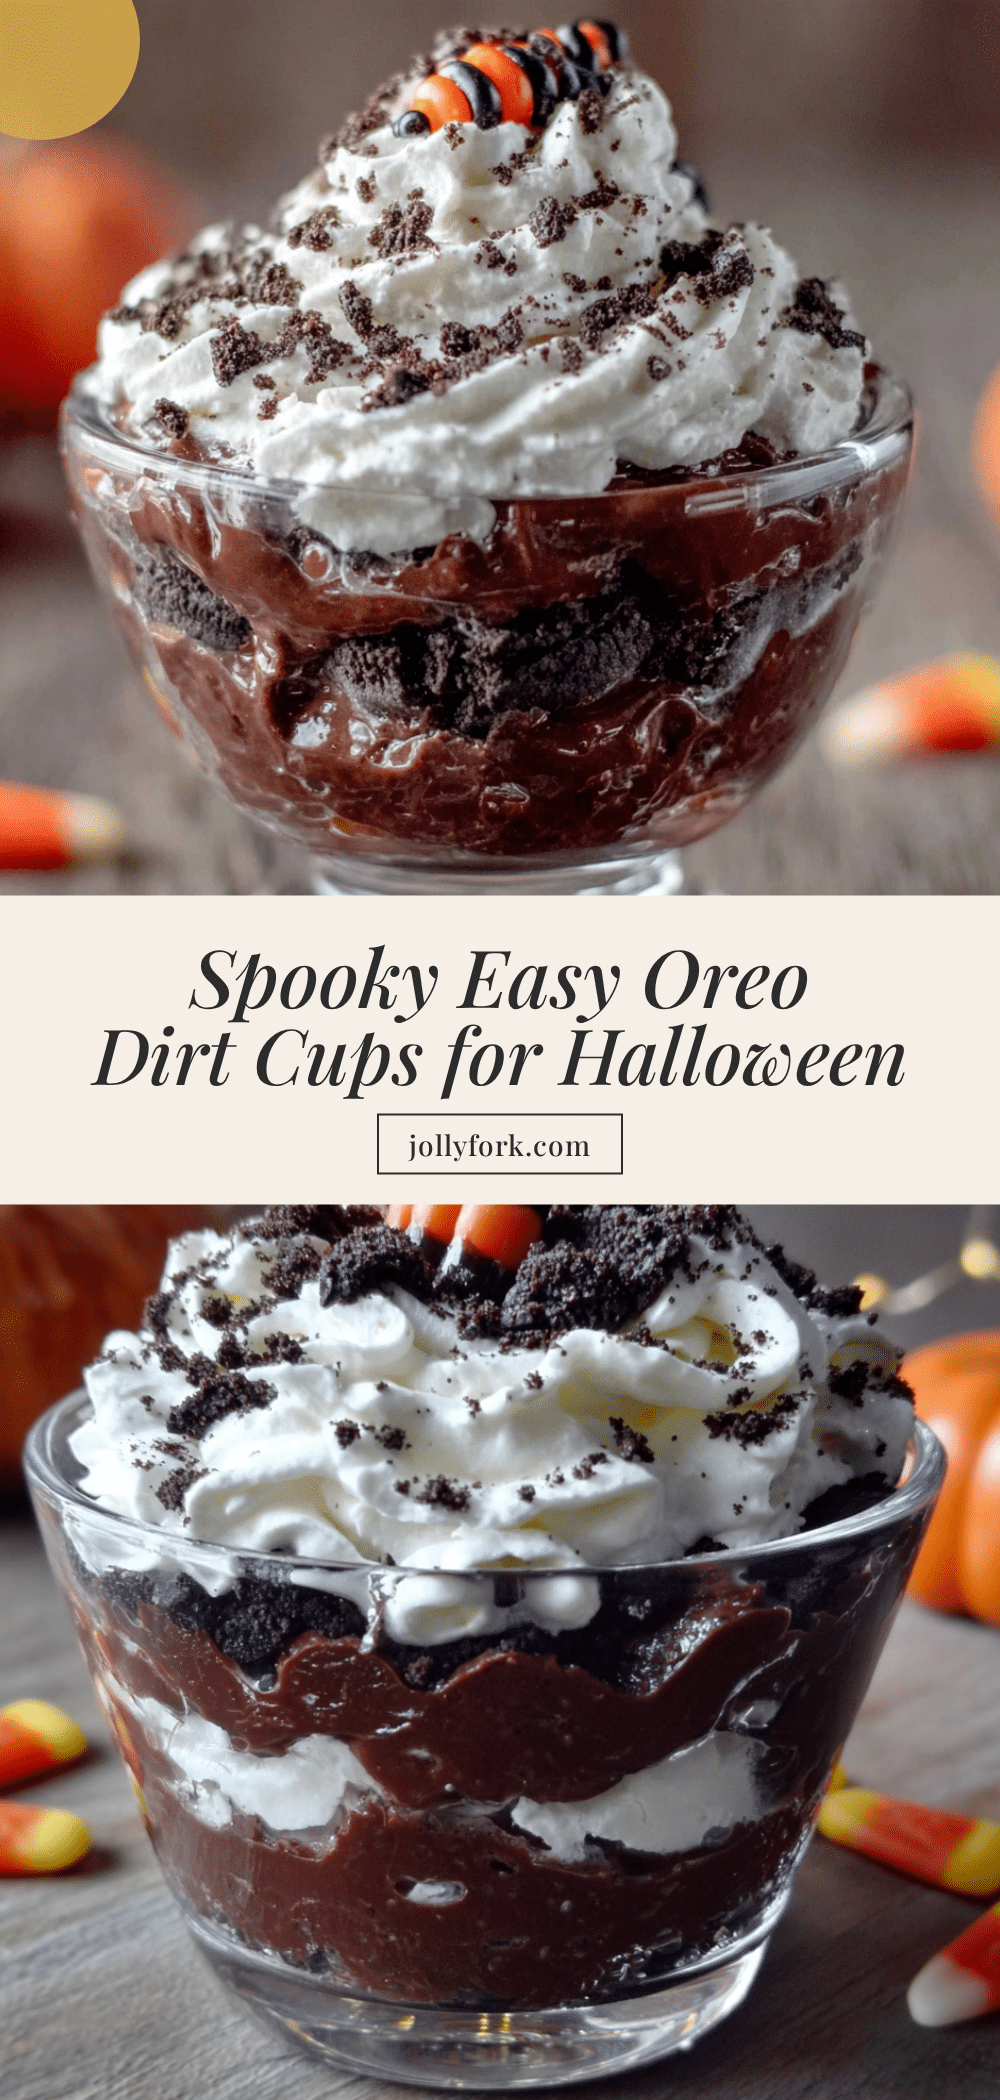
Spooky Easy Oreo Dirt Cups: Perfect Halloween Treat
These no-bake Oreo dirt cups are a quick and easy Halloween dessert made with layers of creamy cheesecake, chocolate pudding, and crushed Oreo ‘dirt’. Perfect for parties and guaranteed to be a crowd-pleaser.
- Prep Time: 15 minutes
- Cook Time: 0 minutes
- Total Time: 2 hours 15 minutes
- Yield: 8 servings 1x
- Category: Dessert
- Cuisine: American
Ingredients
- 8 oz cream cheese, softened
- 1/2 cup granulated sugar
- 1 teaspoon vanilla extract
- 8 oz Cool Whip, thawed
- 1 (3.9 oz) box instant chocolate pudding mix
- 2 cups cold milk
- 1 (14.3 oz) package Oreo cookies
- Gummy worms, for decoration
- Optional: small plastic Halloween decorations
Instructions
- Crush the entire package of Oreos in a large zip-top bag with a rolling pin until you have a mix of fine crumbs and small pebbly pieces. Set aside.
- In a medium bowl, beat softened cream cheese with an electric hand mixer until smooth and fluffy, about 2 minutes. Add sugar and vanilla extract, beat for another minute until combined.
- Fold in thawed Cool Whip on low speed until just combined. Set aside.
- In a separate bowl, whisk together instant chocolate pudding mix and cold milk for 2 minutes until it starts to thicken. Let sit for 5 minutes to thicken slightly.
- Layer the cups: spoon about 2 tablespoons crushed Oreos into the bottom of each clear cup. Add about 3 tablespoons of the cream cheese mixture. Then add about 3 tablespoons of chocolate pudding. Finish with another layer of crushed Oreos on top.
- Stick 2-3 gummy worms into each cup so they look like they’re crawling out of the dirt.
- Refrigerate for at least 2 hours, preferably overnight, before serving.
Notes
Room temperature cream cheese is essential for a smooth filling. Let pudding set for 5 minutes before layering to keep layers distinct. For best results, chill overnight. Use a piping bag for clean layers if desired.
Nutrition
- Serving Size: 1 cup
- Calories: 420
- Sugar: 38
- Sodium: 380
- Fat: 22
- Saturated Fat: 12
- Carbohydrates: 52
- Fiber: 2
- Protein: 6
Keywords: Oreo dirt cups, Halloween dessert, no-bake dessert, chocolate pudding, cream cheese, gummy worms, easy dessert


