My phone buzzed at 4:17 PM on a Tuesday. It was my sister-in-law, and the message just said: “Those peanut butter balls. I need the recipe. Now.” I had brought a small container of them to her house the weekend before, mostly as a snack for the kids while we all caught up on the porch. I hadn’t thought much of it — they were just something I whipped up in five minutes between answering emails and packing lunches. But apparently, her entire family had been fighting over the last few, and her husband had already polished off what was supposed to be a mid-week snack for my nephew.
That’s the thing about these easy 3-ingredient peanut butter protein balls. They don’t look like much sitting in the fridge — just humble little spheres, unassuming, a little rustic-looking. But one bite, and suddenly everyone’s asking for the recipe. Honestly, I wasn’t surprised. I’ve been making some version of these for years, ever since I realized that most store-bought protein snacks taste like cardboard and cost a small fortune. I wanted something I could feel good about eating, something my kids would actually reach for instead of a granola bar, and something that didn’t require me to turn on the oven or break out the stand mixer.
So I started experimenting. I messed up a few batches — too dry, too sticky, too crumbly — until I landed on this exact combination. Three ingredients. No bake. No fuss. And somehow, impossibly good. It’s the kind of recipe that feels almost too simple to share, but then you taste one and you get it. There’s no hidden trick here. Just honest, real food that works. And honestly? That’s my favorite kind of recipe to keep in my back pocket.
Why You’ll Love This Recipe
Let’s be real for a second. We all want to eat better, but most of us don’t have the time or energy to spend an hour in the kitchen making “healthy” snacks that end up tasting like sawdust. These easy 3-ingredient peanut butter protein balls are the exact opposite of that. They come together in under ten minutes, require zero baking skills, and taste like a treat you’d actually look forward to eating.
Here’s why this recipe stands out from the hundreds of other energy ball recipes floating around the internet:
- Quick & Easy: From start to finish, you’re looking at about 10 minutes of active time. No oven, no stove, no complicated techniques. Just mix, roll, and chill.
- Simple Ingredients: You only need three things — peanut butter, honey (or maple syrup), and rolled oats. That’s it. No weird protein powders, no expensive superfoods, no ingredients you have to hunt down at a specialty store.
- Perfect for Busy Days: Whether you need a quick breakfast on the go, a post-workout refuel, or a lunchbox-friendly snack for the kids, these little guys have your back.
- Crowd-Pleaser: I’ve served these at playdates, work meetings, and even holiday cookie swaps. Kids love them. Adults love them. Even my FIL, who claims he “doesn’t do healthy snacks,” ate six in one sitting.
- Unbelievably Delicious: The texture is soft and chewy, the peanut butter flavor is rich without being overwhelming, and the honey adds just the right amount of natural sweetness. You won’t feel like you’re eating a health food. You’ll feel like you’re eating dessert.
What makes these different from the rest is the ratio. I tested batch after batch to get the perfect balance — not too dry, not too sticky, not so sweet that you feel a sugar crash coming on. It’s the Goldilocks of no-bake protein balls, if you will. And because there’s no added oil or refined sugar, you can feel genuinely good about reaching for a second one.
This is one of those recipes that makes you wonder why you ever bought packaged snacks in the first place. It’s comfort food that actually fuels your body, and it’s so simple that you’ll find yourself making a double batch without even thinking twice.
What Ingredients You Will Need
This recipe is the definition of pantry-friendly. You probably have all three of these ingredients sitting in your kitchen right now, which is exactly the point. Each one plays a specific role in creating the perfect texture and flavor, so let’s break them down.
- Peanut Butter (1 cup / 240g): This is the backbone of the recipe. I recommend using a creamy, no-stir peanut butter like Skippy or Jif for the best texture. Natural peanut butters that separate can work, but you’ll need to stir them really well first, and even then, the texture might be a little more oily. If you’re using a natural brand, look for one where the oil hasn’t separated too much, and make sure it’s at room temperature so it mixes smoothly. For a different flavor, you can swap in almond butter or cashew butter, but the texture might vary slightly. Avoid using crunchy peanut butter unless you want little bits of peanut in every bite — which, honestly, isn’t a bad thing.
- Honey (1/3 cup / 110g): Honey provides sweetness and acts as the binder that holds everything together. I like using a mild, everyday honey like clover or orange blossom. If you’re vegan, you can substitute maple syrup or agave nectar, but keep in mind that maple syrup is thinner, so the mixture might be a little stickier. You can also use brown rice syrup for a thicker, maltier flavor. For a lower-sugar option, try using a few drops of liquid stevia or monk fruit sweetener, but you’ll need to add a tiny bit of extra peanut butter or oats to compensate for the missing volume.
- Rolled Oats (1 1/2 cups / 135g): Old-fashioned rolled oats are my go-to here. They give the balls a nice, chewy texture and help absorb moisture so the mixture holds together. Quick oats will also work, but the texture will be softer and less substantial. I don’t recommend using steel-cut oats because they’re too hard and won’t soften enough. If you need a gluten-free option, make sure to buy certified gluten-free oats, as regular oats can sometimes be cross-contaminated during processing. You can also use oat flour if you want a smoother texture, but you’ll need to adjust the amount slightly.
A Note on Add-Ins: While this recipe is intentionally minimal, you can absolutely add extras without changing the base formula. A pinch of sea salt brings out the peanut butter flavor beautifully. A handful of mini chocolate chips turns these into a dessert-like treat. A tablespoon of chia seeds or flaxseed meal adds extra fiber and omega-3s. Just keep in mind that any add-in will slightly alter the texture, so you might need to add a teaspoon or two more of oats if the mixture feels too wet.
I personally love using a brand of peanut butter that has a little added salt — it balances the sweetness of the honey perfectly. And for the oats, I always use Bob’s Red Mill because they’re consistently fresh and have a great texture. But honestly, any brand you have on hand will work just fine.
Equipment Needed
The beauty of this recipe is that it requires almost no special equipment. Here’s what you’ll need:
- Mixing Bowl: Any medium-sized bowl will do. I prefer a glass or ceramic bowl because it’s easier to scrape clean, but a stainless steel one works just as well.
- Measuring Cups and Spoons: You’ll need a 1-cup measure for the peanut butter, a 1/3-cup measure for the honey, and a 1/2-cup measure for the oats. If you don’t have measuring cups, you can eyeball it — just keep the ratios roughly the same.
- Spatula or Wooden Spoon: For mixing everything together. A silicone spatula is my favorite because it scrapes the sides clean and doesn’t leave any peanut butter behind.
- Baking Sheet or Plate: To hold the rolled balls while they chill. Line it with parchment paper or wax paper for easy cleanup.
- Refrigerator or Freezer: These need to chill for at least 30 minutes to firm up. A fridge is fine, but if you’re in a hurry, the freezer works in about 15 minutes.
That’s it. No food processor, no stand mixer, no special molds. I’ve made these in a hotel room with a plastic spoon and a paper plate before — they turned out just fine. If you don’t have a spatula, a fork will do. If you don’t have a baking sheet, a dinner plate works. This recipe is forgiving like that.
Preparation Method
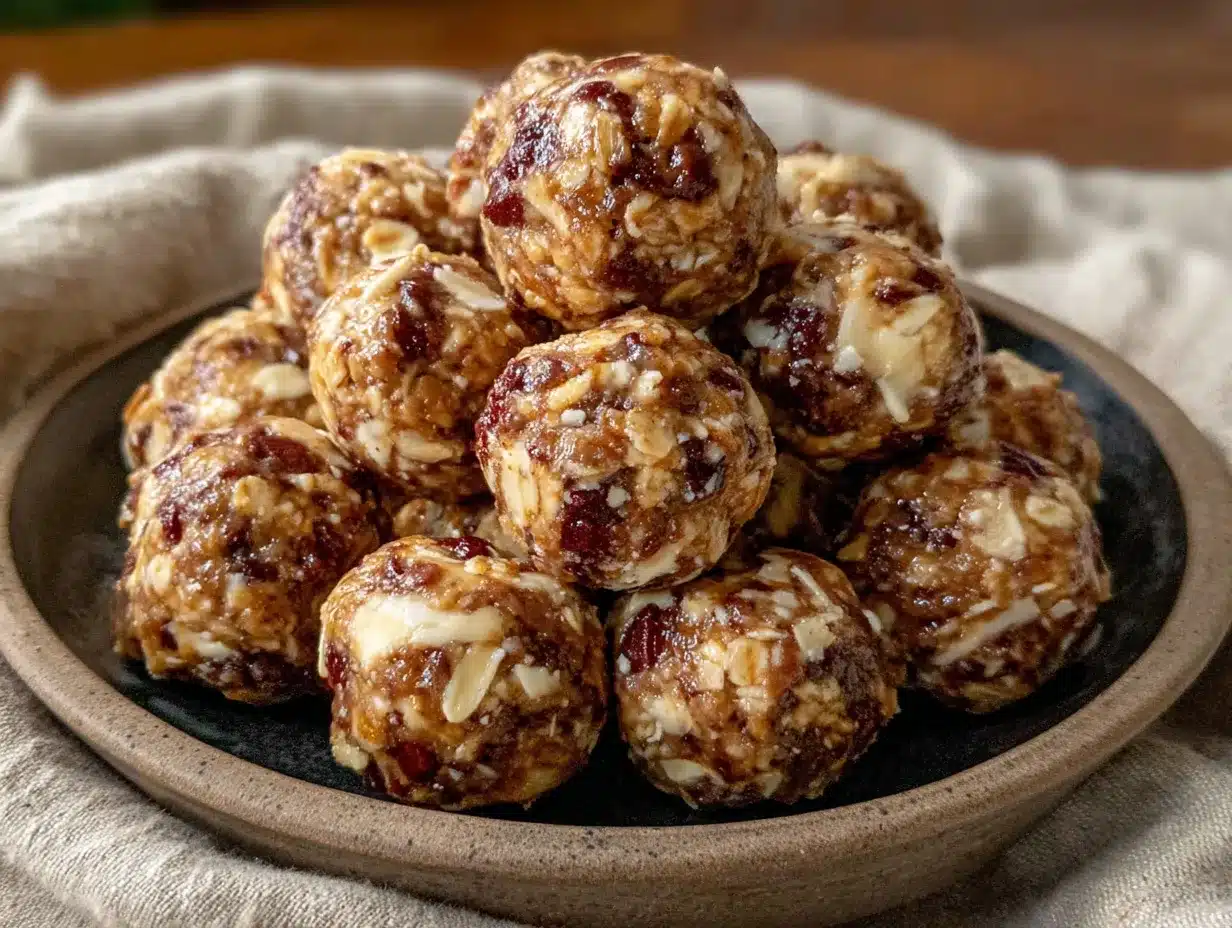
This is where the magic happens. Follow these steps, and you’ll have a batch of perfect little protein balls in no time.
- Measure your peanut butter. Scoop 1 cup (240g) of creamy peanut butter into your mixing bowl. If you’re using a natural brand, stir it really well first to incorporate the oil. You want the peanut butter to be smooth and spoonable, not stiff or separated. If it’s been sitting in the fridge, let it come to room temperature for about 10 minutes — it’ll mix much easier.
- Add the honey. Pour 1/3 cup (110g) of honey over the peanut butter. Don’t worry if it doesn’t look like enough at first — it will come together as you mix. If your honey is crystallized, warm the jar in a bowl of hot water for a few minutes until it loosens up. Cold, thick honey is harder to incorporate and can make the mixture lumpy.
- Stir it together. Use your spatula or wooden spoon to combine the peanut butter and honey. Start with a folding motion, then switch to a stirring motion. It will look a little messy at first — that’s normal. Keep going until the mixture is uniform in color and texture. You shouldn’t see any streaks of honey or peanut butter. This takes about 30 seconds of vigorous stirring.
- Add the oats. Pour 1 1/2 cups (135g) of rolled oats into the bowl. Fold them in gently at first to avoid scattering oats everywhere, then stir until everything is evenly distributed. The mixture will look crumbly at this point, which is exactly what you want. If it looks too dry, add a teaspoon more honey or a splash of milk. If it looks too wet, add a tablespoon more oats. The texture should be like a soft cookie dough — it should hold together when pressed between your fingers but not be sticky or greasy.
- Chill the mixture (optional but recommended). For easier rolling, pop the bowl in the fridge for 10-15 minutes. This firms up the peanut butter and makes the mixture less sticky. If you’re in a hurry, you can skip this step — just be prepared for slightly stickier hands.
- Roll into balls. Scoop out about 1 tablespoon of the mixture (I use a small cookie scoop for consistency). Roll it between your palms to form a smooth, round ball. Don’t press too hard — you want a gentle, even pressure. If the mixture sticks to your hands, lightly dampen your palms with water or rub a tiny bit of oil on them. Place each ball on your lined baking sheet or plate as you go. You should get about 16-18 balls, depending on how big you make them.
- Chill to set. Place the baking sheet in the refrigerator for at least 30 minutes. This allows the balls to firm up so they hold their shape. If you can’t wait that long, 15 minutes in the freezer works too. They’ll be slightly softer but still delicious.
- Enjoy! Once they’re chilled, they’re ready to eat. Store any leftovers in the fridge for up to a week — though honestly, they rarely last that long in my house.
Pro Tip: If you want perfectly uniform balls, use a 1-tablespoon cookie scoop. It makes the process faster and ensures every ball is the same size, which helps them chill evenly. I learned this the hard way after making a batch where some balls were twice the size of others — the big ones were still soft in the middle while the small ones were rock hard.
Cooking Tips & Techniques
Over the years, I’ve made these easy 3-ingredient peanut butter protein balls more times than I can count. And I’ve definitely made my fair share of mistakes. Here are the tips I wish someone had told me when I first started:
- Don’t overmix. Once the oats are incorporated, stop stirring. Overmixing can break down the oats and make the mixture gummy. You want the oats to stay intact for that nice, chewy texture.
- Use room temperature ingredients. Cold peanut butter is a nightmare to mix. It’s stiff, it clumps, and it doesn’t blend evenly with the honey. Let it sit out for 10-15 minutes before you start. Same goes for honey — if it’s crystallized or cold, warm it up slightly.
- Taste test before rolling. Before you commit to rolling the whole batch, take a tiny pinch of the mixture and taste it. Is it sweet enough? Is the peanut butter flavor coming through? This is your chance to adjust before you’ve rolled 18 balls. I’ve added a pinch of salt or an extra drizzle of honey this way more times than I’d like to admit.
- Wet hands are your friend. If the mixture sticks to your palms, just run your hands under cold water and shake off the excess. The thin layer of water prevents sticking without adding any moisture to the balls. It’s a game-changer.
- Chill before rolling if you have time. This is the single best tip for clean, perfect balls. Even 10 minutes in the fridge makes the mixture much easier to handle. I learned this after a particularly sticky batch that ended up looking more like lumpy blobs than balls.
- Don’t skip the chilling step. I know it’s tempting to eat them right away, but they really do need that time in the fridge to firm up. Warm protein balls are soft, fragile, and fall apart easily. After 30 minutes in the fridge, they’re perfectly portable and snackable.
One mistake I made early on: I used a natural peanut butter that had been sitting in the pantry for months. The oil had completely separated, and I didn’t stir it well enough. The balls were greasy, didn’t hold together, and tasted a little off. Now I always give my peanut butter a good stir before measuring, and I check the expiration date. Fresh ingredients make a noticeable difference.
Variations & Adaptations
One of the best things about this recipe is how customizable it is. Once you’ve mastered the basic formula, the possibilities are endless. Here are some of my favorite variations:
- Chocolate Peanut Butter: Add 2 tablespoons of unsweetened cocoa powder to the mixture before adding the oats. You might need an extra tablespoon of honey to balance the bitterness of the cocoa. Roll as directed. These taste like a healthier version of a Reese’s peanut butter cup — honestly, they’re dangerous.
- Crunchy Coconut: Replace 1/4 cup of the oats with unsweetened shredded coconut. The coconut adds a subtle tropical flavor and a nice texture. Roll the finished balls in more shredded coconut for a beautiful, snowball-like finish. My husband calls these “little coconut clouds.”
- Spiced Chai: Add 1 teaspoon of pumpkin pie spice or chai spice blend to the mixture. The warmth of the spices pairs beautifully with the peanut butter and honey. This is my go-to version in the fall, especially when I’m craving something cozy but don’t want to turn on the oven. If you love fall flavors, you might also enjoy these cozy sourdough pumpkin bread for a heartier treat.
- Vegan Option: Substitute the honey with maple syrup or agave nectar. The texture will be slightly stickier, but the flavor is still fantastic. You can also add a tablespoon of ground flaxseed mixed with 3 tablespoons of water (let it sit for 5 minutes to form a gel) if you need extra binding.
- Add-In Ideas: A handful of mini chocolate chips, dried cranberries, chopped dates, or even a few crushed pretzels for a salty-sweet twist. Just keep the total add-ins to about 1/4 cup so the mixture doesn’t get too bulky.
I once made a batch with a tablespoon of instant espresso powder mixed in — it gave the balls a subtle coffee flavor that was absolutely addictive. Just be careful not to add too much, or they’ll taste bitter. Start with 1 teaspoon and adjust from there.
Serving & Storage Suggestions
These easy 3-ingredient peanut butter protein balls are best served cold, straight from the fridge. The texture is firm but chewy, and the flavors are more pronounced when they’re chilled. If you let them sit at room temperature for too long, they’ll soften up and lose their shape a bit.
Here are some serving ideas:
- As a post-workout snack: Grab 2-3 balls after a workout for a quick protein boost. The combination of peanut butter and oats provides sustained energy without the crash.
- In lunchboxes: Pack one or two in a small container for school or work. They hold up well and don’t get soggy or messy. If you’re packing for kids, try our no-bake peanut butter chocolate energy balls for a fun twist.
- As a quick breakfast: Pair 2-3 balls with a piece of fruit or a yogurt cup for a balanced breakfast that takes zero time to prepare.
- For parties or gatherings: Arrange them on a platter with fresh fruit, cheese, and crackers for a healthy snack board. They’re always a hit, even at parties where people don’t expect “healthy” food.
Storage: Keep the balls in an airtight container in the refrigerator for up to 1 week. They’ll stay fresh and firm the whole time. If you want to make a big batch for later, you can freeze them for up to 3 months. Just place them in a single layer on a baking sheet, freeze until solid (about 1 hour), then transfer to a freezer-safe bag or container. To thaw, move them to the fridge overnight or let them sit at room temperature for 10-15 minutes.
Flavor Development: I’ve noticed that these balls actually taste better after a day or two in the fridge. The flavors meld together, and the texture becomes more uniform. So don’t worry if they seem a little loose on day one — they’ll firm up beautifully by day two. If you’re making them for a specific event, I recommend making them a day ahead if possible.
Nutritional Information & Benefits
While I’m not a nutritionist, I can tell you that these little balls pack a surprising amount of goodness into a small package. Here’s the estimated nutritional breakdown per ball (based on 16 balls):
- Calories: ~120
- Protein: 5g
- Fat: 7g
- Carbohydrates: 12g
- Fiber: 2g
- Sugar: 6g (from honey)
Health Benefits:
- Peanut butter is a great source of plant-based protein, healthy monounsaturated fats, and vitamin E. It also contains magnesium, which supports muscle function and energy production.
- Rolled oats are rich in soluble fiber, which helps regulate blood sugar and keeps you feeling full longer. They also provide iron, zinc, and B vitamins.
- Honey offers natural antioxidants and has antimicrobial properties. It’s a better alternative to refined sugar, though it should still be used in moderation.
Dietary Considerations:
- Gluten-Free: Use certified gluten-free oats to make these safe for celiac or gluten sensitivity.
- Vegan: Substitute honey with maple syrup or agave.
- Low-Sugar: Use a sugar-free sweetener like stevia or monk fruit, and add a bit more peanut butter or oats to compensate.
- Nut-Free: Substitute peanut butter with sunflower seed butter (sunbutter) or tahini. Keep in mind that the flavor will change, but the texture will be similar.
Potential Allergens: Peanuts (obviously), and oats can sometimes be cross-contaminated with gluten. Always check labels if you have severe allergies.
Personally, I love that these balls give me sustained energy without the sugar crash that comes from processed snacks. I can eat one or two before a long run or a busy afternoon of errands, and I feel fueled without feeling heavy. That’s a win in my book.
Conclusion
So there you have it — the simplest, most satisfying no-bake snack you’ll ever make. These easy 3-ingredient peanut butter protein balls are proof that you don’t need a long ingredient list or hours in the kitchen to create something delicious and nourishing. They’re the kind of recipe that saves you on a busy day, impresses your friends, and makes you feel like you’ve got your life together — even when you’re just barely hanging on.
I love this recipe because it’s honest. It doesn’t pretend to be something it’s not. It’s just three ingredients, a little bit of love, and a whole lot of flavor. Whether you’re a seasoned home cook or someone who’s never made anything from scratch before, you can do this. I promise.
Now I want to hear from you! Have you tried these? Did you add any fun mix-ins? Did your kids gobble them up as fast as mine did? Drop a comment below and let me know how they turned out. And if you have a favorite variation, share it — I’m always looking for new ideas to try. Until next time, happy snacking!
Frequently Asked Questions
Can I use crunchy peanut butter instead of creamy?
Absolutely. Crunchy peanut butter works just fine, and it adds a nice little texture to the balls. Just keep in mind that the pieces of peanuts might make the balls slightly harder to roll, but it’s totally doable. If you’re using a very chunky brand, you might want to pulse it in a food processor a few times to break down the biggest pieces.
How long do these protein balls last in the fridge?
They’ll stay fresh in an airtight container in the refrigerator for up to 1 week. After that, they might start to dry out or lose their texture. If you need them to last longer, freeze them for up to 3 months. Just make sure to label the container with the date so you don’t forget about them.
Can I make these without honey?
Yes, you can substitute honey with maple syrup, agave nectar, or even brown rice syrup. Keep in mind that different sweeteners have different consistencies, so you might need to adjust the amount of oats slightly. Maple syrup is thinner, so the mixture might be a bit stickier. If you’re using a sugar-free sweetener like stevia, start with a few drops and add more to taste — you’ll probably need to add a little extra peanut butter or oats to get the right texture.
Why are my protein balls falling apart?
This usually happens for one of three reasons: the mixture is too dry, too warm, or hasn’t been chilled long enough. If the mixture feels crumbly and won’t hold together when pressed, add a teaspoon more honey or a splash of milk. If the balls are falling apart after rolling, pop them in the fridge for at least 30 minutes to firm up. If they’re still falling apart after that, you might need to add a bit more peanut butter or honey next time.
Can I add protein powder to this recipe?
You can, but it will change the texture significantly. Protein powder absorbs a lot of moisture, so you’ll need to add extra liquid (like milk or more honey) to compensate. Start with 1-2 tablespoons of protein powder and add a tablespoon of milk at a time until the mixture holds together. I’ve found that vanilla or chocolate protein powder works best. Just be warned — the texture will be denser and less chewy than the original.
Pin This Recipe!
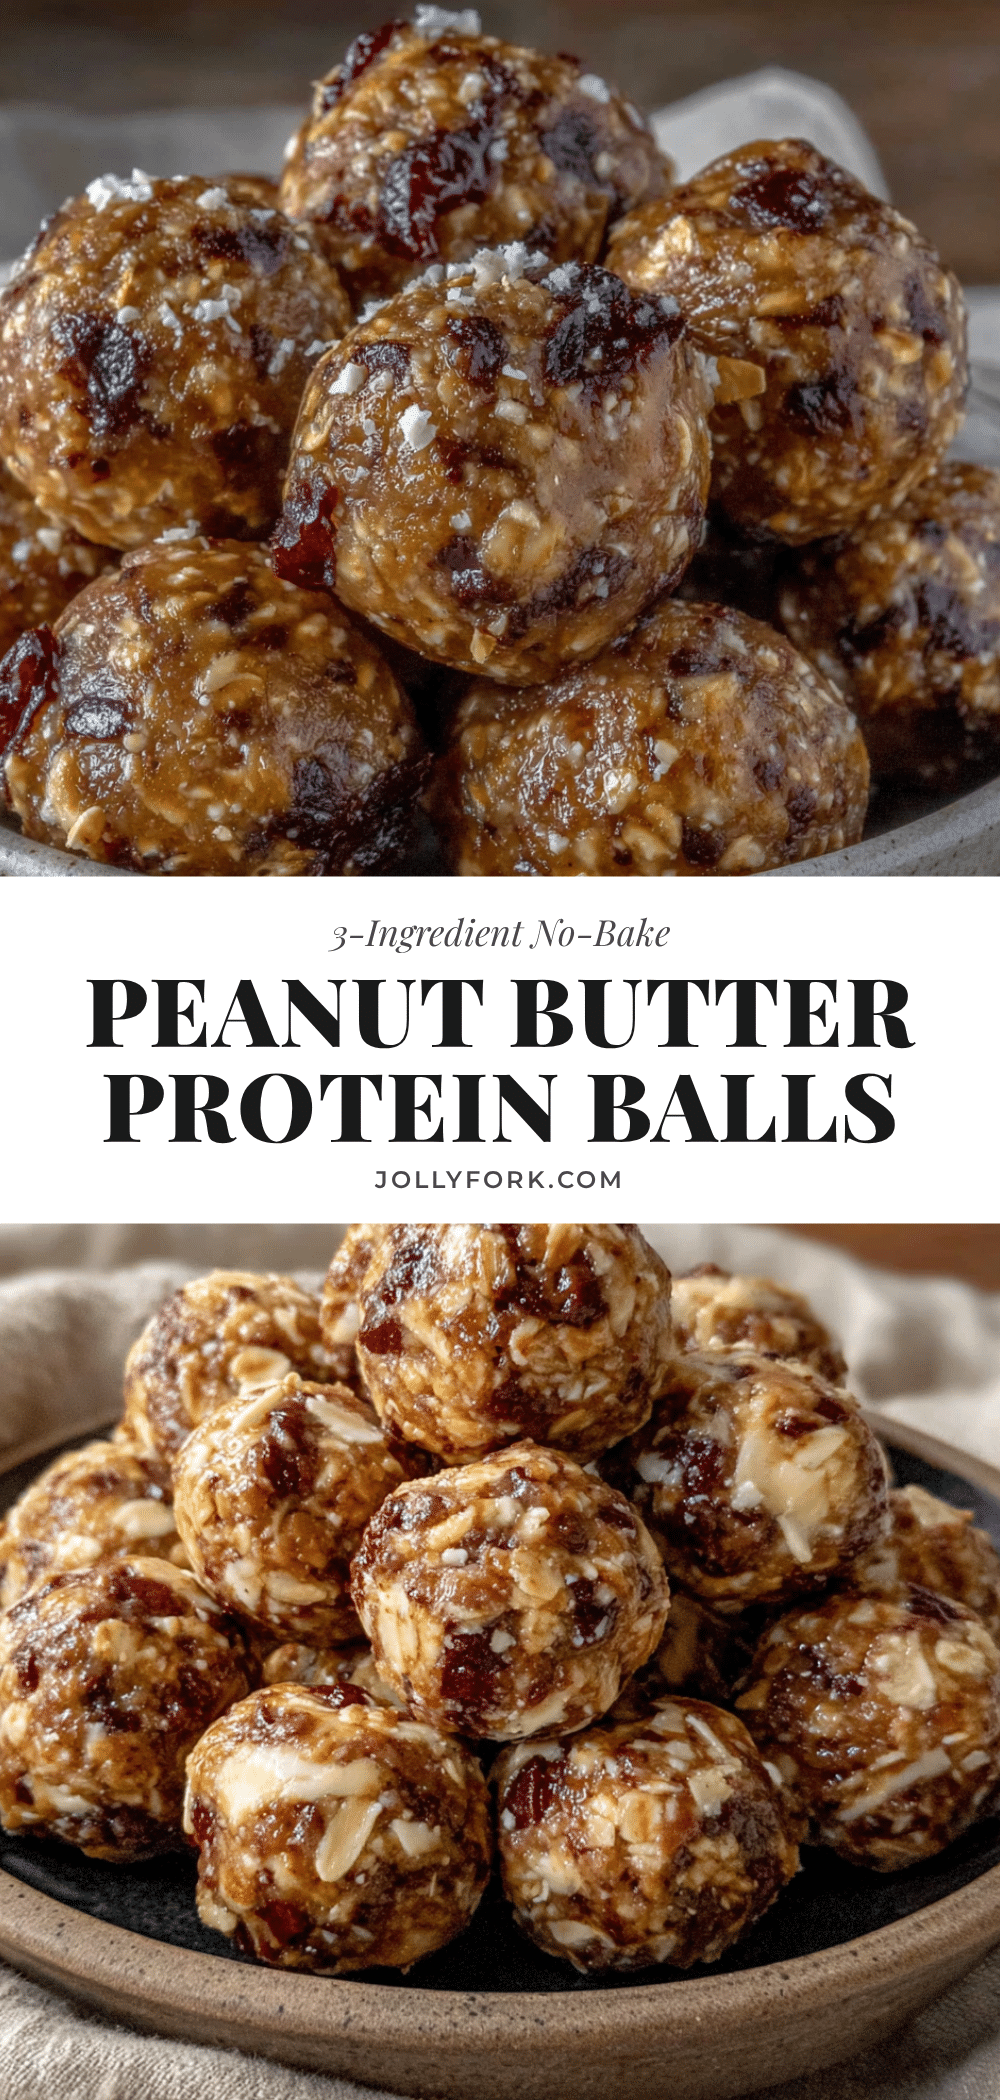
Easy 3-Ingredient Peanut Butter Protein Balls (No Bake)
These easy 3-ingredient peanut butter protein balls are a quick, no-bake snack made with peanut butter, honey, and rolled oats. Perfect for busy days, they come together in under 10 minutes and are a crowd-pleasing, healthy treat.
- Prep Time: 10 minutes
- Cook Time: 0 minutes
- Total Time: 40 minutes (including 30 minutes chilling)
- Yield: 16-18 balls 1x
- Category: Snack
- Cuisine: American
Ingredients
- 1 cup (240g) creamy peanut butter (no-stir recommended, like Skippy or Jif)
- 1/3 cup (110g) honey (or maple syrup for vegan)
- 1 1/2 cups (135g) rolled oats (old-fashioned; use certified gluten-free if needed)
Instructions
- Measure 1 cup (240g) of creamy peanut butter into a mixing bowl. If using natural peanut butter, stir well to incorporate the oil. Let it come to room temperature if refrigerated.
- Add 1/3 cup (110g) of honey over the peanut butter. If honey is crystallized, warm the jar in hot water until loosened.
- Stir the peanut butter and honey together with a spatula or wooden spoon until uniform in color and texture, about 30 seconds.
- Add 1 1/2 cups (135g) of rolled oats. Fold in gently, then stir until evenly distributed. The mixture should be crumbly but hold together when pressed. If too dry, add a teaspoon more honey or a splash of milk; if too wet, add a tablespoon more oats.
- Optional: Chill the mixture in the fridge for 10-15 minutes for easier rolling.
- Scoop about 1 tablespoon of the mixture and roll between your palms to form smooth balls. If sticky, lightly dampen hands with water or rub with a tiny bit of oil. Place on a parchment-lined baking sheet or plate. Makes about 16-18 balls.
- Chill the balls in the refrigerator for at least 30 minutes (or 15 minutes in the freezer) to firm up.
- Enjoy chilled. Store leftovers in an airtight container in the fridge for up to 1 week, or freeze for up to 3 months.
Notes
For best results, use room temperature ingredients. Chill the mixture before rolling for easier handling. The balls taste even better after a day in the fridge as flavors meld. Add-ins like mini chocolate chips, shredded coconut, or a pinch of sea salt can be added without changing the base formula.
Nutrition
- Serving Size: 1 ball
- Calories: 120
- Sugar: 6
- Sodium: 75
- Fat: 7
- Saturated Fat: 1.5
- Carbohydrates: 12
- Fiber: 2
- Protein: 5
Keywords: peanut butter protein balls, no bake protein balls, 3 ingredient protein balls, healthy snack, energy balls, no bake snack, peanut butter oats honey


