I was standing in the checkout line at the hardware store last October—don’t ask, I was buying a new shower curtain liner, not exactly a glamorous errand—when the woman in front of me dropped her bag. A single, perfect, store-bought Halloween cookie rolled right to my feet. It was one of those orange-frosted sugar cookies with the candy corn teeth, and the smell hit me before I even bent down to pick it up: that fake-vanilla, waxy-chocolate scent that somehow smells exactly like autumn in a strip mall. And suddenly I was eight years old at my Aunt Carol’s kitchen counter, trying to pipe melted white chocolate onto pretzel sticks while she laughed and said my witches looked more like friendly garden gnomes.
Aunt Carol wasn’t a fancy baker. She used store-bought pretzel rods, cheap white chocolate chips that never melted right, and she always, always burned at least one batch before getting it right. But her White Chocolate Witch Finger Pretzels were the thing I looked forward to every Halloween—more than the candy, more than the costume. They were creepy in a cute way, salty-sweet in that perfect way, and honestly? They made you feel like a real witch just by holding one. I haven’t seen her in almost five years now, but every time October rolls around, I find myself standing in the baking aisle, staring at pretzel rods, trying to remember exactly how she got the almond slivers to stick just right.
So this year, I decided to stop chasing the memory and actually make them myself. And let me tell you—after three failed attempts (too much chocolate, not enough chilling time, and one very sad-looking almond fingernail situation), I finally cracked it. These Light & Spooky White Chocolate Witch Finger Pretzels are exactly what I remember: crunchy, creamy, a little bit ridiculous, and absolutely perfect for Halloween. Maybe you’ve been there, too—trying to recreate something from childhood that tastes like a hug from someone you miss. This is that recipe.
Why You’ll Love This Recipe
Look, I’ve tested a lot of Halloween recipes over the years, and most of them fall into one of two camps: either they look amazing but taste like cardboard, or they taste incredible but look like a toddler decorated them. These witch finger pretzels are the rare unicorn that nails both. Here’s why you’re going to want to make them immediately:
- Quick & Easy: From start to finish, you’re looking at about 20 minutes of active work plus 30 minutes of chill time. That’s it. No complicated piping bags, no tempering chocolate, no crying over seized white chocolate (been there, done that).
- Simple Ingredients: You probably already have most of this in your pantry. Pretzel rods, white chocolate chips, a little coconut oil, almond slivers, and some green food coloring. That’s the whole list—no specialty baking supply store trips required.
- Perfect for Halloween Parties: These are the kind of snack that makes people do a double-take. They’re creepy enough to impress, but cute enough that kids won’t be scared. Bring these to a potluck or a classroom party, and I promise you’ll leave with an empty platter.
- Crowd-Pleaser: The salty-sweet combo is basically irresistible. Even people who swear they don’t like white chocolate end up grabbing three or four. My neighbor Dave, who claims to be a “dark chocolate purist,” ate half a batch last weekend.
- Unbelievably Delicious: The texture is what gets me every time—that satisfying snap when you bite into the pretzel, followed by the creamy sweetness of the white chocolate, finished with the subtle crunch of the almond “fingernail.” It’s next-level comfort food disguised as a spooky snack.
What makes these different from every other witch finger recipe out there? It’s the little things. I use a touch of coconut oil to thin the white chocolate so it coats the pretzels evenly without clumping. I chill them twice—once before adding the almond nail, once after—so everything stays put. And I’ve figured out exactly how much green food coloring gives you that witchy skin tone without looking radioactive. This isn’t just another version of the same recipe; it’s the version I wish I’d had five years ago when I was standing in that baking aisle, trying to remember.
What Ingredients You Will Need
This recipe uses simple, everyday ingredients to create something that looks way more complicated than it actually is. Most of these are pantry staples, and the ones that aren’t are easy to find at any grocery store. Here’s what you’ll need to make about 24 witch finger pretzels:
For the Pretzel Base
- 24 pretzel rods (look for the thick, sturdy ones—I prefer Snyder’s or Utz brand because they hold up better to the chocolate coating without breaking)
- 2 cups white chocolate chips (I recommend Ghirardelli or Guittard for the smoothest melt; bargain brands tend to seize up or taste waxy)
- 1 tablespoon coconut oil or vegetable shortening (this is the secret to a smooth, dippable consistency—don’t skip it)
- Green gel food coloring (gel is better than liquid because it won’t thin out the chocolate; I use Americolor “Leaf Green” for that perfect witchy shade)
For the Witch Fingernails
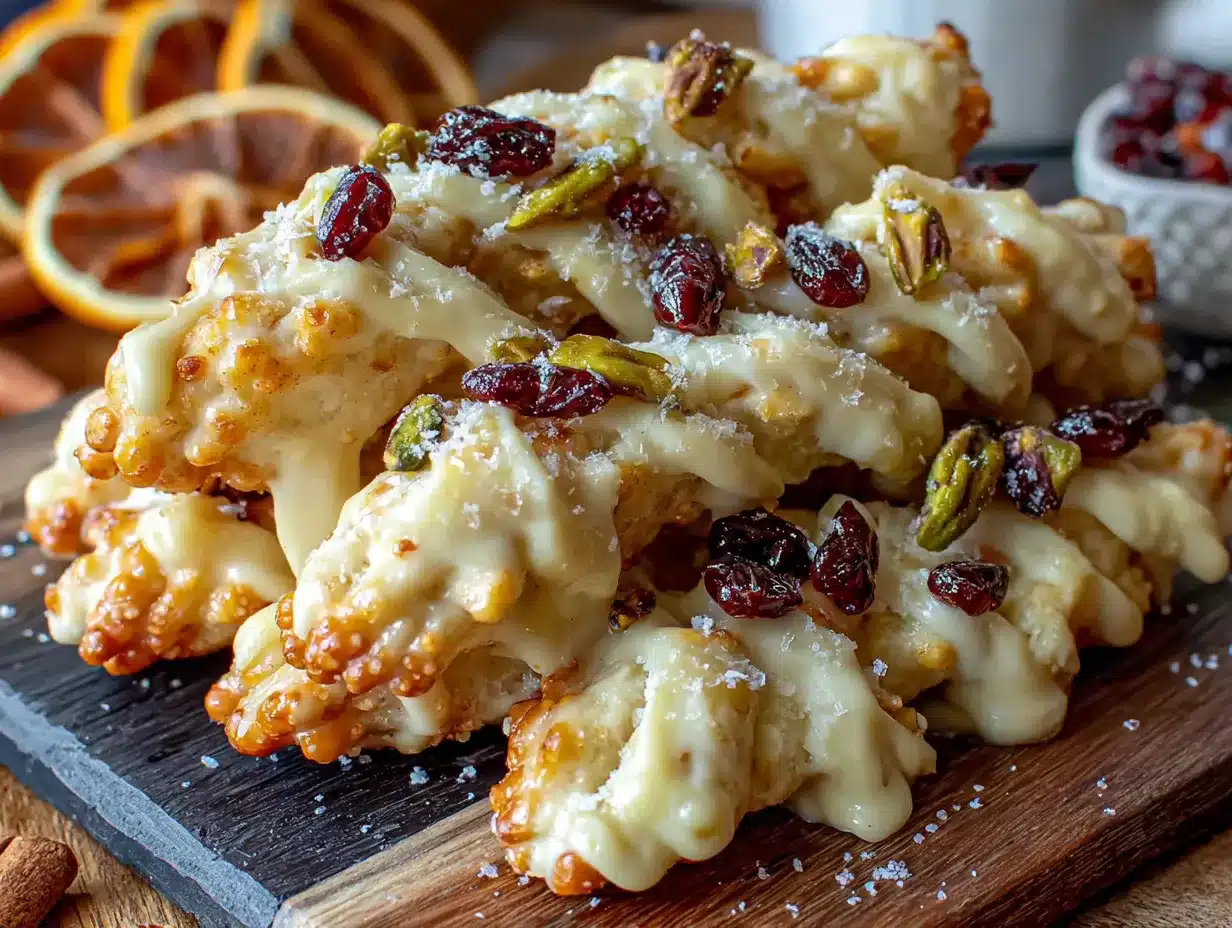
- 24 whole almonds, slivered almonds, or sliced almonds (whole almonds look most like real fingernails, but slivered almonds are easier to find and work just fine)
- Optional: a few drops of almond extract (add this to the white chocolate if you want to really lean into the almond flavor—I do this sometimes for extra depth)
For Decoration (Optional but Fun)
- Red gel food coloring or red sanding sugar (for a little “blood” at the base of the nail—totally optional, but kids love it)
- Black or orange sprinkles (if you want to make them more festive and less creepy)
- Edible glitter dust (for a magical witchy shimmer—I use this when I’m making them for adult parties)
A quick note on substitutions: If you’re dairy-free, use dairy-free white chocolate chips and a dairy-free shortening. If you can’t find pretzel rods, thick pretzel sticks work in a pinch—just be aware they’re more fragile and might break during dipping. And if you’re not a fan of almonds, you can use cashew pieces or even small candy corn pieces for the fingernails (though that changes the look significantly).
One thing I learned the hard way: don’t use white chocolate melting wafers unless you’re okay with a slightly different texture. They melt beautifully and are super forgiving, but they have a different mouthfeel than real white chocolate. For this recipe, I prefer the real stuff—it tastes creamier and sets up with a nice snap.
Equipment Needed
You don’t need a professional pastry kitchen for these, thank goodness. Here’s what you’ll actually use:
- Baking sheet (a standard half-sheet pan works great—line it with parchment paper or a silicone baking mat for easy cleanup)
- Microwave-safe bowl or double boiler (I use a glass measuring cup for easy pouring; if you’re using a double boiler, make sure the top bowl fits snugly without letting steam touch the chocolate)
- Rubber spatula (for stirring the chocolate—metal spoons can cause white chocolate to seize if you’re not careful)
- Small offset spatula or butter knife (for spreading the chocolate evenly on the pretzels)
- Piping bag or small zip-top bag (for adding details like knuckle lines—a zip-top bag with the corner snipped off works perfectly)
- Toothpicks (for adjusting almond placement and cleaning up edges)
- Refrigerator space (you need a flat spot in your fridge where the baking sheet can sit undisturbed for 30 minutes)
If you don’t have a microwave, a double boiler works just as well—just be patient and keep the heat low. And if you don’t have a piping bag, honestly, a small paintbrush works for adding details. I’ve used one in a pinch, and it gives the witch fingers a cool, hand-painted look that’s actually kind of charming.
A word on budget: you can find most of this equipment at a dollar store or thrift shop. I bought my first offset spatula for $1.50, and it’s still going strong five years later. Don’t feel like you need to invest in fancy tools for these—they’re meant to be fun and approachable.
Preparation Method
- Line your baking sheet with parchment paper or a silicone mat. This is non-negotiable—trust me, you don’t want to scrape hardened white chocolate off a bare baking sheet. Set it aside while you prepare the chocolate.
- Melt the white chocolate chips and coconut oil together. Place them in a microwave-safe bowl and microwave in 30-second intervals, stirring thoroughly after each interval. White chocolate is finicky—it can go from perfectly melted to grainy and seized in seconds. Stop heating when about 75% of the chips are melted, then stir until the residual heat melts the rest. If you’re using a double boiler, keep the water at a gentle simmer and stir constantly. The coconut oil helps the chocolate flow smoothly and gives it a nice sheen.
- Add the green gel food coloring. Start with a tiny amount—like, the tip of a toothpick—and stir it in completely before adding more. Gel coloring is concentrated, so a little goes a long way. You’re aiming for a pale, sickly green, not electric lime. I usually end up with a shade that reminds me of the Wicked Witch of the West’s skin tone—creepy but not cartoonish. If you’re using almond extract, add it now (about 1/4 teaspoon).
- Dip each pretzel rod into the green white chocolate. Hold the pretzel by the end that will be the “wrist” and dip the other end into the chocolate, rotating to coat about two-thirds of the pretzel. Let the excess drip off for a few seconds—you want a thin, even coating, not a thick glob. If the chocolate starts to thicken as it cools, pop it back in the microwave for 10 seconds and stir.
- Place the dipped pretzels on the prepared baking sheet. Space them about an inch apart so they don’t stick together. Work quickly here—the chocolate starts to set as soon as it hits the cool parchment. Don’t worry if they’re not perfect; you can clean up the edges later.
- Add the almond “fingernail” to each pretzel. While the chocolate is still wet, press one almond (pointed end facing outward) onto the tip of each pretzel. The almond should overlap the end of the pretzel by about 1/4 inch to look like a real fingernail growing from the finger. Press gently but firmly so it sticks. If the chocolate has already started to set, hold the almond in place for a few seconds to let your body heat soften the chocolate slightly.
- Chill the pretzels for 15 minutes. This first chill sets the base layer so you can add details without smudging. Pop the baking sheet into the refrigerator and let the chocolate harden completely.
- Create the knuckle lines and wrinkles. After the first chill, use your piping bag (or zip-top bag with a tiny corner snipped off) filled with leftover green white chocolate to pipe small lines across each “finger” to look like knuckles. You can also add a few thin lines near the “nail” to look like cuticle wrinkles. Don’t overdo it—three or four lines per finger is plenty. Less is more here; you want them to look like witch fingers, not road maps.
- Add optional “blood” details. If you’re using red food coloring, dip a toothpick in it and dab a tiny bit at the base of each almond nail. You can also use red sanding sugar for a gory-but-glittery effect. I skip this step when I’m making them for kids’ parties, but for adult Halloween gatherings, it’s a fun touch that always gets a reaction.
- Chill again for 15-30 minutes. This second chill ensures everything is set and stable. The white chocolate should be firm to the touch and the almonds should be firmly attached. If you’re in a hurry, you can pop them in the freezer for 10 minutes, but watch them carefully—white chocolate can develop condensation if it gets too cold too fast.
- Serve or store. Once the chocolate is fully set, your witch finger pretzels are ready to eat. Arrange them on a platter with the “fingers” pointing in different directions for maximum creepiness. If you’re storing them, see the storage section below.
A few notes from my trial-and-error experience: if your white chocolate seizes up (turns thick and grainy), you can sometimes rescue it by adding another teaspoon of coconut oil and stirring vigorously. If that doesn’t work, start over—it’s not worth the frustration. Also, if your pretzels keep breaking when you dip them, try letting them come to room temperature first. Cold pretzels are more brittle and prone to snapping.
Cooking Tips & Techniques
I’ve made these witch finger pretzels probably a dozen times now, and I’ve collected a few tricks that make the process smoother and the results more consistent. Here’s what I’ve learned:
Temperature is everything. White chocolate is notoriously temperamental. It doesn’t like heat, it doesn’t like cold, and it really doesn’t like water. Make sure your bowls and utensils are completely dry before you start—even a drop of water can cause the chocolate to seize into a grainy mess. Also, let your pretzels come to room temperature before dipping. Cold pretzels will make the chocolate set too quickly, leaving you with uneven coverage and a bumpy texture.
Work in small batches. Don’t try to dip all 24 pretzels at once unless you’re incredibly fast. I usually work in batches of 6-8, melting fresh chocolate for each batch if needed. This keeps the chocolate at the right consistency and prevents it from thickening before you’re done. It takes a little longer, but the results are worth it.
Use a fork for dipping. If you’re struggling with messy drips, try using a fork to dip the pretzels instead of holding them by the end. Spear the pretzel with the fork tines, dip it in the chocolate, and let the excess drip off over the bowl. This gives you more control and results in a cleaner finish. I learned this trick from a candy-making class I took years ago, and it’s been a game-changer.
Don’t over-chill. I know I said to chill them twice, but don’t leave them in the fridge for hours. White chocolate can develop condensation when it’s moved from cold to warm, which makes it look streaky and dull. If you’re making them ahead of time, store them in an airtight container at room temperature once the chocolate is set. They’ll keep for up to a week without any issues.
My biggest failure? The first time I made these, I used liquid food coloring instead of gel. The chocolate went from perfectly melted to a soupy, streaky mess in about 30 seconds. I tried to salvage it by adding more white chocolate, but it just got worse. I ended up with a bowl of weirdly green, grainy chocolate that I had to throw out. Learn from my mistake—gel coloring is non-negotiable for this recipe.
Variations & Adaptations
One of the best things about this recipe is how easy it is to adapt. Here are some variations I’ve tried and loved:
Dark & Spooky Version
Swap the white chocolate for dark or milk chocolate. Use black gel food coloring instead of green (or leave it plain for a more natural witchy look). The dark chocolate version tastes richer and less sweet, which some people prefer. I’ve also made these with ruby chocolate (that naturally pink stuff) for a Valentine’s Day version—they look like creepy glamour witch fingers, and they’re honestly stunning.
Dietary Adaptations
For a vegan version, use dairy-free white chocolate and coconut oil. Most pretzel rods are accidentally vegan, but double-check the label. For a gluten-free version, use gluten-free pretzel rods—they’re available at most health food stores and online. The texture is slightly different (a bit more crumbly), but the taste is still great. For a lower-sugar version, use sugar-free white chocolate chips. Just be aware that sugar-free chocolate melts differently and may not set as firmly.
Flavor Twists
Add 1/2 teaspoon of peppermint extract to the white chocolate for a candy-cane witch finger vibe. Or try orange extract for a creamsicle-inspired Halloween treat. I once made a batch with lavender extract and purple food coloring for a “magical” theme, and they were a hit at a Harry Potter-themed party. The possibilities are really endless here—just keep the extract amounts small so they don’t overpower the white chocolate.
Different “Nails”
Instead of almonds, try using candy corn for a sweeter, more colorful nail. Or use small pretzel twists broken in half for a salty-savory nail. I’ve even used dried cranberries for a “bloody” nail effect—they’re tart, chewy, and look surprisingly realistic. Just make sure whatever you use is flat enough to stick securely to the chocolate.
Serving & Storage Suggestions
These witch finger pretzels are at their best when the chocolate is fully set but not ice-cold. I recommend taking them out of the fridge about 10 minutes before serving so the chocolate softens slightly—it makes for a better texture and the flavors come through more clearly.
For presentation, arrange them on a black or dark purple platter with the “fingers” pointing every which way. Scatter a few fake spiders or plastic eyeballs around for extra Halloween flair. If you’re serving them at a party, I like to stand a few of them upright in a small glass jar filled with black beans or coffee grounds—it looks like a jar of severed fingers, and it always gets a laugh.
These pair beautifully with other Halloween treats. Serve them alongside pumpkin spice popcorn, caramel apples, or a bowl of candy corn for a full Halloween snack spread. For drinks, they go surprisingly well with hot apple cider, pumpkin spice lattes, or even a dark stout beer for the adults.
Storage: Store the finished pretzels in an airtight container at room temperature for up to a week. If your kitchen is warm (above 75°F), store them in the refrigerator instead—just let them come to room temperature before serving to avoid condensation. You can also freeze them for up to 3 months. Layer them between sheets of parchment paper in a freezer-safe container, and thaw in the refrigerator overnight before serving.
One thing to note: the pretzels will soften slightly over time as they absorb moisture from the chocolate coating. They’re best within the first 3-4 days, but they’re still perfectly edible for up to a week. If they start to get too soft, you can crisp them up in a 300°F oven for 5 minutes—just watch them carefully so the chocolate doesn’t melt.
Nutritional Information & Benefits
Let’s be real—these are a treat, not a health food. But that doesn’t mean they can’t fit into a balanced lifestyle. Here’s the approximate nutritional breakdown for one witch finger pretzel (based on 24 servings):
- Calories: 120-140
- Total Fat: 7-8g
- Saturated Fat: 4-5g
- Carbohydrates: 14-16g
- Sugar: 10-12g
- Protein: 2-3g
- Sodium: 150-200mg
These numbers will vary depending on the brands you use and whether you add any extra decorations. If you’re watching your sugar intake, you can use sugar-free white chocolate chips—just be aware that the taste and texture will be slightly different.
On the plus side, almonds are a great source of vitamin E, magnesium, and healthy fats. And pretzels are lower in fat than many other snack options (as long as you don’t go overboard on the chocolate). I like to think of these as a “sometimes food”—perfect for Halloween parties and special occasions, not an everyday snack. And honestly? That’s okay. Food is about enjoyment, too.
If you’re serving these at a party, be aware that they contain dairy, gluten, and tree nuts (almonds). If you’re making them for a group with allergies, consider the variations I mentioned above to accommodate different dietary needs.
Conclusion
Look, I’m not going to tell you these White Chocolate Witch Finger Pretzels will change your life. But they might change your Halloween. They’re the kind of recipe that makes people stop and stare, then laugh, then reach for another one. They’re creepy without being gross, sweet without being cloying, and impressive without being complicated. That’s a hard balance to strike, and these nail it (pun absolutely intended).
What I love most about this recipe is how it brings people together. There’s something about decorating these that turns even the most reluctant baker into a kid again. I’ve made them with my niece, who insisted on giving each witch finger a name. I’ve made them with friends who argued about whether the knuckles should be three lines or four. And every time, someone says the same thing: “These are way easier than I thought they’d be.”
So go ahead—give them a try. Make them your own. Add extra green food coloring, skip the blood, use different nuts, whatever feels right. And when you’re done, I’d love to hear how they turned out. Drop a comment below and let me know if your witch fingers looked more like mine (slightly crooked, charmingly imperfect) or if you somehow managed to make them look like they came from a professional bakery. Either way, I’m cheering you on.
Happy Halloween, friends. May your white chocolate stay smooth, your almonds stay put, and your witch fingers be just creepy enough.
Frequently Asked Questions
Can I make these ahead of time for a party?
Absolutely! These are actually perfect for making ahead. Prepare them up to 3 days in advance and store them in an airtight container at room temperature. The chocolate stays firm, the pretzels stay crunchy, and you’ll have one less thing to worry about on party day. Just don’t refrigerate them if you’re serving them within a few days—room temperature is fine and actually gives you a better texture.
My white chocolate seized up. What went wrong?
White chocolate is sensitive to heat and moisture. If it seized, it likely got too hot (over 110°F) or came into contact with water. Always use completely dry bowls and utensils, and melt the chocolate slowly in short bursts. If it does seize, you can sometimes rescue it by stirring in a teaspoon of coconut oil or vegetable shortening. If that doesn’t work, it’s best to start over with fresh chocolate.
Can I use white candy melts instead of white chocolate?
Yes, you can! Candy melts are actually easier to work with because they’re designed to melt smoothly and set firmly. The trade-off is that they don’t taste as rich as real white chocolate. If you’re using candy melts, skip the coconut oil—they already have the right consistency for dipping. Just follow the package instructions for melting.
How do I get the green color right without it looking fake?
The key is to use gel food coloring and add it gradually. Start with a tiny amount (the tip of a toothpick) and stir it in completely before adding more. You’re aiming for a pale, sickly green—think Wicked Witch of the West, not radioactive slime. If you accidentally add too much, you can dilute it by adding more melted white chocolate, but it’s easier to just go slowly from the start.
My almonds keep falling off. How do I make them stick?
This usually happens when the chocolate has started to set before you add the almond. Make sure you press the almond into the chocolate while it’s still wet—within 10-15 seconds of dipping. If the chocolate has already thickened, hold the almond in place for a few seconds to let your body heat soften the chocolate underneath. You can also dab a tiny bit of melted chocolate on the back of the almond before pressing it onto the pretzel for extra adhesion.
Pin This Recipe!
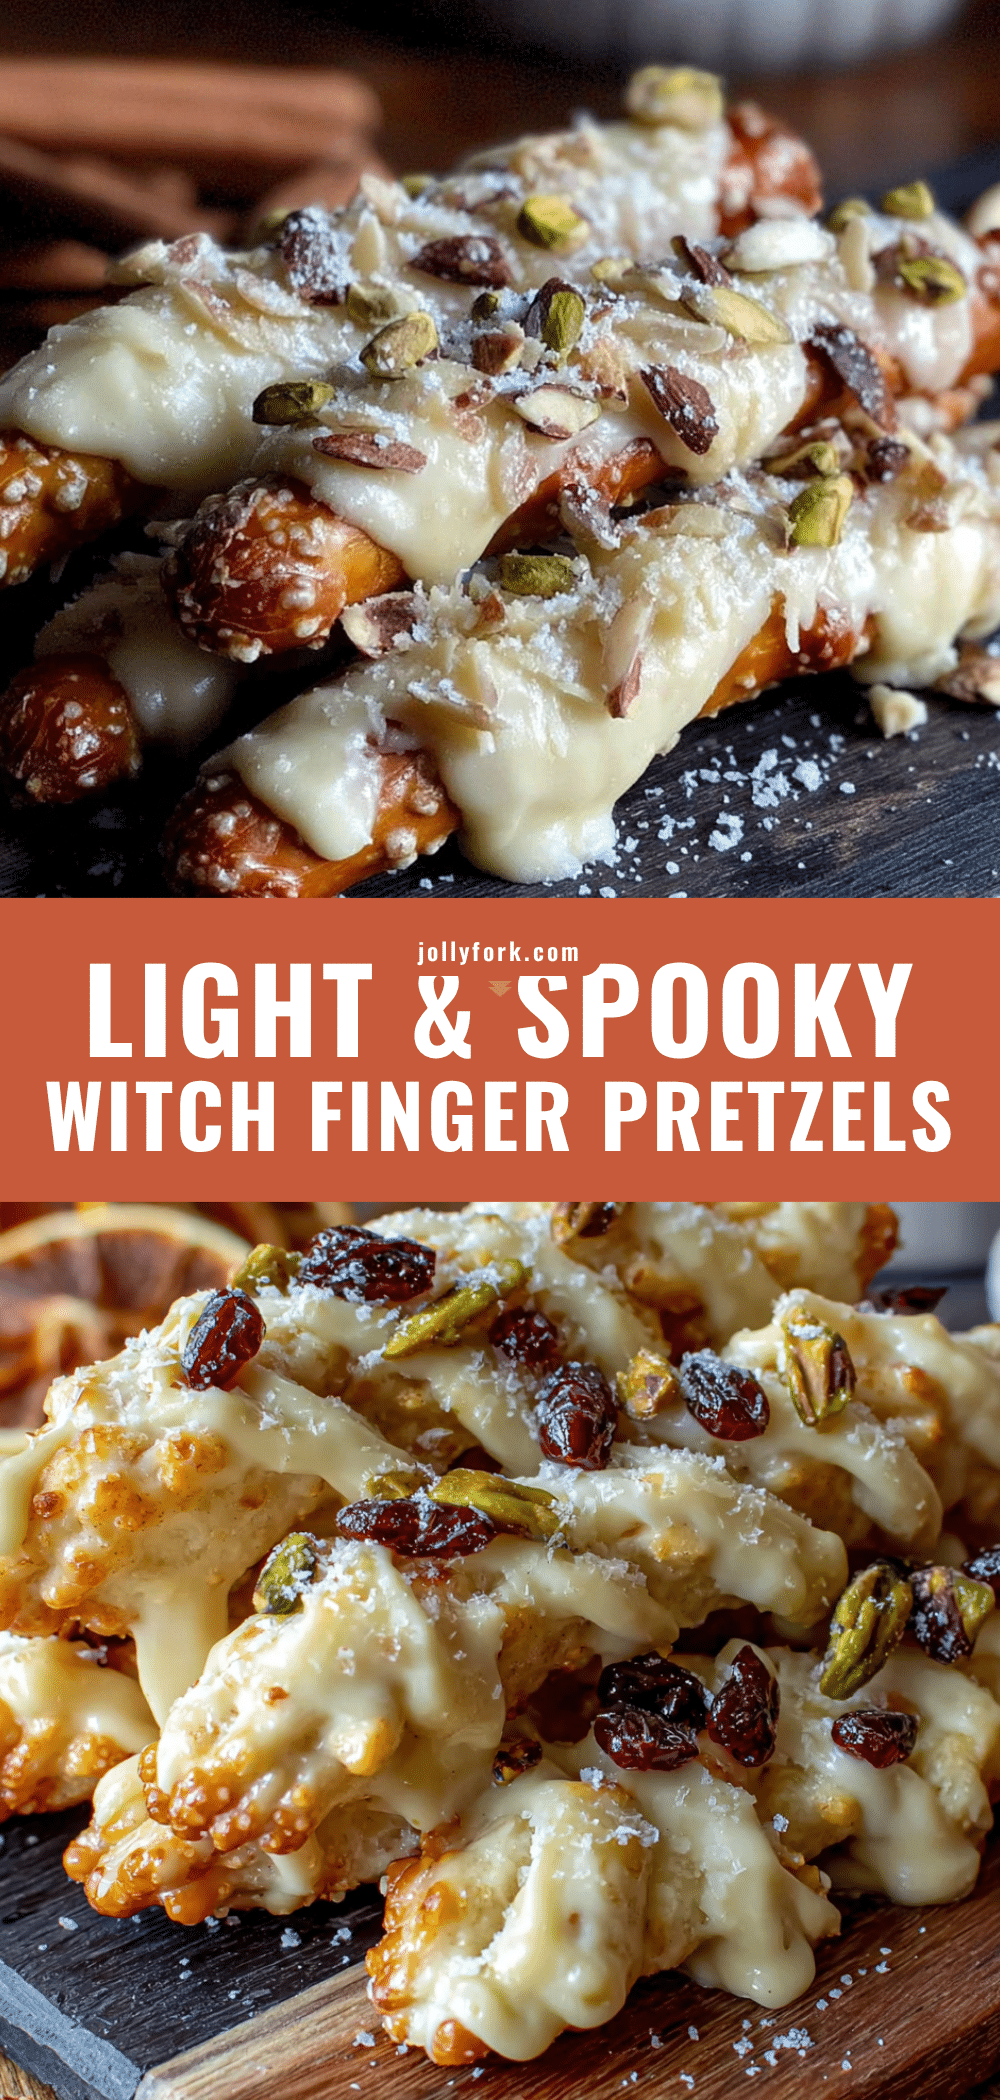
Best Easy White Chocolate Witch Finger Pretzels

These White Chocolate Witch Finger Pretzels are a fun and easy Halloween treat that combines salty pretzel rods with creamy white chocolate and almond fingernails. They’re creepy, cute, and absolutely delicious.
- Prep Time: 20 minutes
- Cook Time: 0 minutes
- Total Time: 50 minutes (including chilling)
- Yield: 24 servings 1x
- Category: Dessert
- Cuisine: American
Ingredients
- 24 pretzel rods (thick, sturdy ones like Snyder’s or Utz)
- 2 cups white chocolate chips (Ghirardelli or Guittard recommended)
- 1 tablespoon coconut oil or vegetable shortening
- Green gel food coloring (Americolor ‘Leaf Green’ recommended)
- 24 whole almonds, slivered almonds, or sliced almonds
- Optional: 1/4 teaspoon almond extract
- Optional: Red gel food coloring or red sanding sugar for ‘blood’
- Optional: Black or orange sprinkles
- Optional: Edible glitter dust
Instructions
- Line a baking sheet with parchment paper or a silicone mat.
- Melt the white chocolate chips and coconut oil together in a microwave-safe bowl in 30-second intervals, stirring after each, until smooth. Stop when about 75% melted and stir until residual heat melts the rest.
- Add green gel food coloring gradually, starting with a tiny amount (tip of a toothpick), and stir until you achieve a pale, sickly green. Add almond extract if using.
- Dip each pretzel rod into the green white chocolate, coating about two-thirds of the pretzel. Let excess drip off.
- Place dipped pretzels on the prepared baking sheet, spacing them about an inch apart.
- While the chocolate is still wet, press one almond (pointed end outward) onto the tip of each pretzel, overlapping the end by about 1/4 inch.
- Chill the pretzels for 15 minutes to set the base layer.
- After chilling, use a piping bag or zip-top bag with a tiny corner snipped off filled with leftover green white chocolate to pipe small lines across each ‘finger’ for knuckles and cuticle wrinkles.
- Optional: Dip a toothpick in red food coloring and dab a tiny bit at the base of each almond nail for ‘blood’.
- Chill again for 15-30 minutes until fully set.
- Serve or store in an airtight container at room temperature for up to a week.
Notes
Use gel food coloring, not liquid, to avoid thinning the chocolate. Work in small batches to keep chocolate at the right consistency. If white chocolate seizes, try adding a teaspoon of coconut oil and stirring vigorously. Let pretzels come to room temperature before dipping to prevent breakage.
Nutrition
- Serving Size: 1 witch finger pretz
- Calories: 130
- Sugar: 11
- Sodium: 175
- Fat: 7.5
- Saturated Fat: 4.5
- Carbohydrates: 15
- Fiber: 0.5
- Protein: 2.5
Keywords: Halloween, witch fingers, pretzels, white chocolate, easy, spooky, party snack


