My cousin Mark asked why I couldn’t just layer everything in a big dish instead of making individual portions. I was about to explain why that wouldn’t work—then stopped. He was sixteen, covered in chocolate fingerprints, and genuinely curious. The truth is, I had been fussing over these little ramekins for an hour, and the kitchen looked like a disaster zone. I handed him the 9×13 pan and said, “Fine, you do it.” He stacked cookies, spread filling, repeated. No piping bags. No careful measurements. Just layers. That pan sat in the fridge overnight, and the next day, it was the first thing gone at the party. Honestly, I felt a little embarrassed. All that time I spent making things complicated, and a teenager figured out the obvious. That’s how this no-bake peanut butter Oreo icebox cake for a crowd was born—out of my own stubbornness and a very patient cousin.
You know that feeling when you’re hosting and you want to serve something impressive, but you also need to actually talk to your guests? This cake is the answer. It’s the dessert that lets you be a host instead of a kitchen slave. I mean, the first time I made it for a dinner party, I kept apologizing for how easy it was. “It’s just cookies and cream,” I said. People didn’t care. They were too busy going back for seconds. There’s something about the way the Oreos soften into cake-like layers, the peanut butter mousse gets all fluffy, and the whole thing tastes like a fancy ice cream cake without the freezer burn. I keep making it because it makes me look like a hero, and all I did was stir and stack.
Maybe you’ve been there—staring at a recipe that requires ten steps and a stand mixer, wondering if you really have the energy. This one flips that script. It’s the dessert that works with your schedule, not against it. And honestly, it tastes better when you make it the day before, which is basically a hosting cheat code.
Why You’ll Love This Recipe
This isn’t just another dessert you throw together. It’s the one that gets requested every single time I host. I’ve tested it at potlucks, birthday parties, and casual Sunday dinners. It never fails. Here’s why this no-bake peanut butter Oreo icebox cake for a crowd stands out from every other recipe you’ll find.
- No Oven Required: Summer hosting? No problem. You don’t even have to turn on the stove. This is a true no-bake situation, which means your kitchen stays cool and you stay sane.
- Simple Ingredients: Cream cheese, peanut butter, heavy cream, powdered sugar, vanilla, and Oreos. That’s it. No fancy extracts, no hard-to-find items. You probably have most of this in your pantry right now.
- Perfect for a Crowd: This recipe fills a 9×13 pan, which means it serves 12 to 16 people easily. No more cutting tiny slices or running out of dessert. It’s designed for gatherings.
- Make-Ahead Magic: You assemble it the night before your event. The next day, you just pull it out, slice it, and take all the credit. The chilling time is actually part of the recipe, not an inconvenience.
- Crowd-Pleaser: Kids love the Oreo layers. Adults love the peanut butter mousse. Everyone loves that it’s not too sweet. I’ve watched people who “don’t like sweets” go back for a third slice.
- Unbelievably Delicious: The texture is what gets people. The cookies soften into a cake-like consistency, the mousse stays light and airy, and the whole thing tastes like a fancy ice cream cake from a bakery. But you made it in your kitchen with zero baking skills required.
What makes this recipe different is the technique. Most icebox cakes use straight whipped cream, which can get soggy. I use a stabilized peanut butter mousse that keeps its structure even after two days in the fridge. It’s a small change, but it makes a huge difference in texture and flavor. This isn’t just a good no-bake cake—it’s the best version of itself.
What Ingredients You Will Need
This recipe uses simple, everyday ingredients to create something that tastes far more complicated than it is. The magic happens when these pantry staples come together in layers. Here’s what you need and why each ingredient matters.
- Oreo Cookies (two 14.3-ounce packages): You’ll use the whole cookie—filling and all. Don’t twist them apart. The cream filling helps bind the layers and adds sweetness. I recommend using regular Oreos, not Double Stuf, because the cookie-to-cream ratio is better for structure. If you want to get fancy, use the Peanut Butter Oreos for extra flavor.
- Cream Cheese (16 ounces, softened): Two blocks of full-fat cream cheese. This is the base of your mousse. It adds richness and structure. Let it sit on the counter for at least an hour before you start. Cold cream cheese makes lumpy mousse, and nobody wants that.
- Creamy Peanut Butter (1 cup): Use the regular processed kind—Jif or Skippy. Natural peanut butter separates and can make the mousse grainy. I’ve tried it with natural, and it works, but the texture isn’t as smooth. Save the fancy stuff for your toast.
- Powdered Sugar (1 ½ cups): This sweetens the mousse without making it gritty. Sift it if you have the patience, but honestly, I never do and it turns out fine. Just mix it well.
- Heavy Whipping Cream (2 cups): This is what makes the mousse light and fluffy instead of dense and heavy. Make sure it’s cold. Warm cream won’t whip properly. You’ll whip it to stiff peaks before folding it into the cream cheese mixture.
- Vanilla Extract (1 teaspoon): Pure vanilla is best, but imitation works fine. It rounds out the flavors and adds warmth. Don’t skip it—it makes a difference.
- Optional Garnishes: Extra crushed Oreos, a drizzle of melted peanut butter, chocolate shavings, or whipped cream rosettes. These are for presentation only, but they make the cake look like you spent hours on it.
One thing I learned the hard way—don’t use low-fat cream cheese. The mousse won’t set properly, and you’ll end up with a soupy mess. Trust me on this. Full-fat is non-negotiable here. Also, if you’re serving this to someone with a peanut allergy, you can substitute sunflower seed butter (like SunButter) for the peanut butter. It changes the flavor slightly, but the texture stays the same.
Equipment Needed
You don’t need a fancy kitchen to pull this off. Most of these items you probably already own. Here’s the list:
- 9×13-inch Baking Dish: Glass or ceramic works best. Metal can work, but glass lets you see the layers, which is nice for presentation. I use a Pyrex dish that my grandmother gave me.
- Electric Hand Mixer or Stand Mixer: You could whip the cream by hand, but your arm will hate you. A hand mixer is perfect for this. I’ve used a $20 model for years and it works great.
- Large Mixing Bowls: You’ll need two—one for the cream cheese mixture and one for the whipped cream. Stainless steel or glass is fine.
- Rubber Spatula: For folding the whipped cream into the cream cheese mixture. A metal spoon will deflate the mousse. Use a spatula.
- Measuring Cups and Spoons: Standard set. Nothing fancy.
- Plastic Wrap or Aluminum Foil: To cover the dish while it chills. Plastic wrap creates a better seal, but foil works in a pinch.
If you don’t have a hand mixer, you can use a whisk and some serious elbow grease. I did it once when my mixer broke, and it took about ten minutes of vigorous whisking. It worked, but I wouldn’t recommend it for a party. Your arm will be too tired to serve the cake.
Preparation Method
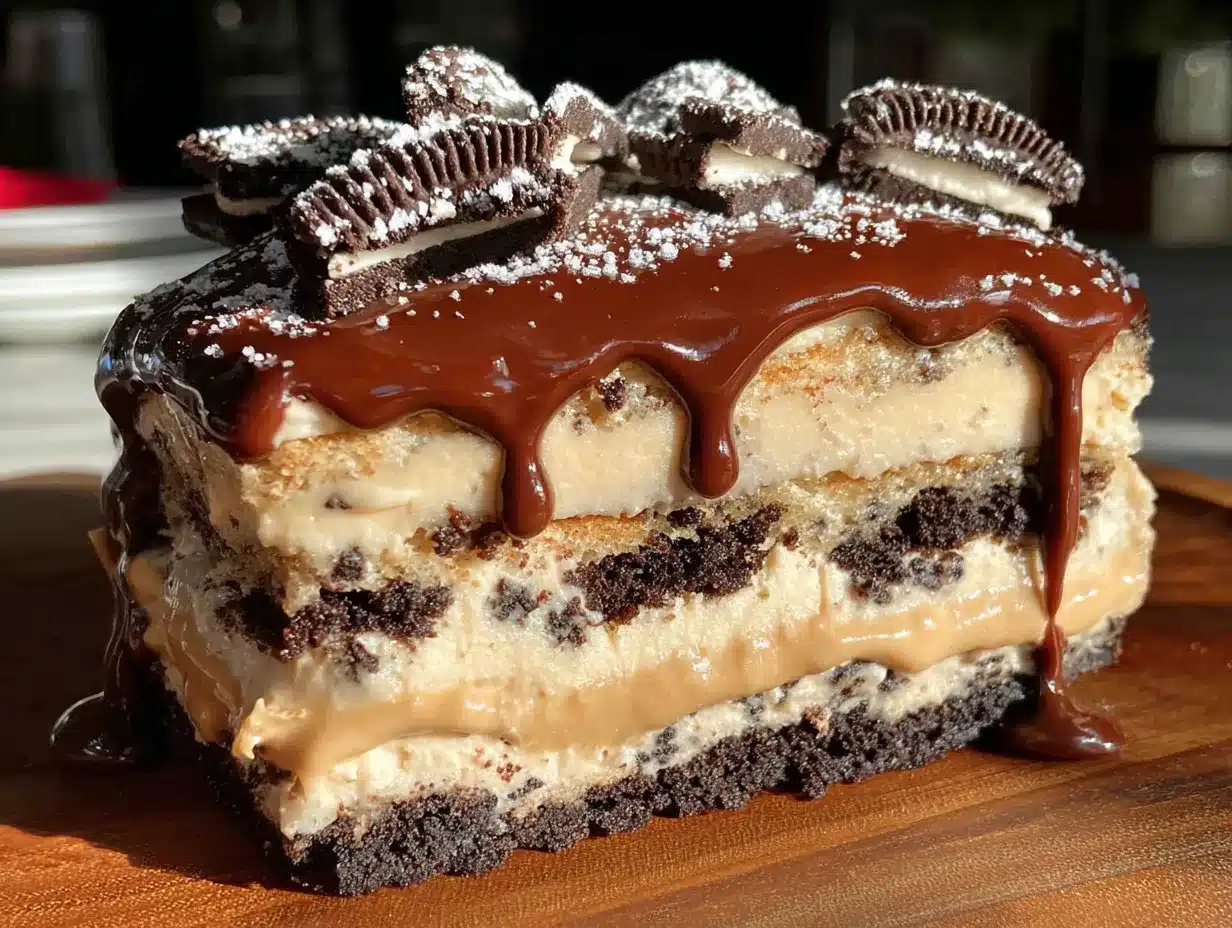
This is where the magic happens. Follow these steps, and you’ll have a dessert that looks like it came from a bakery. The key is patience—don’t rush the chilling time.
- Soften the cream cheese: Take the cream cheese out of the fridge at least one hour before you start. If you forgot, you can microwave it in 10-second bursts, but be careful not to melt it. You want it soft, not hot.
- Whip the heavy cream: In a large bowl, pour 2 cups of cold heavy whipping cream. Add 1 teaspoon of vanilla extract. Beat on medium-high speed until stiff peaks form. This takes about 3-4 minutes with a hand mixer. You’ll know it’s ready when you lift the beaters and the cream stands up straight. Don’t over-whip, or you’ll end up with butter. Set this bowl aside in the fridge.
- Make the peanut butter mousse base: In another large bowl, beat the softened cream cheese with an electric mixer until smooth and creamy. Add 1 cup of creamy peanut butter and beat until combined. Gradually add 1 ½ cups of powdered sugar, beating on low speed at first to avoid a sugar cloud. Scrape down the sides of the bowl with a spatula. The mixture will be thick and sticky at this point.
- Fold in the whipped cream: Take the whipped cream out of the fridge. Add about one-third of it to the cream cheese mixture. Fold gently with a rubber spatula—don’t stir. You want to incorporate the cream without deflating it. Add the remaining whipped cream in two more additions, folding until no white streaks remain. The mousse should be light, airy, and a pale brown color. Taste it. Yes, it’s good. Stop eating it.
- Layer the cake: Spread a thin layer of mousse (about ½ cup) on the bottom of your 9×13 dish. This helps the first layer of cookies stick. Arrange a single layer of Oreos on top of the mousse. You’ll fit about 16 cookies in a single layer—four rows of four. Don’t overlap them. Spread one-third of the remaining mousse over the cookies. Use an offset spatula or the back of a spoon to spread it evenly. Repeat with another layer of Oreos, another third of mousse, and a final layer of Oreos. Spread the last of the mousse on top, making sure to cover all the cookies completely. The top should be smooth.
- Chill overnight: Cover the dish tightly with plastic wrap. Refrigerate for at least 8 hours, but 12 to 24 hours is better. This is non-negotiable. The cookies need time to soften and absorb moisture from the mousse. If you try to serve it early, the cookies will be crunchy and the cake won’t slice cleanly. Patience, my friend.
- Garnish and serve: Before serving, you can add toppings. Crush a few Oreos and sprinkle them on top. Drizzle melted peanut butter in a zigzag pattern. Pipe whipped cream rosettes if you’re feeling fancy. Use a sharp knife to cut slices, wiping the blade clean between cuts for neat edges.
A note on timing: This cake actually tastes better on day two. The flavors meld together, and the texture becomes perfectly uniform. If you can, make it two days before your event. Your future self will thank you.
Cooking Tips & Techniques
I’ve made this cake more times than I can count, and I’ve learned a few things the hard way. Here are my best tips for success.
Don’t rush the softening process. Cold cream cheese is the enemy of smooth mousse. I once tried to speed things up by microwaving the cream cheese for too long, and it melted into a greasy mess. The mousse never set properly, and I ended up with a runny disaster. Let it sit on the counter for a full hour. If you’re in a hurry, cut it into small cubes—they soften faster.
Whip the cream to stiff peaks. Soft peaks will deflate when you fold them into the cream cheese mixture. You want the cream to hold its shape firmly. If you’re not sure, lift the beaters—the cream should stand up in a point that doesn’t flop over. This is the difference between a light mousse and a dense paste.
Fold, don’t stir. Stirring deflates the whipped cream. Use a gentle folding motion—cut down through the center, scrape along the bottom, and bring the mixture up and over. Rotate the bowl as you go. It takes about 15 folds to incorporate everything. Stop when you don’t see white streaks anymore.
Use a sharp knife for clean slices. A dull knife will drag through the mousse and mess up the layers. Run the knife under hot water, wipe it dry, then slice. Clean the blade between each cut. This gives you those beautiful, Instagram-worthy slices.
Let it rest after slicing. If you cut the cake straight from the fridge, the mousse will be very firm. Let the slices sit on the counter for 5 minutes before serving. They’ll soften slightly and taste even better.
Variations & Adaptations
This recipe is incredibly flexible. Here are some ways to make it your own.
- Chocolate Peanut Butter Version: Use chocolate Oreos (the regular ones are fine) and add ¼ cup of cocoa powder to the mousse. Sift it in with the powdered sugar. The chocolate flavor intensifies the peanut butter beautifully.
- Gluten-Free Option: Use gluten-free chocolate sandwich cookies. There are several brands that work well. The texture will be slightly different, but the flavor is still amazing. Just check that all other ingredients are certified gluten-free.
- Lighter Version: Use reduced-fat cream cheese and light peanut butter. Swap half of the heavy cream for whipped topping (like Cool Whip). The texture won’t be as rich, but it still tastes great. I’ve made this for friends who are watching their calories, and they didn’t complain.
- Add a Banana Layer: Slice 2 ripe bananas and place a layer on top of the first mousse layer. The banana adds natural sweetness and a creamy texture that pairs perfectly with peanut butter and chocolate. This is my personal favorite variation.
- Make it a Peanut Butter Cup Cake: Chop up 1 cup of peanut butter cups (like Reese’s) and sprinkle them between the layers. It adds little pockets of peanut butter and chocolate that are absolutely delightful.
I tried the banana version last summer for a backyard barbecue, and it was a hit. The bananas added a freshness that balanced the richness of the mousse. Just make sure the bananas are ripe but not mushy. Overripe bananas will make the cake soggy.
Serving & Storage Suggestions
This cake is designed for hosting, so presentation matters. Here’s how to serve and store it like a pro.
Serving Temperature: Serve the cake cold, straight from the fridge. It should be firm but not rock-hard. If it’s been in the fridge for more than 24 hours, let it sit at room temperature for 10 minutes before slicing. The mousse will soften slightly, making it easier to cut and more pleasant to eat.
Presentation Tips: For a dinner party, I like to garnish the top with a border of crushed Oreos and a drizzle of melted peanut butter. It looks elegant but takes two minutes. If you’re serving at a potluck, keep it simple—just a dusting of cocoa powder or a few whole Oreos on top. For a birthday, pipe whipped cream rosettes around the edges and add sprinkles. The cake is a blank canvas.
What to Serve Alongside: This cake is rich, so pair it with something light. A scoop of vanilla ice cream is classic. Fresh berries—strawberries or raspberries—cut through the sweetness beautifully. A cup of black coffee or cold milk is perfect for balancing the flavors. If you’re serving a full meal, keep the main course simple—grilled chicken, a green salad, or something with bright acidity.
Storage Instructions: Cover the dish tightly with plastic wrap or transfer leftovers to an airtight container. The cake will keep in the refrigerator for up to 5 days. The texture actually improves after the first day as the flavors meld together. After day three, the cookies start to get very soft, but it’s still delicious. I’ve eaten it on day five and loved it.
Freezing Instructions: You can freeze this cake for up to 3 months. Assemble it completely, but don’t add garnishes. Wrap the dish tightly in plastic wrap, then a layer of aluminum foil. To serve, thaw it in the refrigerator overnight. The texture will be slightly different—the mousse will be a bit denser—but it’s still fantastic. I’ve done this for holiday prep, and it saves so much time.
Reheating: You don’t reheat this cake. It’s served cold. If you want a warm dessert, try microwaving a slice for 10 seconds. The mousse gets soft and almost pudding-like. It’s a different experience, but some people love it.
Nutritional Information & Benefits
Let’s be honest—this is a dessert, not a health food. But knowing what’s in it helps you make informed choices. Here’s the breakdown per slice (assuming 16 servings).
- Calories: Approximately 420 per slice. It’s rich, so a small piece goes a long way.
- Protein: About 9 grams per slice. The peanut butter and cream cheese add a surprising amount of protein.
- Fat: 28 grams. Most of this comes from the cream cheese, heavy cream, and peanut butter. It’s what makes the mousse so satisfying.
- Carbohydrates: 38 grams. The Oreos and powdered sugar contribute most of the carbs.
- Sugar: 24 grams. It’s sweet, but not cloying. You can reduce the powdered sugar to 1 cup if you prefer a less sweet mousse.
Health Benefits: Peanut butter is a good source of healthy fats and protein. It also contains vitamin E, magnesium, and potassium. Cream cheese provides calcium and vitamin A. The Oreos? Well, they provide happiness. That counts for something, right? If you’re looking for a slightly healthier version, use the reduced-fat cream cheese and light peanut butter. The calorie count drops to about 350 per slice.
Allergen Information: This recipe contains dairy (cream cheese, heavy cream), peanuts, gluten (Oreos), and soy (Oreos). It is not suitable for vegans or those with dairy, peanut, or gluten allergies without substitutions. For a dairy-free version, use dairy-free cream cheese and coconut cream instead of heavy cream. For a nut-free version, use sunflower seed butter.
I’m not a nutritionist, but I’ve learned to balance indulgence with awareness. This cake is a treat, not an everyday snack. Serve it on special occasions, enjoy every bite, and don’t feel guilty about it.
Conclusion
This no-bake peanut butter Oreo icebox cake for a crowd is the dessert that keeps on giving. It’s easy enough for a beginner, impressive enough for a dinner party, and delicious enough to become your go-to recipe. The layers of soft Oreos and creamy peanut butter mousse create a dessert that tastes like a labor of love, even though it took you twenty minutes to assemble. That’s the kind of magic we all need in our lives.
I love this recipe because it reminds me that cooking doesn’t have to be complicated to be good. Sometimes the best dishes come from letting go of control and trusting the process—or in my case, trusting a sixteen-year-old with a good idea. Every time I make this cake, I think of Mark standing in my messy kitchen, covered in chocolate, proving me wrong. And I smile.
Now it’s your turn. Make this cake for your next gathering. Customize it with your favorite add-ins. Serve it with pride. And when everyone asks for the recipe, tell them it’s a family secret—with a wink. I’d love to hear how it turns out. Leave a comment below, share your photos, and let me know what variations you tried. Happy hosting!
Frequently Asked Questions
Can I use natural peanut butter in this recipe?
You can, but the texture won’t be as smooth. Natural peanut butter tends to separate, and the oil can make the mousse grainy. For best results, use processed peanut butter like Jif or Skippy. If you only have natural, stir it very well before measuring and expect a slightly different texture.
How far in advance can I make this cake?
You can make it up to 5 days in advance. Store it covered in the refrigerator. The texture actually improves after the first day. If you’re making it for a party, I recommend assembling it 1 to 2 days ahead. You can also freeze it for up to 3 months—just thaw it in the fridge overnight before serving.
Can I use Double Stuf Oreos instead of regular ones?
You can, but the layers won’t be as stable. Double Stuf Oreos have more cream filling, which can make the cake too sweet and the layers less defined. If you only have Double Stuf, scrape off some of the cream before using them. Regular Oreos work best for structure and flavor balance.
My mousse turned out runny. What went wrong?
This usually happens for one of three reasons: the cream cheese wasn’t fully softened, the whipped cream wasn’t beaten to stiff peaks, or the mixture was over-folded. Make sure your cream cheese is at room temperature, whip the cream until it stands up firmly, and fold gently. If your mousse is already runny, you can try chilling it for an extra hour before layering—it might firm up enough to work.
Can I make this recipe in a different size pan?
Yes, you can adjust the pan size. For an 8×8 pan, halve the recipe. For a 9×9 pan, use about two-thirds of the ingredients. The layering technique stays the same—just adjust the number of cookies per layer. Keep in mind that a smaller pan will give you taller slices, which might need a longer chilling time to set properly.
Pin This Recipe!
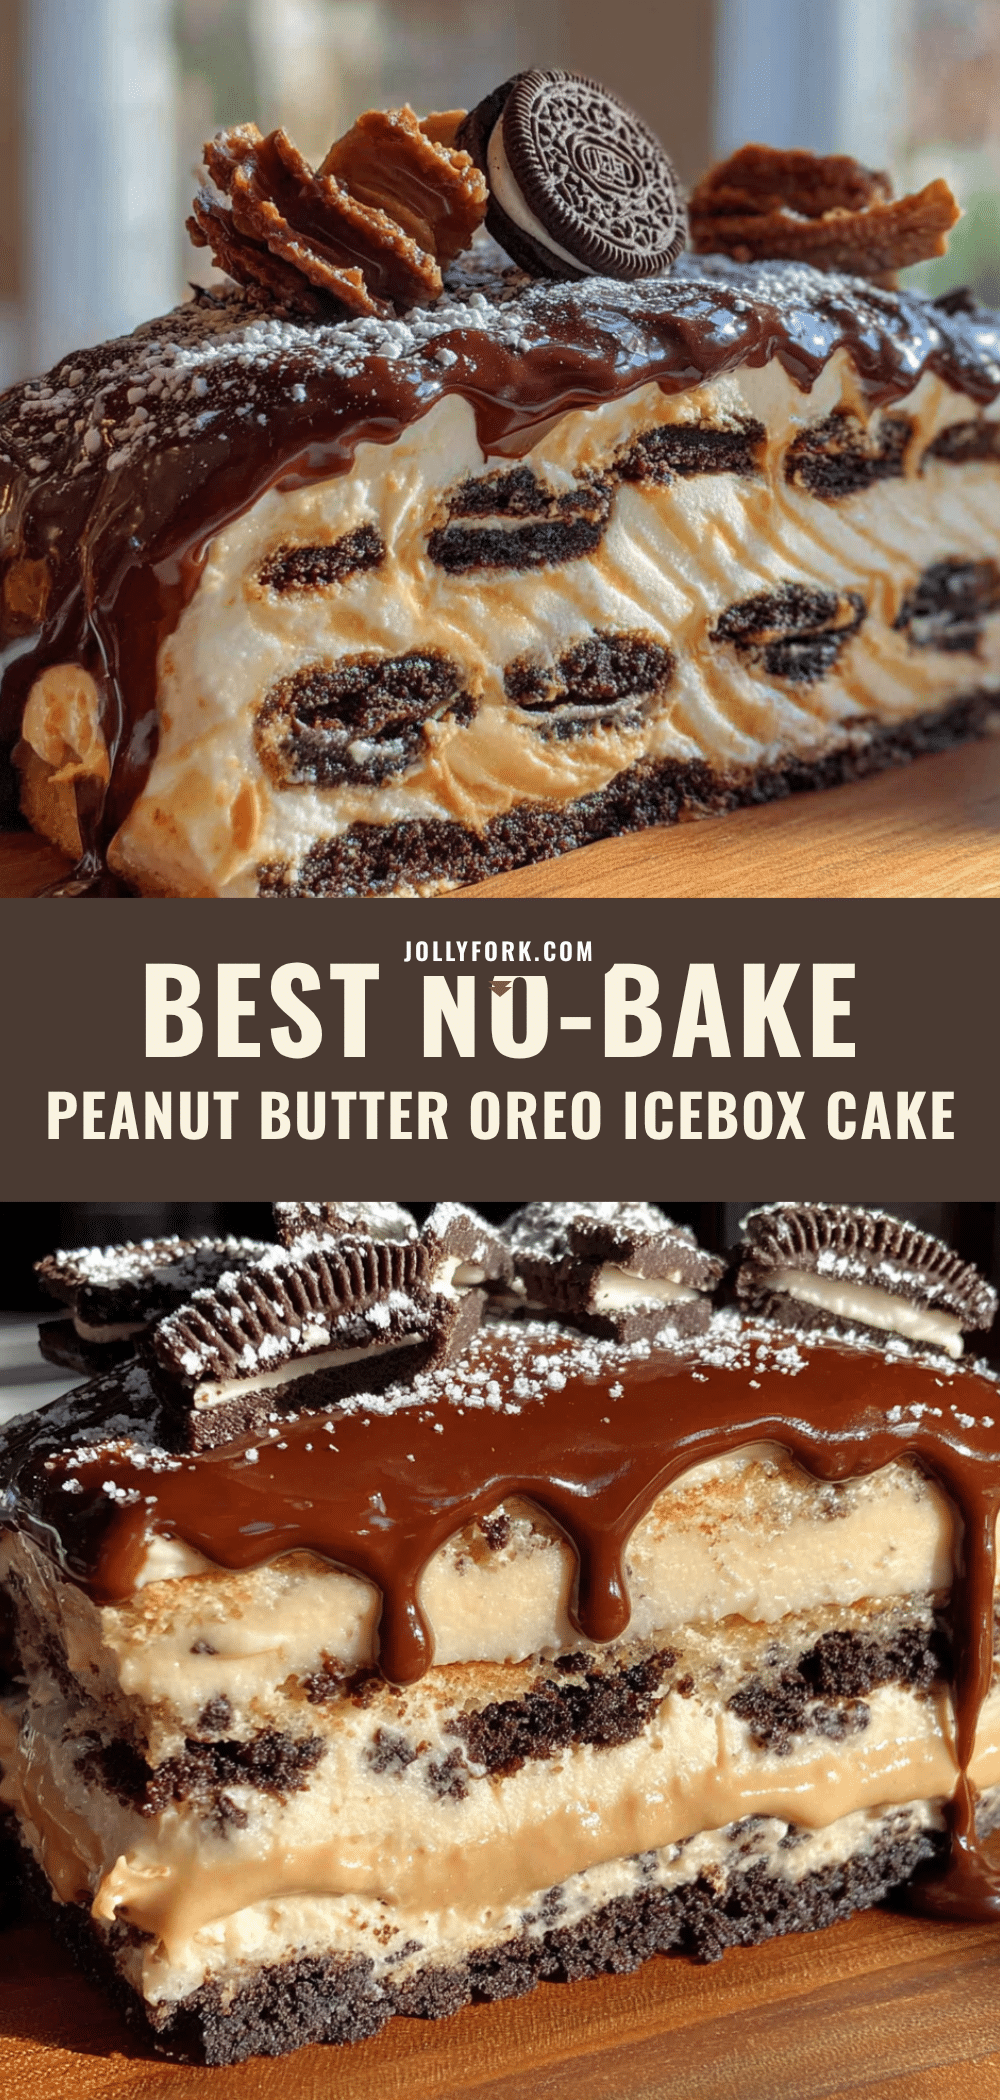
Best No-Bake Peanut Butter Oreo Icebox Cake Recipe for a Crowd
This no-bake peanut butter Oreo icebox cake is the ultimate crowd-pleasing dessert. Layers of soft Oreo cookies and a creamy peanut butter mousse create a make-ahead treat that’s perfect for parties and potlucks.
- Prep Time: 20 minutes
- Cook Time: 0 minutes
- Total Time: 8 hours 20 minutes (includes chilling)
- Yield: 12-16 servings
- Category: Dessert
- Cuisine: American
Ingredients
- Oreo Cookies (two 14.3-ounce packages)
- Cream Cheese (16 ounces, softened)
- Creamy Peanut Butter (1 cup)
- Powdered Sugar (1 ½ cups)
- Heavy Whipping Cream (2 cups)
- Vanilla Extract (1 teaspoon)
- Optional Garnishes: Extra crushed Oreos, a drizzle of melted peanut butter, chocolate shavings, or whipped cream rosettes
Instructions
- Soften the cream cheese: Take the cream cheese out of the fridge at least one hour before you start. If you forgot, you can microwave it in 10-second bursts, but be careful not to melt it. You want it soft, not hot.
- Whip the heavy cream: In a large bowl, pour 2 cups of cold heavy whipping cream. Add 1 teaspoon of vanilla extract. Beat on medium-high speed until stiff peaks form. This takes about 3-4 minutes with a hand mixer. You’ll know it’s ready when you lift the beaters and the cream stands up straight. Don’t over-whip, or you’ll end up with butter. Set this bowl aside in the fridge.
- Make the peanut butter mousse base: In another large bowl, beat the softened cream cheese with an electric mixer until smooth and creamy. Add 1 cup of creamy peanut butter and beat until combined. Gradually add 1 ½ cups of powdered sugar, beating on low speed at first to avoid a sugar cloud. Scrape down the sides of the bowl with a spatula. The mixture will be thick and sticky at this point.
- Fold in the whipped cream: Take the whipped cream out of the fridge. Add about one-third of it to the cream cheese mixture. Fold gently with a rubber spatula—don’t stir. You want to incorporate the cream without deflating it. Add the remaining whipped cream in two more additions, folding until no white streaks remain. The mousse should be light, airy, and a pale brown color. Taste it. Yes, it’s good. Stop eating it.
- Layer the cake: Spread a thin layer of mousse (about ½ cup) on the bottom of your 9×13 dish. This helps the first layer of cookies stick. Arrange a single layer of Oreos on top of the mousse. You’ll fit about 16 cookies in a single layer—four rows of four. Don’t overlap them. Spread one-third of the remaining mousse over the cookies. Use an offset spatula or the back of a spoon to spread it evenly. Repeat with another layer of Oreos, another third of mousse, and a final layer of Oreos. Spread th…
- Chill overnight: Cover the dish tightly with plastic wrap. Refrigerate for at least 8 hours, but 12 to 24 hours is better. This is non-negotiable. The cookies need time to soften and absorb moisture from the mousse. If you try to serve it early, the cookies will be crunchy and the cake won’t slice cleanly. Patience, my friend.
- Garnish and serve: Before serving, you can add toppings. Crush a few Oreos and sprinkle them on top. Drizzle melted peanut butter in a zigzag pattern. Pipe whipped cream rosettes if you’re feeling fancy. Use a sharp knife to cut slices, wiping the blade clean between cuts for neat edges.
Notes
Don’t rush the softening process. Cold cream cheese is the enemy of smooth mousse. Whip the cream to stiff peaks. Fold, don’t stir. Use a sharp knife for clean slices. Let it rest after slicing. This cake actually tastes better on day two. The flavors meld together, and the texture becomes perfectly uniform.
Nutrition
- Serving Size: 1 slice (assuming 16
- Calories: 420
- Sugar: 24
- Sodium: 320
- Fat: 28
- Saturated Fat: 12
- Carbohydrates: 38
- Fiber: 2
- Protein: 9
Keywords: no-bake dessert, icebox cake, peanut butter, Oreo, crowd-pleaser, make-ahead dessert, summer dessert, potluck dessert


