That first deep inhale of espresso powder hitting melted dark chocolate — the kind that wraps around you before you even stir — still takes me straight to my tiny apartment kitchen in late August. My Virgo best friend was turning thirty, and I had this ridiculous idea that her birthday cake should taste like her. Not just any cake, but something that captured that whole grounded, meticulous, deeply comforting energy she carries. I wanted layers. I wanted precision. I wanted a dessert that felt as thoughtfully put together as she is.
So I started testing. And honestly? The first attempt was a disaster — too dense, the espresso flavor barely there. But that second try, the one where I let the coffee linger and folded the batter just until it came together, that was the one. It was the kind of cake that makes you slow down with each bite, not because it’s complicated, but because it asks you to pay attention. And isn’t that so Virgo?
This Best Virgo Season Chocolate Espresso Layer Cake isn’t just a recipe. It’s a love letter to the people who notice the small things — the ones who appreciate a perfectly smooth crumb and a frosting that’s not too sweet. It’s for the planners, the organizers, the ones who show up with a homemade gift and a hand-written card. If you’ve ever wanted to bake something that feels both indulgent and intentional, this is your cake.
Why You’ll Love This Recipe
I’ve tested this cake more times than I care to admit, and every single version taught me something new. Here’s why this one is the keeper:
- Perfectly Balanced Flavor : The espresso doesn’t overpower the chocolate — it deepens it. You get that rich, dark cocoa taste with a subtle coffee warmth that lingers.
- Moist, Tender Crumb : Thanks to a simple trick with hot coffee and buttermilk, this cake stays incredibly soft for days. No dry corners here.
- Foolproof for Bakers of Any Level : I’ve made this with my niece who measures by feel and with a friend who follows every gram to the letter. It works both ways.
- Ideal for Celebrations : Whether it’s a birthday, a Virgo season gathering, or just a Tuesday that needs a little ceremony, this cake delivers.
- Make-Ahead Friendly : The layers actually taste better the next day. You can bake, wrap, and frost when you’re ready.
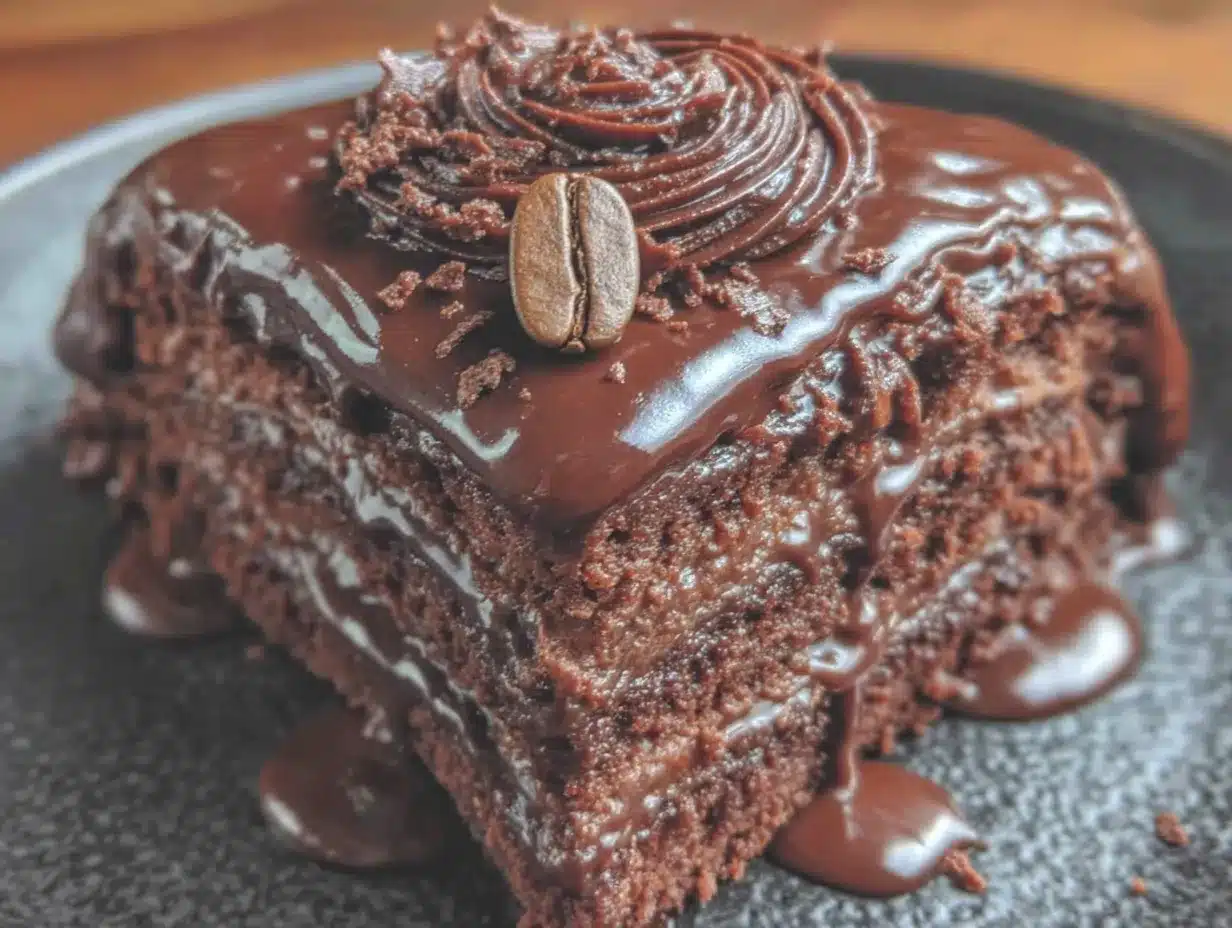
What makes this recipe different from other chocolate espresso cakes? It’s the texture — that fine, even crumb that doesn’t crumble apart when you slice it. The frosting is a silky, dark chocolate ganache-style buttercream that’s rich without being cloying. It’s the kind of cake you serve with a cup of black coffee and a quiet moment to yourself.
This cake isn’t just good — it’s the kind that makes you close your eyes after the first bite. It’s comfort food reimagined: sophisticated enough for a dinner party, but cozy enough for a Sunday afternoon. Perfect for impressing guests without stress, or turning a simple evening into something memorable.
What Ingredients You Will Need
This recipe uses simple, high-quality ingredients to deliver that deep, layered flavor. Most of these are pantry staples, but a few key players make all the difference.
For the Cake Layers
- 2 cups (240g) all-purpose flour — Spoon and level for accuracy. I prefer King Arthur Flour for consistent results.
- 1 ¾ cups (350g) granulated sugar — Regular white sugar works best here. It dissolves cleanly and adds structure.
- ¾ cup (75g) unsweetened cocoa powder — Use a high-quality brand like Guittard or Valrhona for that deep, dark flavor. Dutch-processed gives a smoother taste.
- 2 teaspoons baking soda — Make sure it’s fresh. This reacts with the buttermilk and coffee for lift.
- 1 teaspoon baking powder — Adds extra rise and lightness.
- 1 teaspoon salt — Fine sea salt balances the sweetness and enhances the chocolate.
- 2 large eggs — Room temperature, so they emulsify properly into the batter.
- 1 cup (240ml) buttermilk — Full-fat is best. No buttermilk? Add 1 tablespoon lemon juice to regular milk and let it sit for 5 minutes.
- ½ cup (120ml) vegetable oil — Keeps the cake moist without adding butter flavor. Canola or avocado oil work too.
- 2 teaspoons vanilla extract — Pure vanilla, not imitation. It rounds out the chocolate.
- 1 cup (240ml) hot brewed espresso or strong coffee — This is the secret. The hot liquid blooms the cocoa and deepens the whole flavor profile.
For the Chocolate Espresso Buttercream
- 1 ½ cups (3 sticks / 340g) unsalted butter — Softened to room temperature. Let it sit out for at least an hour.
- 3 ½ cups (420g) powdered sugar — Sifted to avoid lumps.
- ¾ cup (75g) unsweetened cocoa powder — Sifted as well. Same brand as the cake for consistency.
- 2 tablespoons espresso powder — Dissolved in 2 tablespoons hot water. This gives a concentrated coffee kick.
- 1 teaspoon vanilla extract — Again, pure.
- ¼ teaspoon salt — Just enough to cut the sweetness.
- 3-4 tablespoons heavy cream or milk — For adjusting consistency. Heavy cream makes it dreamy.
For Garnish (Optional but Lovely)
- Chocolate shavings or curls — Use a vegetable peeler on a dark chocolate bar.
- Flaky sea salt — Maldon is my go-to. A tiny sprinkle on top balances the richness.
- Fresh coffee beans — For a pretty, thematic look.
Equipment Needed
You don’t need a professional bakery setup, but a few tools make the process smoother.
- Three 8-inch round cake pans — I use light-colored metal pans for even baking. Dark pans can cause the edges to brown too fast.
- Parchment paper — Cut circles for the bottom of each pan. This guarantees clean release.
- Stand mixer or hand mixer — A stand mixer with the paddle attachment is ideal for the frosting, but a hand mixer works perfectly for the batter.
- Large mixing bowls — At least two: one for dry ingredients, one for wet.
- Whisk and rubber spatula — For combining and folding.
- Cooling rack — Essential for letting layers cool completely before frosting.
- Offset spatula — For smooth, even frosting layers. A butter knife works in a pinch, but the offset spatula is worth the ten bucks.
- Cake stand or turntable — Makes frosting much easier. I have a simple plastic turntable that cost fifteen dollars and it’s been a game-changer.
- Kitchen scale — If you have one, use it. Baking by weight is more accurate and consistent.
Preparation Method
Let’s get baking. This process is straightforward, but each step matters. Take your time — Virgo energy, remember?
- Preheat and Prep — Preheat your oven to 350°F (175°C). Grease three 8-inch round cake pans and line the bottoms with parchment paper. Lightly flour the sides after greasing. This is non-negotiable for clean release.
- Mix Dry Ingredients — In a large bowl, whisk together the flour, sugar, cocoa powder, baking soda, baking powder, and salt. Whisk for about 30 seconds to aerate and break up any clumps. Set aside.
- Combine Wet Ingredients — In a separate bowl or a large liquid measuring cup, whisk together the buttermilk, oil, eggs, and vanilla extract. Make sure the eggs are fully incorporated. The mixture should look smooth and slightly thick.
- Bring It Together — Pour the wet ingredients into the dry ingredients. Stir with a spatula until just combined — a few streaks of flour are okay at this point. Do not overmix.
- Add the Hot Coffee — Slowly pour the hot brewed espresso or coffee into the batter while stirring gently. The batter will become very thin and liquid — this is exactly right. It should look like a milkshake. Scrape the bottom of the bowl to make sure everything is incorporated.
- Divide and Bake — Pour the batter evenly into the three prepared pans. I use a kitchen scale to weigh each pan for precise layers — about 14-15 ounces per pan. Bake for 22-26 minutes, or until a toothpick inserted in the center comes out with a few moist crumbs (not wet batter). The cakes should spring back when lightly pressed.
- Cool Completely — Let the cakes cool in the pans for 10 minutes. Then run a knife around the edges, invert onto a cooling rack, and remove the parchment paper. Let them cool completely — at least 1 hour. Warm layers will melt your frosting.
- Make the Frosting — While the cakes cool, make the buttercream. In the bowl of a stand mixer fitted with the paddle attachment, beat the softened butter on medium speed for 3-4 minutes until pale and creamy. In a separate small bowl, dissolve the espresso powder in the hot water. Sift together the powdered sugar and cocoa powder. With the mixer on low, gradually add the sugar-cocoa mixture to the butter, a cup at a time. Add the dissolved espresso, vanilla, and salt. Increase speed to medium and beat for 2 minutes. Add heavy cream, one tablespoon at a time, until the frosting is smooth and spreadable but still holds its shape.
- Assemble the Cake — Place one cake layer on your cake stand or plate. Spread about ¾ cup of frosting evenly on top. Repeat with the second layer. Add the third layer on top. Apply a thin crumb coat all over the cake — a thin layer of frosting that seals in the crumbs. Refrigerate for 20 minutes to set.
- Frost and Finish — Apply the remaining frosting to the top and sides. Use an offset spatula for smooth, even strokes. If you want a rustic look, leave swirls. For a clean finish, run the spatula under hot water, dry it, and smooth the sides. Garnish with chocolate shavings and a sprinkle of flaky sea salt.
Cooking Tips & Techniques
I’ve learned a few things the hard way so you don’t have to. Here are the tricks that make this cake foolproof.
Don’t skip the hot coffee step. I know it sounds weird — adding hot liquid to cake batter? But this is what creates that silky, moist texture. The heat helps dissolve the cocoa and sugar, and it activates the baking soda for a perfect rise. I once tried using cold coffee out of laziness, and the cake was noticeably denser. Hot is non-negotiable.
Measure your flour correctly. The number one mistake home bakers make is scooping flour directly from the bag with the measuring cup. This packs in too much flour and makes cakes dry. Instead, fluff the flour with a spoon, then spoon it into the cup and level it off with a knife. Or better yet, use a kitchen scale.
Room temperature ingredients matter. Cold eggs and cold buttermilk can cause the batter to seize up, especially when you add hot coffee. Set your eggs and buttermilk out on the counter 30 minutes before you start. If you forget, place the eggs in a bowl of warm water for 5 minutes and microwave the buttermilk for 10 seconds.
Let the layers cool completely. This is where patience pays off. If you try to frost even slightly warm cakes, the buttercream will slide right off. I’ve been there — it’s a mess. Give them a full hour on the cooling rack, then refrigerate for 15 minutes before frosting if you’re in a hurry.
Use a serrated knife to level the layers. Even if your cakes bake evenly, they might have a slight dome on top. Use a long serrated knife to slice off the domes so each layer is flat. This gives you a professional-looking cake with even layers of frosting.
Variations & Adaptations
This cake is wonderfully adaptable. Here are a few ways to make it your own.
Gluten-Free Version : Substitute the all-purpose flour with a high-quality 1:1 gluten-free baking flour blend (I like King Arthur Measure for Measure). Add ½ teaspoon xanthan gum if your blend doesn’t include it. The texture will be slightly more tender, but the flavor is just as deep.
Dairy-Free Adaptation : Use full-fat oat milk or unsweetened almond milk mixed with 1 tablespoon apple cider vinegar as a buttermilk substitute. Swap the butter in the frosting with a high-quality vegan butter stick (not tub margarine). Use canned coconut cream instead of heavy cream. The frosting will be a bit softer, so refrigerate the cake before serving.
Mocha Lover’s Twist : Add 1 cup of mini chocolate chips to the batter along with an extra tablespoon of espresso powder dissolved in the hot coffee. Fold in ½ cup chopped dark chocolate into the frosting. This version is intensely chocolatey and perfect for serious coffee fans.
Single Layer or Cupcakes : Short on time? Bake the batter in two 9-inch round pans for 25-30 minutes and make a single-layer cake with double the filling. For cupcakes, fill liners ⅔ full and bake for 18-20 minutes. This recipe makes about 24 cupcakes.
Seasonal Variation : In the fall, add 1 teaspoon cinnamon and ½ teaspoon nutmeg to the dry ingredients. In the summer, serve with a scoop of no-churn peach cream cheese ice cream for a stunning contrast. The fruity sweetness pairs beautifully with the dark chocolate.
Serving & Storage Suggestions
This cake is best served at room temperature — the texture is softer, and the flavors are more pronounced. Let it sit out for 20-30 minutes after removing from the fridge.
How to Serve : Slice with a sharp, thin-bladed knife dipped in hot water and wiped dry between cuts. This gives you clean, bakery-style slices. Serve with a dollop of lightly sweetened whipped cream or a dusting of cocoa powder. A cup of black coffee or a cold glass of milk is the perfect companion.
Storage : Store leftover cake in an airtight container at room temperature for up to 2 days, or in the refrigerator for up to 5 days. The cake actually tastes even better on day two — the flavors meld together beautifully. If refrigerated, let slices come to room temperature before serving.
Freezing : This cake freezes wonderfully. Wrap unfrosted cake layers individually in plastic wrap, then foil, and freeze for up to 3 months. Thaw overnight in the refrigerator before frosting. Frosted cake can also be frozen — place it in the freezer unwrapped for 1 hour to firm up the frosting, then wrap tightly in plastic wrap and foil. Thaw in the refrigerator overnight.
How Flavors Develop : The espresso flavor becomes more pronounced after 24 hours. If you’re making this for a party, bake and assemble the cake a day ahead. The frosting sets up nicely, and slicing is easier. Just keep it covered in the fridge.
Nutritional Information & Benefits
Let’s be honest — this is a celebration cake, not a health food. But that doesn’t mean it’s without its redeeming qualities.
Estimated per slice (1/12 of cake) : Calories: 485 | Fat: 28g | Carbs: 56g | Protein: 6g | Fiber: 3g | Sugar: 38g
Health Highlights : Dark chocolate and cocoa powder are rich in antioxidants called flavonoids, which support heart health. Espresso contains caffeine and antioxidants that can improve focus and mood. The buttermilk adds calcium and probiotics (if using cultured buttermilk).
Dietary Considerations : This recipe contains dairy, eggs, and gluten. It is nut-free (as written), but check your cocoa powder and chocolate for cross-contamination if allergies are a concern. For a lower-sugar option, reduce the granulated sugar to 1 ½ cups — the cake will be slightly less tender but still delicious.
My Personal Take : I believe in balance. This cake is meant to be enjoyed in moderation, with full presence and zero guilt. It’s the kind of dessert you share with people you love, and that counts for something. A slice of this with a cup of tea on a quiet afternoon? That’s self-care, my friend.
Conclusion
This Best Virgo Season Chocolate Espresso Layer Cake is more than a recipe — it’s a moment. It’s the cake you bake when you want to say “I see you” to someone who deserves a little extra thoughtfulness. The deep chocolate, the gentle warmth of espresso, the perfectly balanced sweetness — it all comes together in a way that feels both grounded and celebratory.
I hope you make this cake for your favorite Virgo, or for yourself on a day that needs a little ceremony. Customize it, make it your own, and don’t stress about perfection. The beauty of this cake is in its layers — both literal and figurative. If your frosting gets a little messy, that’s character. If your layers aren’t perfectly even, that’s homemade charm.
I’d love to hear how it turns out. Drop a comment below with your variations, your serving suggestions, or just a photo of your finished cake. Share it with a friend who needs a pick-me-up, and tag me so I can see your beautiful creation. Happy baking, and remember — the best cakes are the ones made with intention.
Frequently Asked Questions
Can I make this cake without a stand mixer?
Absolutely. A hand mixer works perfectly for both the batter and the frosting. For the cake batter, you can even whisk by hand — just make sure to whisk vigorously to break up any lumps. The frosting is easier with a mixer, but a strong arm and a wooden spoon can get the job done.
Can I use instant coffee instead of espresso?
Yes, you can. Dissolve 2 tablespoons of instant coffee granules in 1 cup of hot water instead of using brewed espresso. The flavor will be slightly less intense, but still delicious. For a stronger coffee taste, use 3 tablespoons of instant coffee.
Why did my cake sink in the middle?
This usually happens for one of three reasons: the oven temperature was too low, the baking soda was old, or the batter was overmixed. Make sure your oven is fully preheated, check the expiration date on your baking soda, and stop mixing as soon as the ingredients come together. If your cake sinks slightly, just level it with a serrated knife — no one will know.
How do I get smooth frosting layers?
The key is the crumb coat. Apply a thin layer of frosting all over the cake, then refrigerate for 20 minutes. This sets the crumbs in place so your final layer goes on smooth. Use an offset spatula and work from the bottom up. Dip the spatula in hot water, dry it, and use it to smooth the sides for a clean finish.
Can I turn this into a sheet cake?
Yes! Pour the batter into a greased 9×13-inch baking pan and bake at 350°F (175°C) for 30-35 minutes. Let it cool completely, then spread the frosting directly on top. This is a great option for feeding a crowd or for a less formal presentation. The baking time may vary slightly, so start checking at 28 minutes.
Pin This Recipe!
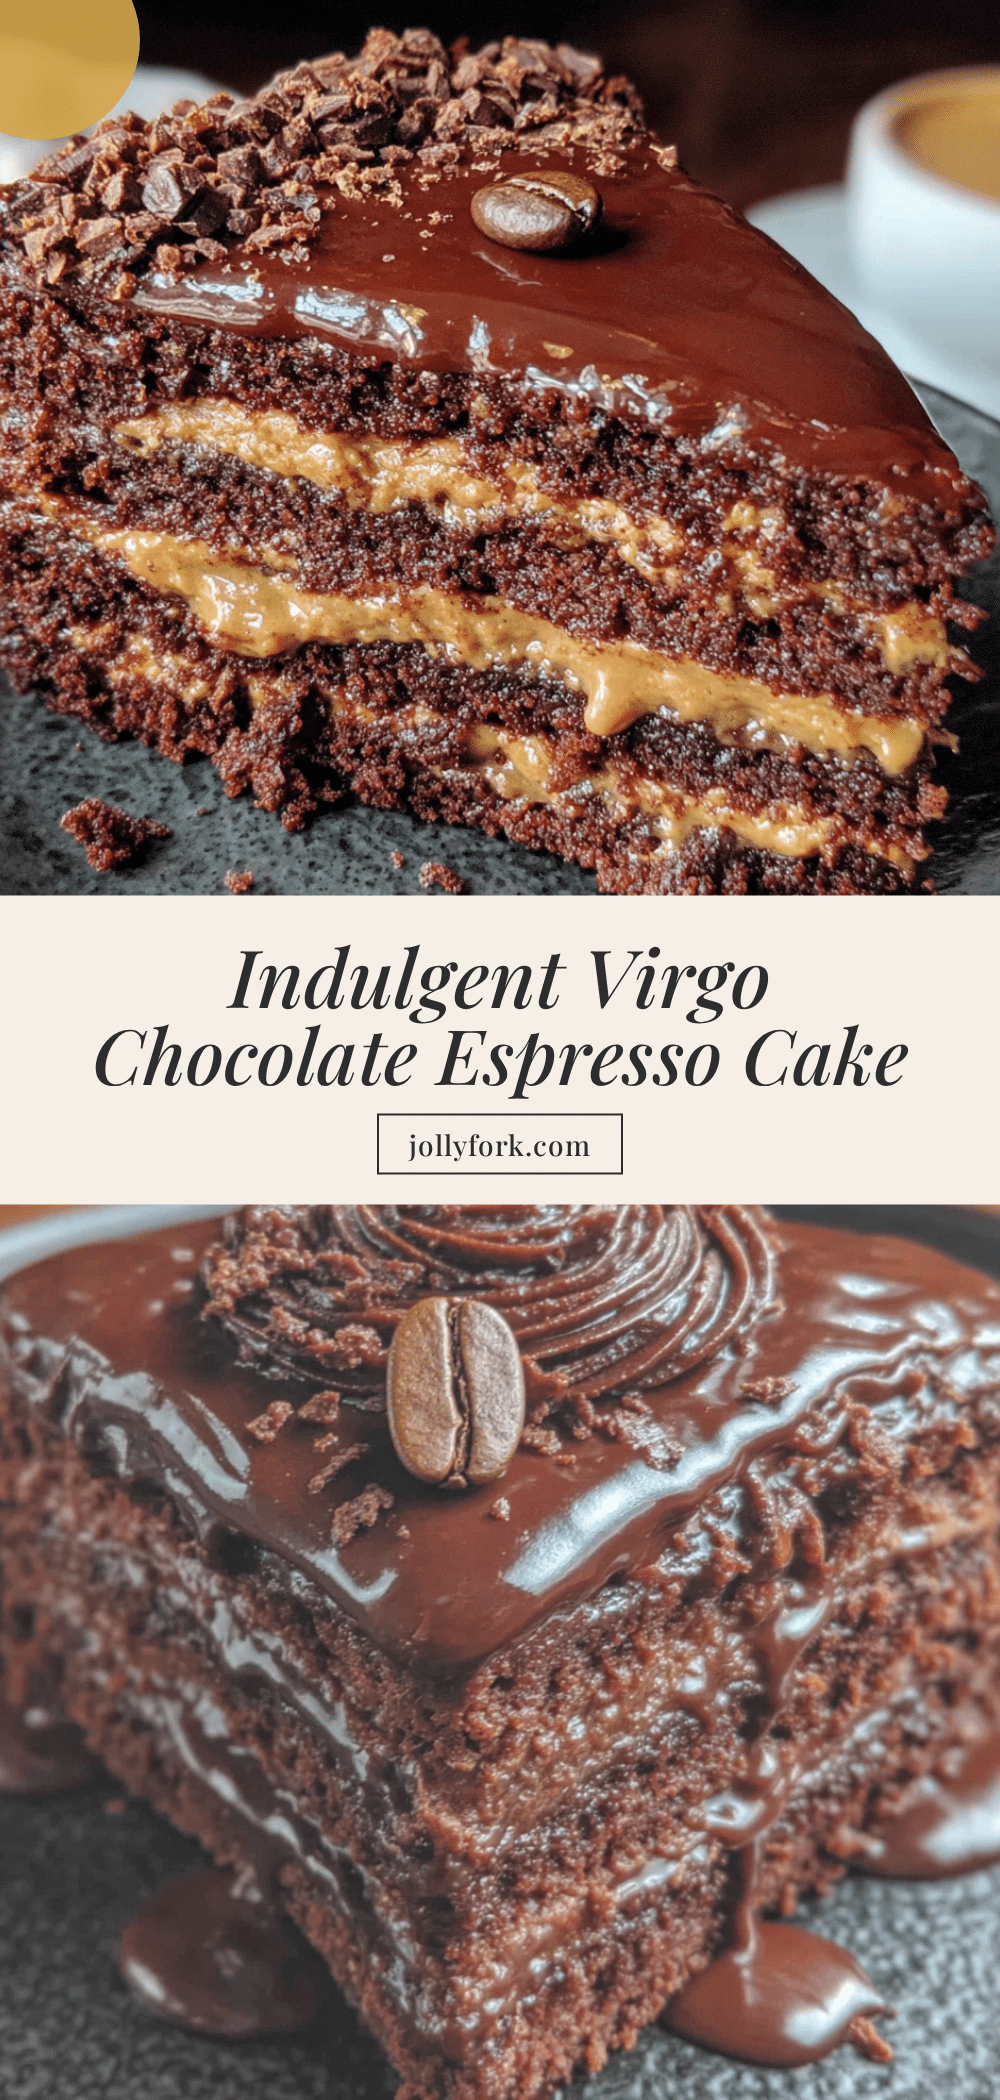
Best Virgo Chocolate Espresso Layer Cake
A deeply flavorful chocolate espresso layer cake with a moist, tender crumb and silky dark chocolate buttercream. Perfect for celebrations or a quiet moment of indulgence.
- Prep Time: 30 minutes
- Cook Time: 26 minutes
- Total Time: 1 hour 56 minutes
- Yield: 12 servings 1x
- Category: Dessert
- Cuisine: American
Ingredients
- 2 cups (240g) all-purpose flour
- 1 ¾ cups (350g) granulated sugar
- ¾ cup (75g) unsweetened cocoa powder
- 2 teaspoons baking soda
- 1 teaspoon baking powder
- 1 teaspoon salt
- 2 large eggs, room temperature
- 1 cup (240ml) buttermilk, room temperature
- ½ cup (120ml) vegetable oil
- 2 teaspoons vanilla extract
- 1 cup (240ml) hot brewed espresso or strong coffee
- 1 ½ cups (3 sticks / 340g) unsalted butter, softened
- 3 ½ cups (420g) powdered sugar, sifted
- ¾ cup (75g) unsweetened cocoa powder, sifted
- 2 tablespoons espresso powder dissolved in 2 tablespoons hot water
- 1 teaspoon vanilla extract
- ¼ teaspoon salt
- 3–4 tablespoons heavy cream or milk
- Chocolate shavings or curls (optional)
- Flaky sea salt (optional)
- Fresh coffee beans (optional)
Instructions
- Preheat oven to 350°F (175°C). Grease three 8-inch round cake pans and line bottoms with parchment paper. Lightly flour the sides.
- In a large bowl, whisk together flour, sugar, cocoa powder, baking soda, baking powder, and salt for 30 seconds.
- In a separate bowl, whisk together buttermilk, oil, eggs, and vanilla until smooth.
- Pour wet ingredients into dry ingredients and stir with a spatula until just combined (a few streaks of flour are okay).
- Slowly pour hot espresso into the batter while stirring gently. Batter will become thin and liquid.
- Divide batter evenly among the three pans (about 14-15 ounces per pan). Bake for 22-26 minutes, until a toothpick inserted in the center comes out with a few moist crumbs.
- Let cakes cool in pans for 10 minutes, then invert onto a cooling rack, remove parchment, and cool completely (at least 1 hour).
- For the frosting: In a stand mixer with paddle attachment, beat softened butter on medium speed for 3-4 minutes until pale and creamy.
- Dissolve espresso powder in hot water. Sift together powdered sugar and cocoa powder.
- With mixer on low, gradually add sugar-cocoa mixture to butter. Add dissolved espresso, vanilla, and salt. Beat on medium for 2 minutes.
- Add heavy cream one tablespoon at a time until frosting is smooth and spreadable.
- Place one cake layer on a cake stand. Spread about ¾ cup frosting evenly on top. Repeat with second layer. Add third layer.
- Apply a thin crumb coat all over the cake. Refrigerate for 20 minutes.
- Apply remaining frosting to top and sides. Use an offset spatula for smooth strokes. Garnish with chocolate shavings and flaky sea salt if desired.
Notes
Don’t skip the hot coffee step; it creates a silky texture. Measure flour correctly by spooning and leveling. Use room temperature ingredients. Let layers cool completely before frosting. Level domed layers with a serrated knife for even stacking. The cake tastes even better the next day.
Nutrition
- Serving Size: 1 slice (1/12 of cak
- Calories: 485
- Sugar: 38
- Sodium: 380
- Fat: 28
- Saturated Fat: 16
- Carbohydrates: 56
- Fiber: 3
- Protein: 6
Keywords: chocolate espresso cake, layer cake, Virgo cake, chocolate cake, espresso cake, birthday cake


