Grabbed the last bell pepper from the crisper drawer and immediately knew it wasn’t going to be enough. Sunday night, 7:42 PM, and I had three meal prep containers staring back at me from the counter like empty promises. The chicken thighs were defrosted, the onions were starting to wrinkle, and honestly? I was this close to just ordering takeout and calling it a week. But then I remembered the sheet pan hiding in the back of my cabinet. That thing has saved me more times than I can count. And in that moment, these Easy Sheet Pan Chicken Fajita Bowls for Meal Prep were born. Not out of some grand culinary vision. Out of pure, desperate survival mode.
The smell hit me first. That smoky, slightly charred aroma of peppers and onions mingling with cumin and chili powder. It filled the whole apartment and made my stomach growl in a way that felt almost embarrassing. By the time everything came out of the oven, golden and sizzling, I knew I had stumbled onto something special. These bowls weren’t just good. They were the kind of good that makes you forget you’re eating meal prep at all. The kind that has you looking forward to Tuesday’s lunch like it’s a treat, not a chore.
And honestly, that’s the whole point, isn’t it? We all want to eat well during the week. We just don’t want it to feel like punishment. These Easy Sheet Pan Chicken Fajita Bowls for Meal Prep manage to be both incredibly satisfying and genuinely practical. They keep beautifully, reheat like a dream, and let you have a little fiesta in the middle of a random Wednesday. That’s not just cooking. That’s winning at life.
Why You’ll Love This Recipe
I’ve tested this recipe more times than I care to admit. Burned a batch or two. Overcooked the chicken until it was sad and dry. But I kept coming back because the potential was so clearly there. And now? I’ve got it dialed in. Here’s why these bowls deserve a permanent spot in your weekly rotation:
- Quick & Easy: From start to finish, we’re talking about 35 minutes. Most of that is hands-off oven time. You can prep these bowls while catching up on your favorite podcast.
- Simple Ingredients: Nothing fancy here. Chicken, peppers, onions, pantry spices, and rice. You probably have most of this stuff already.
- Perfect for Meal Prep: This is the whole reason I developed this recipe. These bowls sit beautifully in the fridge for up to 5 days. The flavors actually get better as they hang out together.
- Crowd-Pleaser: I’ve served these to picky kids, skeptical spouses, and hungry coworkers. Everyone loves them. They’re familiar enough to be comforting but exciting enough to feel special.
- Unbelievably Delicious: The caramelized edges on the peppers, the juicy, spiced chicken, the creamy avocado on top. It’s a texture and flavor combo that just works.
What makes this version different from all the other fajita bowl recipes out there? It’s the technique. Roasting everything on a single sheet pan at high heat creates that deep, smoky char you usually only get from a cast iron skillet or an actual grill. No standing over a hot stove. No flipping individual pieces. Just set it and forget it. And the seasoning blend? I spent weeks tweaking it until it hit that perfect balance of smoky, savory, and just a little bit spicy. It’s not just another fajita bowl. It’s the best version I’ve ever made.
This is the kind of recipe that makes you feel like you’ve got your life together. Even when you absolutely don’t. And honestly? That’s a beautiful thing.
What Ingredients You Will Need
This recipe uses simple, wholesome ingredients to deliver bold flavor and satisfying texture without the fuss. Most of these are pantry staples or easy to find at any grocery store. Here’s what you’ll need:
For the Chicken Fajitas
- Boneless, skinless chicken thighs (1.5 lbs or 680g) — Thighs stay juicier than breasts during high-heat roasting. If you prefer chicken breasts, go for it, just reduce cooking time by about 5 minutes.
- Bell peppers (3 large, mixed colors) — I use one red, one yellow, and one orange for visual appeal. Green peppers work too, but they’re a bit more bitter.
- Yellow onion (1 large) — Sliced into thin wedges. Red onion is a great substitute if that’s what you have.
- Avocado oil (3 tablespoons) — High smoke point makes it perfect for roasting. Olive oil works in a pinch.
- Chili powder (2 teaspoons) — Use a good quality one. I prefer the mild variety so it doesn’t overpower everything.
- Ground cumin (2 teaspoons) — This is the backbone of the fajita flavor. Don’t skip it.
- Smoked paprika (1 teaspoon) — Adds that deep, smoky note. Regular paprika works but won’t have the same punch.
- Garlic powder (1 teaspoon) — Not fresh garlic here. The powder coats better and won’t burn in the oven.
- Dried oregano (1/2 teaspoon) — Mexican oregano if you have it, but regular works fine.
- Salt (1 teaspoon) — I use kosher salt. Adjust based on your preference.
- Black pepper (1/2 teaspoon) — Freshly ground is always better.
For the Bowl Base
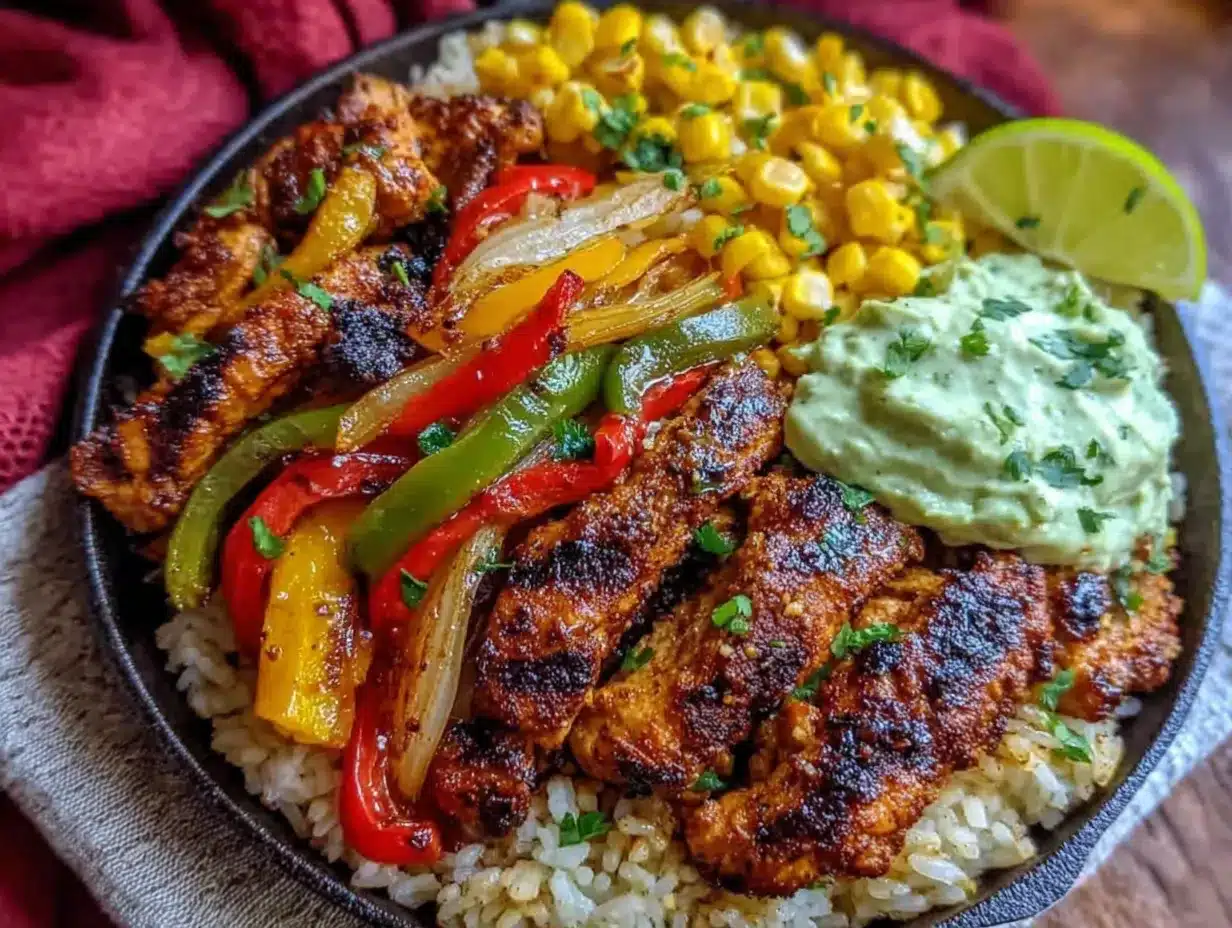
- Cooked white rice (2 cups, about 400g) — I use long-grain jasmine rice for its fluffy texture. Brown rice or cauliflower rice work great too.
- Black beans (1 can, 15 oz or 425g, drained and rinsed) — Adds protein and fiber. Pinto beans are a fine substitute.
- Corn kernels (1 cup, fresh or frozen) — If using frozen, no need to thaw first. Just toss them on.
For Topping (Optional but Recommended)
- Fresh avocado (1 large) — Sliced or cubed. Adds creaminess that balances the spice.
- Fresh lime juice (from 1 lime) — Brightens everything up right before serving.
- Fresh cilantro (1/4 cup, chopped) — For that final pop of freshness.
- Sour cream or Greek yogurt (for serving) — Cools down the heat if you like things spicy.
- Hot sauce (optional) — I like Cholula or Valentina for these bowls.
Equipment Needed
You don’t need a fancy kitchen to make these bowls work. Here’s what you’ll actually use:
- Large sheet pan (18×13 inches or similar) — A rimmed baking sheet is crucial. The rim catches all those delicious juices. No rim means a mess in your oven.
- Parchment paper or aluminum foil — For easy cleanup. Trust me, you want this. I learned the hard way.
- Chef’s knife — A sharp one makes slicing peppers and onions way less miserable.
- Cutting board — Preferably large enough to hold all your prepped veggies.
- Mixing bowls — One large for the chicken marinade, one small for the seasoning blend.
- Measuring spoons — For the spices. Eyeballing works if you’re confident, but measuring ensures consistency.
- Tongs — For flipping the chicken halfway through cooking. A spatula works too.
- Meat thermometer (optional but recommended) — Chicken thighs should hit 165°F (74°C) internally. I’ve overcooked enough chicken to know this tool is worth its weight in gold.
- Meal prep containers — 4 to 6 containers with tight-fitting lids. Glass is best for reheating, but BPA-free plastic works fine.
If you don’t have a meat thermometer, don’t stress. Cut into the thickest piece of chicken. If the juices run clear and there’s no pink, you’re good. I’ve done it that way for years before I finally bought a thermometer.
Preparation Method
Let’s get cooking. This whole process takes about 35 minutes, and most of it is hands-off. Here’s the step-by-step:
- Preheat your oven to 425°F (220°C). Line your sheet pan with parchment paper or aluminum foil. I prefer parchment because nothing sticks to it, but foil works and is usually cheaper.
- Make the seasoning blend. In a small bowl, combine 2 teaspoons chili powder, 2 teaspoons cumin, 1 teaspoon smoked paprika, 1 teaspoon garlic powder, 1/2 teaspoon dried oregano, 1 teaspoon salt, and 1/2 teaspoon black pepper. Stir it all together. Smell that? That’s dinner happening.
- Prep the chicken. Pat your chicken thighs dry with paper towels. This helps the seasoning stick and promotes browning. Trim off any excess fat if needed. Place the chicken in a large bowl and drizzle with 2 tablespoons of avocado oil. Sprinkle over about two-thirds of the seasoning blend. Toss everything together until the chicken is evenly coated. Set aside for a minute.
- Prep the vegetables. Slice your bell peppers into thin strips, about 1/4 inch wide. Slice the onion into thin wedges. Don’t worry about being perfect here. Just aim for even pieces so they cook at the same rate. Place the peppers and onions on the prepared sheet pan. Drizzle with the remaining 1 tablespoon of avocado oil and sprinkle with the remaining seasoning blend. Toss with your hands to coat everything evenly. Spread them out in a single layer.
- Arrange the chicken. Nestle the seasoned chicken thighs in among the peppers and onions. Don’t pile everything on top of each other. You want space between pieces so they roast, not steam. If things look crowded, use two sheet pans. Crowding is the enemy of browning.
- Roast for 20-25 minutes. Place the sheet pan in the preheated oven. After 15 minutes, use tongs to flip the chicken thighs. This ensures even cooking and browning. Return to the oven and roast for another 5-10 minutes, until the chicken reaches an internal temperature of 165°F (74°C) and the vegetables are tender with charred edges.
- Let the chicken rest. Remove the sheet pan from the oven. Transfer the chicken thighs to a cutting board and let them rest for 5 minutes. This is non-negotiable. Resting keeps the juices inside the meat instead of all over your cutting board. While the chicken rests, you can warm up your rice, beans, and corn.
- Slice the chicken. After resting, slice the chicken thighs against the grain into thin strips. You’ll see the natural lines in the meat. Cut perpendicular to those. This makes the meat more tender when you chew it.
- Assemble the bowls. Divide the cooked rice evenly among your meal prep containers. Top with black beans and corn. Add a generous portion of the roasted peppers and onions. Layer on the sliced chicken. If you’re eating right away, add fresh avocado, a squeeze of lime, and a sprinkle of cilantro. If you’re meal prepping, leave the avocado off until you’re ready to eat.
- Cool before sealing. Let the assembled bowls cool completely at room temperature before putting the lids on. This usually takes about 20-30 minutes. Sealing hot containers creates condensation, which leads to soggy rice and sad vegetables. Patience pays off here.
Cooking Tips & Techniques
I’ve made this recipe maybe twenty times now. Here’s what I’ve learned the hard way so you don’t have to:
Don’t overcrowd the pan. This is the number one mistake people make with sheet pan dinners. If everything is piled on top of each other, it steams instead of roasts. You lose that beautiful charred edge that makes fajitas taste like fajitas. If your pan looks crowded, use two pans or cook in batches. Your patience will be rewarded.
Cut vegetables uniformly. I know, I know. It’s meal prep, not culinary school. But uneven pieces mean some will be burnt while others are still crunchy. Take the extra minute to make them roughly the same size. Your future self will thank you.
Let the chicken come to room temperature. If you have time, let the seasoned chicken sit on the counter for 15 minutes before roasting. Cold chicken straight from the fridge takes longer to cook, which can dry out the edges before the center is done. Room temperature chicken cooks more evenly.
Use a meat thermometer. I resisted this for years. Thought I could tell by feel or by cutting into it. I was wrong so many times. A simple instant-read thermometer costs about ten bucks and guarantees perfectly cooked chicken every time. Chicken thighs are done at 165°F (74°C). Pull them out at that temperature and they’ll be juicy every single time.
Toast your rice. If you’re cooking rice from scratch for these bowls, try toasting it in a bit of oil before adding water. It takes an extra three minutes but adds a nutty flavor that makes the bowls taste way more elevated. I do this with jasmine rice and it’s a game changer.
Double the batch. The oven is already hot. The sheet pan is already dirty. You might as well make twice as much chicken and vegetables. Use the extra for tacos later in the week, or toss it into a salad for lunch the next day. Efficiency is the name of the game here.
Variations & Adaptations
One of the best things about this recipe is how flexible it is. Here are some ways to make it your own:
Make it low-carb or keto. Skip the rice entirely and use cauliflower rice instead. Load up on extra vegetables and top with plenty of avocado and sour cream. The chicken and veggies are already low-carb friendly. This version is incredibly satisfying without the carbs.
Go vegetarian. Swap the chicken for extra firm tofu, portobello mushrooms, or canned jackfruit. Tofu needs to be pressed and cubed. Mushrooms can be sliced thick. Jackfruit should be drained and shredded. Use the same seasoning blend and roasting method. You’ll get a completely different but equally delicious meal.
Change up the protein. This recipe works beautifully with shrimp (cook for 8-10 minutes instead), flank steak (slice thin against the grain), or even ground turkey (cook in a skillet instead of roasting). Each protein brings its own personality to the bowl. I’ve done all three and honestly can’t pick a favorite.
Add more vegetables. Zucchini, yellow squash, cherry tomatoes, and even broccoli all roast beautifully alongside the peppers and onions. Just cut them to a similar size so everything cooks evenly. More vegetables mean more color, more nutrients, and more flavor.
Spice it up or down. If you like things hot, add a diced jalapeño to the vegetables before roasting, or stir a teaspoon of cayenne into the seasoning blend. If you’re cooking for kids or spice-sensitive folks, reduce the chili powder to 1 teaspoon and skip the cayenne. The recipe is forgiving either way.
Make it a burrito bowl. Swap the rice for warm tortillas and turn everything into soft tacos. Or add a scoop of refried beans and some shredded cheese for a fully loaded burrito situation. The possibilities are endless, and that’s the beauty of a good base recipe.
Serving & Storage Suggestions
These bowls are designed for meal prep, but they’re also fantastic served fresh. Here’s how to handle both situations:
Serving fresh: Serve the bowls warm, right after assembling. Top with fresh avocado slices, a generous squeeze of lime juice, a sprinkle of cilantro, and a dollop of sour cream or Greek yogurt. If you want extra crunch, add some crushed tortilla chips or toasted pepitas on top. The contrast between the warm, smoky fajita filling and the cool, creamy toppings is absolutely perfect.
Storing for meal prep: Let the bowls cool completely before sealing. Store in airtight containers in the refrigerator for up to 5 days. Keep the avocado, lime, cilantro, and sour cream separate until you’re ready to eat. These fresh elements don’t hold up well over time. I usually prep everything else on Sunday and add the fresh toppings each morning before heading to work.
Freezing instructions: These bowls freeze beautifully for up to 3 months. Assemble without the fresh toppings, let cool completely, then freeze in individual containers. To reheat, thaw overnight in the refrigerator, then microwave for 2-3 minutes or reheat in a skillet over medium heat. The peppers and onions might lose a tiny bit of texture, but the flavor is still outstanding.
Reheating tips: Microwave is the fastest option. Reheat for 1-2 minutes, stir, then another 30 seconds if needed. For better texture, reheat in a skillet over medium heat with a splash of water or chicken broth. Cover the skillet to trap steam and revive the vegetables. This takes about 5 minutes but makes the bowls taste almost as good as fresh. The flavors actually deepen and meld together after a day or two in the fridge. Day 2 bowls are often better than Day 1 bowls. Don’t skip the fresh lime and cilantro when you reheat. That final pop of brightness makes all the difference.
What to serve alongside: These bowls are a complete meal on their own, but they pair beautifully with a simple side salad dressed with lime vinaigrette. If you’re feeding a crowd, set up a DIY fajita bar with warm tortillas, shredded cheese, pickled onions, and extra hot sauce. Let everyone build their own bowl. It’s always a hit.
Nutritional Information & Benefits
Here’s the estimated nutritional breakdown for one bowl (using white rice, chicken thighs, and all the toppings except sour cream):
| Nutrient | Amount Per Serving |
|---|---|
| Calories | 485 |
| Protein | 38g |
| Carbohydrates | 42g |
| Fiber | 8g |
| Fat | 18g |
| Saturated Fat | 4g |
| Sodium | 720mg |
These bowls are packed with protein from the chicken and black beans, which helps keep you full and satisfied for hours. The bell peppers are loaded with vitamin C — actually more than an orange by weight. The cumin and chili powder aren’t just for flavor; they have anti-inflammatory properties that are great for digestion. And the healthy fats from the avocado support brain function and help your body absorb fat-soluble vitamins from the vegetables.
If you’re watching your sodium, reduce the salt in the seasoning blend to 1/2 teaspoon and use low-sodium black beans. You’ll still get plenty of flavor from the spices. For a lower-calorie option, swap chicken thighs for breasts and use cauliflower rice instead of white rice. You’ll save about 150 calories per serving without sacrificing much in the way of satisfaction.
These bowls are naturally gluten-free and can be made dairy-free by skipping the sour cream or using a dairy-free alternative. They’re also easily adaptable for Whole30 by omitting the rice and beans and doubling up on vegetables. This is a meal that works for almost any dietary preference.
Conclusion
These Easy Sheet Pan Chicken Fajita Bowls for Meal Prep have genuinely changed how I approach my week. No more sad desk lunches or expensive takeout. No more staring into the fridge wondering what to eat. Just delicious, satisfying bowls that make me feel like I’ve got my act together. And honestly? That feeling is worth every minute of Sunday prep.
I love this recipe because it’s proof that meal prep doesn’t have to be boring. You can eat well, eat deliciously, and still have time for the things that actually matter. The smoky char on the peppers, the juicy chicken, the fresh pop of lime and cilantro — it all comes together in a way that feels like a treat, not a chore.
Now I want to hear from you. Have you tried these bowls? Did you add your own twist? Drop a comment below and let me know how they turned out. And if you loved them, share this recipe with a friend who needs a little meal prep inspiration. Trust me, they’ll thank you when Wednesday lunch rolls around. Happy cooking, friends!
Frequently Asked Questions
Can I use chicken breasts instead of thighs?
Absolutely. Chicken breasts work fine, but they cook faster and can dry out more easily. Reduce the roasting time by about 5 minutes and check the internal temperature at 160°F (71°C). Let them rest for 5 minutes; the temperature will rise to 165°F (74°C) during resting. Slice against the grain for the most tender results.
How long do these bowls last in the fridge?
Stored properly in airtight containers, these bowls stay fresh for up to 5 days. The flavors actually get better after a day or two as the spices meld together. Just keep the avocado, lime, and fresh herbs separate until you’re ready to eat. If you notice any off smells or sliminess, toss them. Better safe than sorry.
Can I freeze these fajita bowls?
Yes! These bowls freeze beautifully for up to 3 months. Assemble without the fresh toppings, let cool completely, then freeze in individual containers. To reheat, thaw overnight in the refrigerator and microwave for 2-3 minutes. The peppers might lose a tiny bit of crunch, but the flavor remains outstanding. I often double the batch and freeze half for busy weeks.
What can I use instead of rice?
Cauliflower rice is the most popular low-carb substitute. You can also use quinoa, farro, or even cooked lentils for extra fiber and protein. For a completely different texture, try warm corn tortillas on the side and make soft tacos instead of bowls. The fajita filling works beautifully in any format.
How do I prevent the chicken from drying out?
Three things: use chicken thighs instead of breasts, don’t overcook them (use a meat thermometer!), and let them rest for 5 minutes before slicing. The resting step is crucial. It allows the juices to redistribute throughout the meat rather than spilling out onto your cutting board. Also, patting the chicken dry before seasoning helps create a nice crust that seals in moisture.
Pin This Recipe!
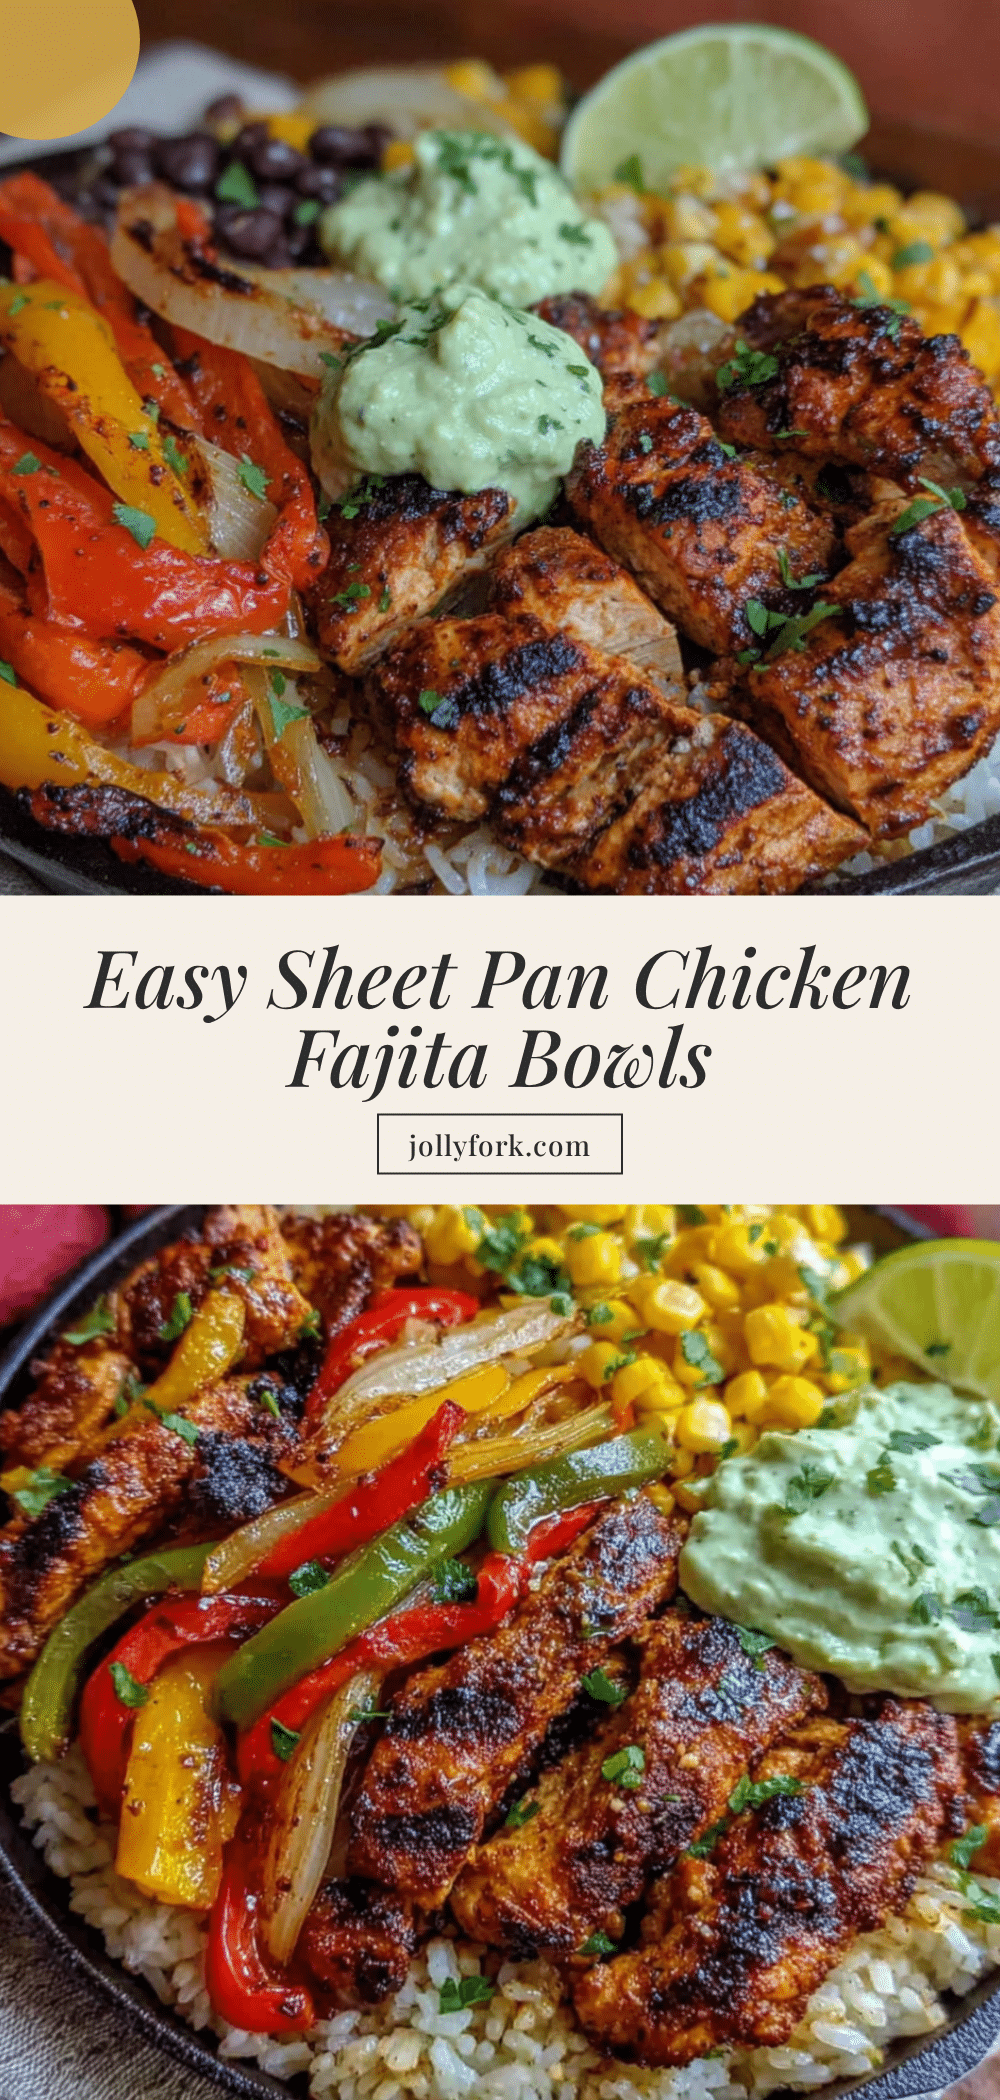
Easy Sheet Pan Chicken Fajita Bowls: Best Meal Prep
These Easy Sheet Pan Chicken Fajita Bowls are the ultimate meal prep solution, featuring smoky, charred peppers and onions, juicy spiced chicken thighs, and all your favorite toppings. Ready in 35 minutes, they’re perfect for busy weeks and reheat beautifully.
- Prep Time: 15 minutes
- Cook Time: 25 minutes
- Total Time: 40 minutes
- Yield: 4 servings 1x
- Category: Main Course
- Cuisine: Mexican
Ingredients
- 1.5 lbs (680g) boneless, skinless chicken thighs
- 3 large bell peppers (mixed colors), sliced into thin strips
- 1 large yellow onion, sliced into thin wedges
- 3 tablespoons avocado oil
- 2 teaspoons chili powder
- 2 teaspoons ground cumin
- 1 teaspoon smoked paprika
- 1 teaspoon garlic powder
- 1/2 teaspoon dried oregano
- 1 teaspoon kosher salt
- 1/2 teaspoon black pepper
- 2 cups cooked white rice (about 400g)
- 1 can (15 oz or 425g) black beans, drained and rinsed
- 1 cup corn kernels (fresh or frozen)
- 1 large avocado, sliced or cubed (for topping)
- Fresh lime juice (from 1 lime)
- 1/4 cup fresh cilantro, chopped
- Sour cream or Greek yogurt (for serving, optional)
- Hot sauce (optional)
Instructions
- Preheat your oven to 425°F (220°C). Line a large sheet pan with parchment paper or aluminum foil.
- In a small bowl, combine chili powder, cumin, smoked paprika, garlic powder, oregano, salt, and black pepper to make the seasoning blend.
- Pat chicken thighs dry with paper towels. Trim excess fat. Place in a large bowl, drizzle with 2 tablespoons avocado oil, and sprinkle with about two-thirds of the seasoning blend. Toss to coat evenly.
- Slice bell peppers into thin strips (about 1/4 inch wide) and onion into thin wedges. Place on the prepared sheet pan. Drizzle with remaining 1 tablespoon avocado oil and sprinkle with remaining seasoning blend. Toss to coat and spread in a single layer.
- Nestle the seasoned chicken thighs among the peppers and onions, ensuring space between pieces for even roasting.
- Roast for 20-25 minutes. After 15 minutes, flip the chicken thighs using tongs. Continue roasting until chicken reaches an internal temperature of 165°F (74°C) and vegetables are tender with charred edges.
- Remove sheet pan from oven. Transfer chicken to a cutting board and let rest for 5 minutes.
- Slice chicken thighs against the grain into thin strips.
- Assemble bowls: Divide cooked rice among meal prep containers. Top with black beans, corn, roasted peppers and onions, and sliced chicken. If eating immediately, add fresh avocado, lime juice, and cilantro. For meal prep, leave avocado off until ready to eat.
- Let assembled bowls cool completely at room temperature (about 20-30 minutes) before sealing with lids. Store in the refrigerator for up to 5 days.
Notes
Don’t overcrowd the pan to ensure proper browning. Let chicken come to room temperature for 15 minutes before roasting for even cooking. Use a meat thermometer for perfectly cooked chicken. For meal prep, keep avocado, lime, and cilantro separate until serving. Bowls can be frozen for up to 3 months.
Nutrition
- Serving Size: 1 bowl
- Calories: 485
- Sugar: 6
- Sodium: 720
- Fat: 18
- Saturated Fat: 4
- Carbohydrates: 42
- Fiber: 8
- Protein: 38
Keywords: sheet pan chicken fajita bowls, meal prep, chicken fajitas, easy dinner, healthy meal prep, gluten-free, high protein


