I wasn’t expecting meal prep advice from my plumber, but there I was, knee-deep in a kitchen sink crisis, listening to Marco explain exactly how to make freezer burritos that don’t turn into soggy disasters. He was on his hands and knees under my sink, wrench in hand, when he started talking about his Sunday ritual of making fifty burritos at a time for his construction crew. Honestly, I was just trying to figure out how to pay for the emergency visit, and instead, I got a life-changing lesson in freezer-friendly cooking.
Marco told me the secret wasn’t in the filling—it was in how you wrap them and what you leave out. “No salsa inside,” he said, shaking his head. “That’s amateur hour. You put the salsa on the side when you eat it, or you’re eating a wet sock.” He had a point. His crew devoured these things every day for lunch, and they’d been doing it for years without a single complaint. I scribbled his instructions on a soggy napkin while he finished fixing the pipe, and let me tell you, I’ve been making these Quick Freezer Turkey Black Bean Burritos ever since.
The first batch I made was a complete mess—too much filling, not enough wrapping, and I forgot to squeeze out the excess moisture from the beans. But Marco’s core advice held up, and by the third try, I had it down. These burritos have saved me on countless weeknights when I had zero energy to cook. Maybe you’ve been there, staring into an empty fridge at 6 PM, wondering how you’re going to get dinner on the table. That’s exactly why this recipe stayed with me. It’s not fancy, it’s not complicated, but it works every single time.
Why You’ll Love This Recipe
I’ve tested this recipe more times than I can count, tweaking the seasoning ratios and testing different wrapping techniques to find what actually holds up in the freezer. Here’s what makes these burritos stand out from the rest:
- Quick & Easy: From start to finish, these come together in under 30 minutes. That includes cooking the filling, assembling the burritos, and getting them into the freezer. Perfect for a Sunday afternoon when you want to prep for the week ahead.
- Simple Ingredients: No fancy grocery trips needed here. Ground turkey, canned black beans, rice, cheese, and basic spices—you probably have most of this in your pantry right now.
- Perfect for Busy Weeknights: When you’re exhausted after work and the last thing you want to do is cook, just grab a burrito from the freezer, microwave it for two minutes, and dinner is done.
- Crowd-Pleaser: My kids devour these, my husband packs them for lunch, and even my picky mother-in-law asked for the recipe. They’re just that good.
- Unbelievably Delicious: The combination of seasoned turkey, creamy black beans, melted cheese, and that slight crispiness from the tortilla—it’s comfort food that actually makes you feel good.
What makes this recipe different is the technique. Most freezer burrito recipes end up with soggy tortillas or dry filling. I’ve figured out the exact moisture balance—draining and rinsing the beans, letting the turkey cool slightly before assembling, and using the double-wrap method that Marco taught me. This isn’t just another burrito recipe; it’s your best version of a weeknight lifesaver.
What Ingredients You Will Need
This recipe uses simple, wholesome ingredients to deliver bold flavor and satisfying texture without the fuss. Most of these are pantry staples you probably already have on hand.
- Ground turkey (1 lb / 450g) – I prefer 93% lean for the best balance of flavor and moisture. Too lean and the filling gets dry; too fatty and it gets greasy after freezing.
- Black beans (15 oz / 425g can, drained and rinsed) – Canned is totally fine here. Just make sure you rinse them well to remove excess sodium and that slimy can liquid.
- Cooked rice (1 cup / 180g) – Day-old rice works best because it’s drier and won’t make the filling mushy. I usually make extra rice earlier in the week just for this.
- Shredded cheese (1 cup / 120g) – Cheddar, Monterey Jack, or a Mexican blend all work great. Pre-shredded is fine in a pinch, but freshly shredded melts better.
- Yellow onion (1 medium, diced) – Adds that savory base flavor. You could use white onion if that’s what you have.
- Garlic (3 cloves, minced) – Fresh garlic makes a real difference here. Skip the jarred stuff if you can.
- Chili powder (2 teaspoons) – This is the backbone of the seasoning. I use McCormick for consistent heat and flavor.
- Cumin (1 teaspoon) – Adds that warm, earthy note that makes burritos taste authentic.
- Smoked paprika (1 teaspoon) – Optional but highly recommended. It adds a subtle smokiness that elevates the whole thing.
- Salt and pepper (to taste) – Don’t skip the salt—it brings all the flavors together.
- Flour tortillas (8-10, burrito size) – Look for ones that are at least 10 inches. Smaller tortillas won’t hold enough filling and will tear when you wrap them.
- Olive oil (2 tablespoons) – For cooking the turkey and onions.
- Optional mix-ins: Corn kernels (frozen or canned), diced bell peppers, chopped cilantro, or a squeeze of lime juice for brightness.
Substitution guidance: Use ground chicken or beef instead of turkey. Swap black beans with pinto or kidney beans. For a dairy-free version, use vegan cheese or skip it entirely. Brown rice works just as well as white rice.
Equipment Needed
You don’t need a fancy kitchen to make these burritos. Here’s what you’ll actually use:
- Large skillet or frying pan (12-inch is ideal) – For cooking the turkey and onions. A non-stick pan makes cleanup easier, but stainless steel works fine too.
- Mixing bowl (medium size) – For combining the filling ingredients before assembling.
- Cutting board and knife – For dicing the onion and mincing the garlic.
- Measuring spoons and cups – For the spices and rice.
- Can opener – Unless you’re using the pull-tab cans.
- Spatula or wooden spoon – For stirring the filling.
- Baking sheet (optional but helpful) – For lining up the assembled burritos before freezing. A large plate works too.
- Parchment paper or wax paper – For wrapping the burritos individually. I’ve used aluminum foil in a pinch, but parchment is easier to microwave.
- Freezer-safe bag or container – For storing the wrapped burritos.
If you don’t have a large skillet, you can use a pot or even an electric griddle. The key is having enough surface area to cook the turkey evenly. And honestly, I’ve wrapped burritos on a cutting board balanced on my lap while watching TV—it’s not pretty, but it works.
Preparation Method
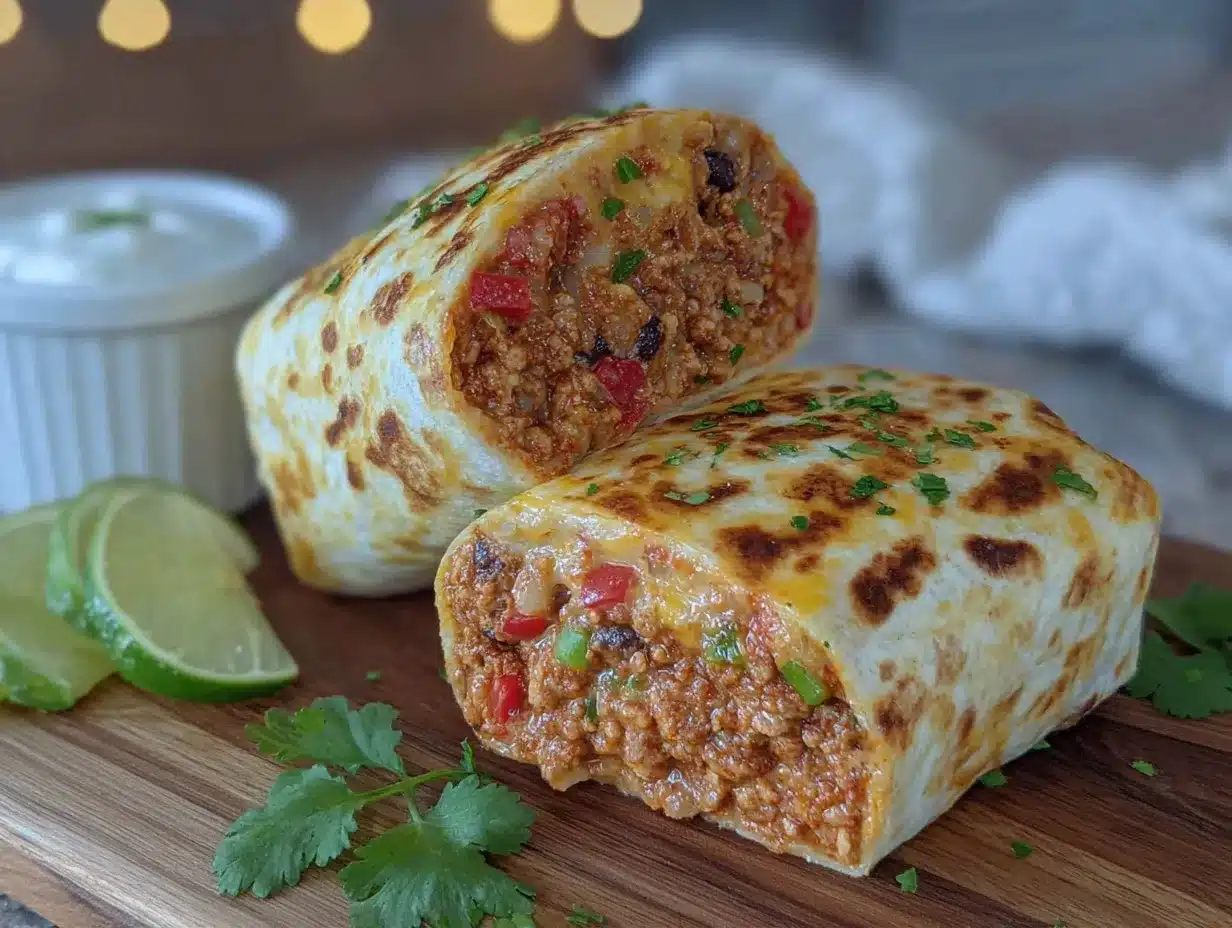
- Cook the rice first (if you don’t have leftover rice). Bring 1 cup of rice and 2 cups of water to a boil, then reduce heat, cover, and simmer for 15-18 minutes until tender. Fluff with a fork and let it cool slightly. You want it at room temperature before mixing it into the filling.
- Heat the oil in a large skillet over medium-high heat. Add the diced onion and cook for 3-4 minutes until it starts to soften and turn translucent. You should hear a gentle sizzle—that’s the sound of flavor developing.
- Add the ground turkey to the skillet. Break it apart with your spatula and cook for 6-8 minutes, stirring occasionally, until it’s no longer pink. Don’t rush this step—browning adds flavor. If there’s excess liquid, let it cook off.
- Add the garlic and spices once the turkey is cooked through. Stir in the minced garlic, chili powder, cumin, smoked paprika, salt, and pepper. Cook for another minute until the kitchen smells incredible. The garlic should be fragrant but not burnt.
- Stir in the black beans and rice. Reduce the heat to low and fold everything together gently. Let it cook for 2-3 minutes so the flavors meld. Taste and adjust seasoning—this is your last chance before assembly.
- Remove from heat and let the filling cool for 5-10 minutes. This is crucial. If you try to wrap hot filling, the steam will make the tortillas soggy and they’ll fall apart in the freezer. I learned this the hard way with my first batch.
- Stir in the shredded cheese once the filling has cooled slightly. The residual heat will melt it just enough to make everything cohesive without turning it into a greasy mess.
- Prepare your assembly station. Lay out your tortillas, a spoonful of filling, and a piece of parchment paper for each burrito. I usually set up an assembly line on my kitchen counter.
- Assemble the burritos. Place a tortilla on a flat surface. Spoon about 1/2 cup of filling into the center, spreading it into a log shape. Fold the sides inward, then fold the bottom flap over the filling, tuck it tightly, and roll it up like a tight package. The goal is a snug, even roll with no gaps.
- Wrap each burrito in parchment paper. Cut a piece of parchment about 12 inches square, place the burrito seam-side down in the center, and fold the paper around it like you’re wrapping a present. Tape the edge if you’re feeling fancy, but I just tuck it under.
- Place the wrapped burritos on a baking sheet and freeze for 1-2 hours until solid. This prevents them from sticking together in the storage bag.
- Transfer to a freezer-safe bag, label with the date, and squeeze out as much air as possible before sealing. They’ll keep for up to 3 months, but honestly, they never last that long in my house.
Cooking Tips & Techniques
After making these burritos more times than I can count, I’ve learned a few things the hard way. Here’s what I wish someone had told me from the start:
Don’t skip the cooling step. I know you’re hungry and want to get these wrapped up fast, but hot filling creates steam, and steam creates soggy tortillas. Let the filling cool until it’s warm but not hot—about the temperature of a warm bath. Your burritos will thank you.
Watch your moisture levels. The biggest mistake people make with freezer burritos is adding too many wet ingredients. Salsa, sour cream, fresh tomatoes—these all release water when frozen and thawed, turning your burrito into a sad, mushy mess. Keep those for serving day.
Use the right tortilla size. I once tried using smaller tortillas because that’s what I had in the fridge. Big mistake. They tore, the filling leaked out, and I ended up with a burrito bowl instead of a burrito. Stick with 10-inch tortillas minimum.
Double-wrap for extra protection. If you’re planning to keep these in the freezer for more than a few weeks, wrap each burrito in parchment paper, then again in aluminum foil. It’s overkill for short-term storage, but it prevents freezer burn like a charm.
Reheat from frozen, not thawed. Microwave a frozen burrito for 2-3 minutes, flipping halfway through. If you thaw it first, the tortilla gets chewy and the filling gets mushy. Straight from the freezer to the microwave is the way to go.
Variations & Adaptations
One of the best things about this recipe is how flexible it is. Here are some variations I’ve tried and loved:
Spicy Southwest version: Add a diced jalapeño with the onions, stir in a can of drained corn, and use pepper jack cheese instead of cheddar. The heat builds nicely without being overwhelming.
Vegetarian option: Swap the ground turkey for an extra can of black beans plus a cup of cooked quinoa or cauliflower rice. The texture is different but just as satisfying. I made this for my vegetarian sister and she didn’t miss the meat at all.
Low-carb adaptation: Use large lettuce leaves or low-carb tortillas instead of flour tortillas. The filling itself is already pretty healthy—just watch the cheese quantity if you’re watching calories.
Breakfast burrito twist: Add scrambled eggs and breakfast sausage instead of turkey, and use hash browns instead of rice. These freeze just as well and make for an incredible grab-and-go breakfast.
Cheesy enchilada style: Instead of freezing them plain, place the assembled burritos in a baking dish, cover with enchilada sauce and extra cheese, and bake at 375°F for 20 minutes. It’s a completely different dish but equally delicious.
Serving & Storage Suggestions
These burritos are designed to be eaten straight from the freezer, but here’s how to make the most of them:
Serving: Microwave a frozen burrito for 2-3 minutes, flipping halfway through. Let it rest for 1 minute before eating—the filling is volcanic hot. For a crispy exterior, unwrap the reheated burrito and toast it in a dry skillet for 1-2 minutes per side.
What to serve with them: A dollop of sour cream, fresh salsa, guacamole, or hot sauce. A simple side salad with lime dressing rounds out the meal nicely. If you have more time, Mexican rice or refried beans make it a feast.
Storage: Freeze the wrapped burritos in a single layer on a baking sheet until solid, then transfer to a freezer bag. They’ll keep for up to 3 months. Label the bag with the date and filling type—trust me, frozen burritos all look the same after a week.
Reheating from the fridge: If you’ve thawed a burrito overnight in the refrigerator, microwave it for 1-2 minutes or reheat in a 350°F oven for 10-15 minutes. The texture won’t be quite as good as frozen-to-microwave, but it’s still perfectly edible.
Make-ahead tip: You can prep the filling up to 3 days in advance and keep it in the fridge. Assemble and freeze the burritos when you’re ready. This breaks the work into manageable chunks for busy weeks.
Nutritional Information & Benefits
Per burrito (approximate, based on 8 servings):
- Calories: 380
- Protein: 28g
- Carbohydrates: 35g
- Fat: 14g
- Fiber: 8g
- Sodium: 650mg
These burritos pack a serious nutritional punch. The ground turkey provides lean protein that keeps you full and satisfied without the saturated fat of beef. Black beans are loaded with fiber and plant-based protein, plus they’re great for heart health. The rice adds complex carbohydrates for sustained energy, and the cheese contributes calcium for strong bones.
This recipe is naturally gluten-free if you use corn tortillas or certified gluten-free flour tortillas. It’s also easy to make dairy-free by skipping the cheese or using a plant-based alternative. For a lower-carb option, swap the rice for cauliflower rice and use low-carb tortillas.
One thing I love about these burritos is that they feel indulgent but are actually pretty balanced. You get the comfort food experience without the guilt, and the portion control is built right in.
Conclusion
These Quick Freezer Turkey Black Bean Burritos have genuinely changed how I handle busy weeknights. When I’m tired, hungry, and tempted to order takeout, knowing there’s a homemade burrito waiting in the freezer makes all the difference. They’re proof that meal prep doesn’t have to be complicated or boring—just practical and delicious.
I’d love for you to try this recipe and make it your own. Adjust the spices, swap in your favorite beans, or add whatever vegetables you have on hand. The beauty of this recipe is that it’s forgiving and flexible. If you try it, drop a comment below and let me know how it turned out. Did you add something unexpected? Did your kids actually eat it? I want to hear it all. Happy cooking, and may your freezer always be stocked with something good.
Frequently Asked Questions
Can I use ground beef instead of turkey?
Absolutely. Ground beef works perfectly in this recipe. Just drain off any excess fat after cooking to keep the filling from getting greasy. Ground chicken or pork would also work well.
How long do these burritos last in the freezer?
Properly wrapped and stored in a freezer-safe bag, these burritos will stay fresh for up to 3 months. After that, they’re still safe to eat but the texture might start to decline. I recommend labeling them with the date so you know which ones to eat first.
Can I add vegetables to the filling?
Yes, but be careful with moisture. Diced bell peppers, corn, or zucchini are great options. Just sauté them with the onions to cook off some of the water before adding the turkey. Avoid adding fresh tomatoes or salsa to the filling—save those for serving.
How do I reheat a burrito without a microwave?
If you don’t have a microwave, thaw the burrito overnight in the refrigerator, then reheat it in a 350°F oven for 10-15 minutes. You can also unwrap it and reheat it in a dry skillet over medium heat, turning frequently, until heated through and crispy on the outside.
Can I make these burritos dairy-free?
Definitely. Just skip the cheese or use a dairy-free alternative. The filling will still be flavorful and satisfying without it. You might want to add a little extra seasoning to compensate for the lost flavor from the cheese.
Pin This Recipe!
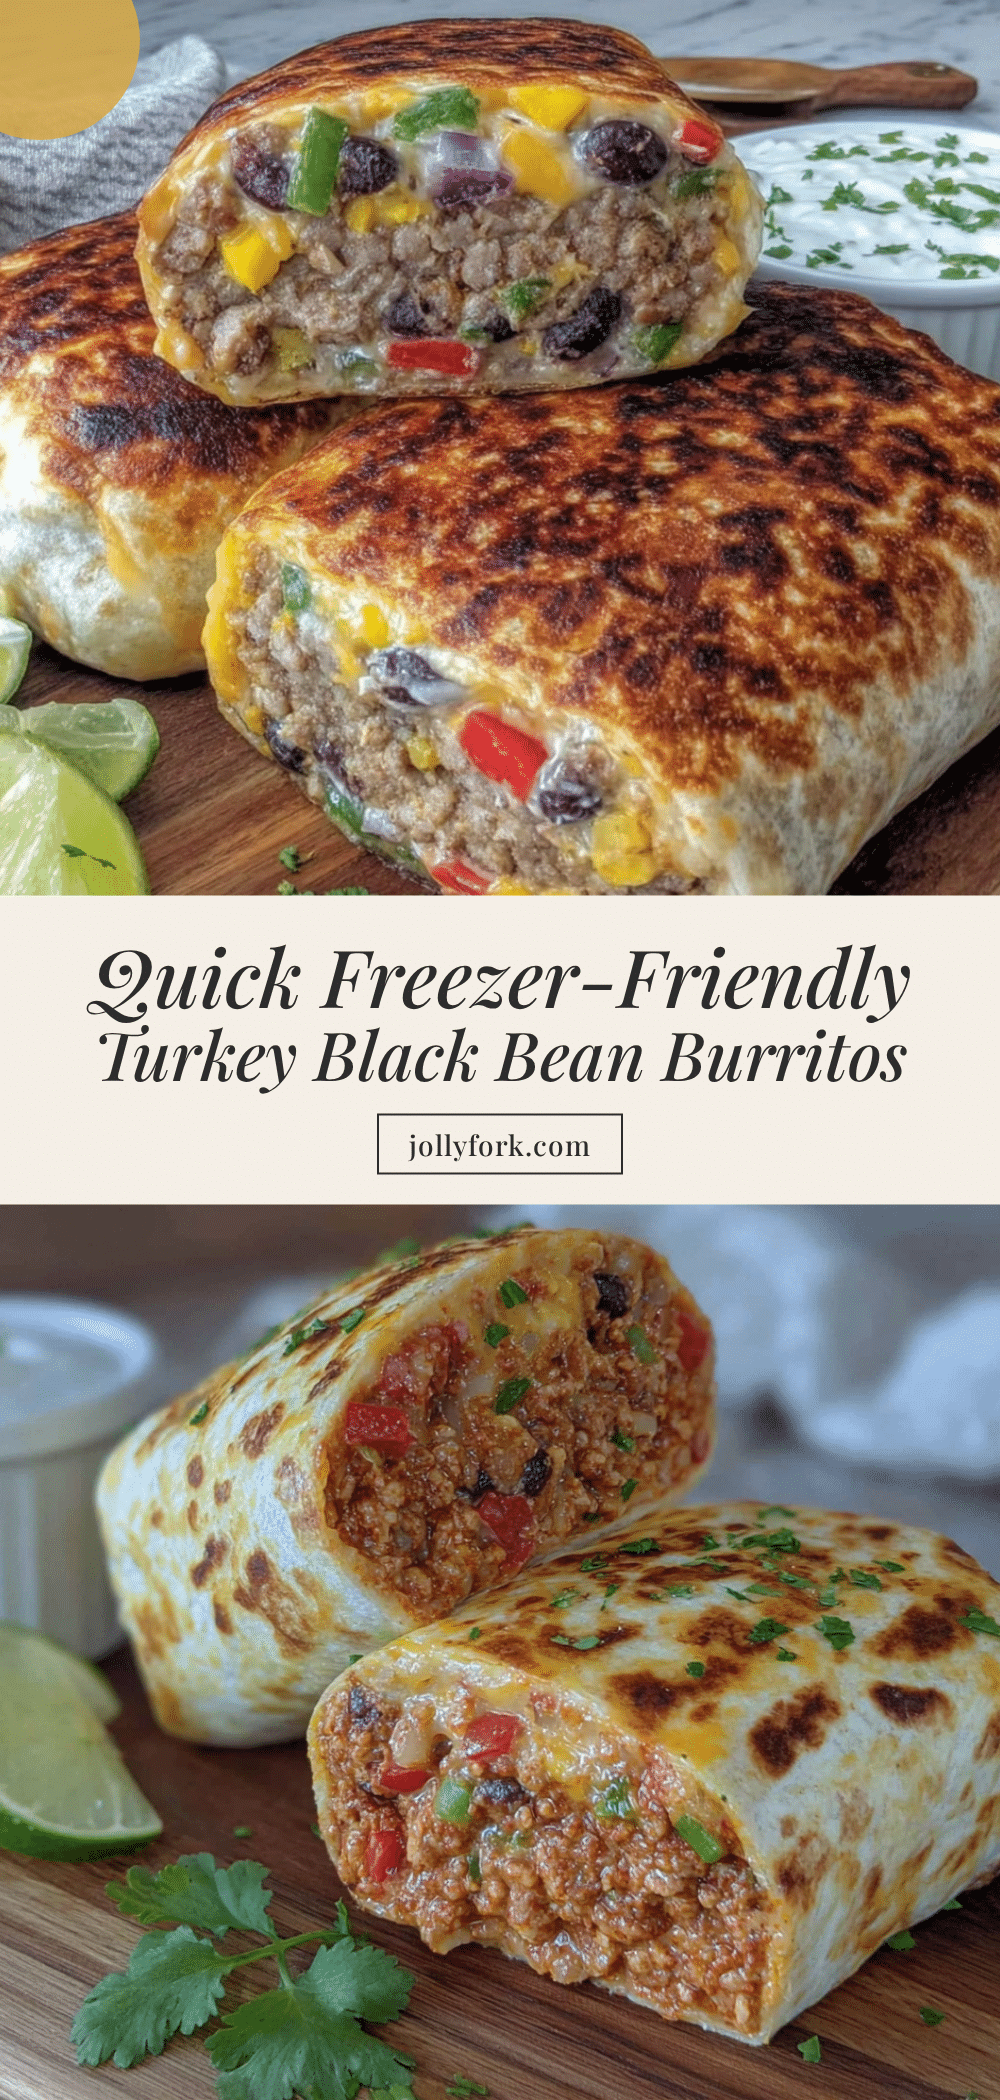
Quick Freezer Turkey Black Bean Burritos: Easy Meal Prep
These freezer-friendly burritos are packed with seasoned ground turkey, black beans, rice, and cheese, wrapped in a flour tortilla. Perfect for busy weeknights, they reheat from frozen in minutes for a satisfying, homemade meal.
- Prep Time: 15 minutes
- Cook Time: 15 minutes
- Total Time: 30 minutes
- Yield: 8 servings 1x
- Category: Main Course
- Cuisine: Mexican
Ingredients
- 1 lb (450g) ground turkey (93% lean recommended)
- 15 oz (425g) can black beans, drained and rinsed
- 1 cup (180g) cooked rice (day-old preferred)
- 1 cup (120g) shredded cheese (cheddar, Monterey Jack, or Mexican blend)
- 1 medium yellow onion, diced
- 3 cloves garlic, minced
- 2 teaspoons chili powder
- 1 teaspoon cumin
- 1 teaspoon smoked paprika (optional)
- Salt and pepper to taste
- 8–10 flour tortillas (burrito size, at least 10 inches)
- 2 tablespoons olive oil
- Optional mix-ins: corn kernels, diced bell peppers, chopped cilantro, lime juice
Instructions
- Cook the rice first if you don’t have leftover rice. Bring 1 cup of rice and 2 cups of water to a boil, then reduce heat, cover, and simmer for 15-18 minutes until tender. Fluff with a fork and let it cool slightly.
- Heat the olive oil in a large skillet over medium-high heat. Add the diced onion and cook for 3-4 minutes until softened and translucent.
- Add the ground turkey to the skillet. Break it apart with a spatula and cook for 6-8 minutes, stirring occasionally, until no longer pink. Let any excess liquid cook off.
- Add the minced garlic, chili powder, cumin, smoked paprika, salt, and pepper. Cook for another minute until fragrant.
- Stir in the black beans and cooked rice. Reduce heat to low and cook for 2-3 minutes, allowing flavors to meld. Taste and adjust seasoning.
- Remove from heat and let the filling cool for 5-10 minutes. This prevents soggy tortillas.
- Stir in the shredded cheese once the filling has cooled slightly. The residual heat will melt it just enough.
- Prepare your assembly station with tortillas, filling, and parchment paper squares (about 12 inches each).
- Assemble each burrito: Place a tortilla on a flat surface. Spoon about 1/2 cup of filling into the center, spreading it into a log shape. Fold the sides inward, then fold the bottom flap over the filling, tuck tightly, and roll up like a tight package.
- Wrap each burrito in parchment paper, placing it seam-side down in the center and folding the paper around it like a present.
- Place the wrapped burritos on a baking sheet and freeze for 1-2 hours until solid.
- Transfer to a freezer-safe bag, label with the date, and squeeze out as much air as possible before sealing. Store for up to 3 months.
Notes
Don’t skip the cooling step—hot filling creates steam and soggy tortillas. Avoid adding wet ingredients like salsa or sour cream to the filling; serve them on the side. Use 10-inch tortillas minimum to prevent tearing. For longer storage, double-wrap in parchment paper then aluminum foil. Reheat from frozen in the microwave for 2-3 minutes, flipping halfway through.
Nutrition
- Serving Size: 1 burrito
- Calories: 380
- Sugar: 3
- Sodium: 650
- Fat: 14
- Saturated Fat: 5
- Carbohydrates: 35
- Fiber: 8
- Protein: 28
Keywords: freezer burritos, turkey black bean burritos, meal prep, quick dinner, freezer-friendly, healthy burritos


