The kind of rain that doesn’t just fall—it settles into your bones. I’d spent the day fighting with a spreadsheet that kept auto-correcting my numbers into something nonsensical, and honestly, by the time I finally shut my laptop, I was running on fumes and frustration. I didn’t have the energy for a production, but I had this deep, almost primal need for mashed potatoes. Not just any mashed potatoes, though. The kind that feel like someone wrapped a warm blanket around your soul.
The problem? I only had three sad potatoes rolling around in the crisper drawer. And no cream. And my butter was frozen solid because I forgot to take it out that morning. A normal person would have ordered takeout. Me? I spotted a head of garlic that was starting to look a little desperate on the counter, and a weird, late-night idea took hold. I’d roast that garlic until it was practically jam, mash those three lonely potatoes with some milk I was praying hadn’t soured, and see what happened. It was 11:47 PM on a rainy Tuesday, and I was about to make the best mistake of my culinary life.
Let me tell you, something magical happens when you’re not trying to impress anyone. You take risks. You don’t measure things. You just go with what feels right. And that night, with rain drumming against the window and the kitchen lit only by the stove light, I stumbled onto something so good it almost made me cry. Or maybe I was just tired. Either way, these Cozy Roasted Garlic Mashed Potatoes became my go-to comfort food from that moment on. I mean, I’ve made them dozens of times since, and they never fail to hit that exact spot. Maybe you’ve been there—needing a dish that doesn’t ask for much but gives everything back.
Why You’ll Love This Recipe
Look, I’m not one to brag about my own cooking, but these mashed potatoes? They’re the kind of side dish that steals the show. I’ve brought them to potlucks where people actually asked for the recipe before touching the main course. And the best part? They’re deceptively simple to make.
- Quick & Easy : From start to table in about 45 minutes, with most of that time being hands-off while the garlic roasts. Perfect for those nights when you need comfort food fast.
- Simple Ingredients : Potatoes, garlic, butter, milk, and a few pantry staples. That’s it. No fancy grocery runs required.
- Perfect for Cozy Nights : Whether it’s a rainy Tuesday, a snowy Sunday, or just a day that didn’t go your way, these potatoes are the edible equivalent of a deep sigh.
- Crowd-Pleaser : I’ve served these to picky kids, dairy-free friends (with a quick swap), and my grandmother who thinks she’s tried every mashed potato recipe in existence. They all went back for seconds.
- Unbelievably Delicious : The roasted garlic adds this sweet, nutty depth that you just can’t get from raw garlic. It’s subtle enough to not overpower, but present enough to make you wonder why you haven’t been doing this your whole life.
What makes this recipe different from the rest? It’s the method. Most people either boil their garlic with the potatoes (which makes it bitter) or skip it entirely. Roasting the garlic separately until it’s golden and caramelized transforms it into something almost candy-like. Then you mash it right into the potatoes, and the flavor just melts through every bite. It’s comfort food reimagined—a little bit fancy, a lot cozy, and completely soul-soothing.
What Ingredients You Will Need
This recipe uses simple, wholesome ingredients to deliver bold flavor and satisfying texture without the fuss. Most of these are probably already in your kitchen, which is exactly how I like it.
For the Roasted Garlic
- 1 whole head of garlic (look for firm, tight cloves—no squishy ones)
- 1 teaspoon olive oil (just enough to coat the garlic; I use extra virgin for flavor)
- A pinch of salt (helps draw out moisture during roasting)
For the Mashed Potatoes
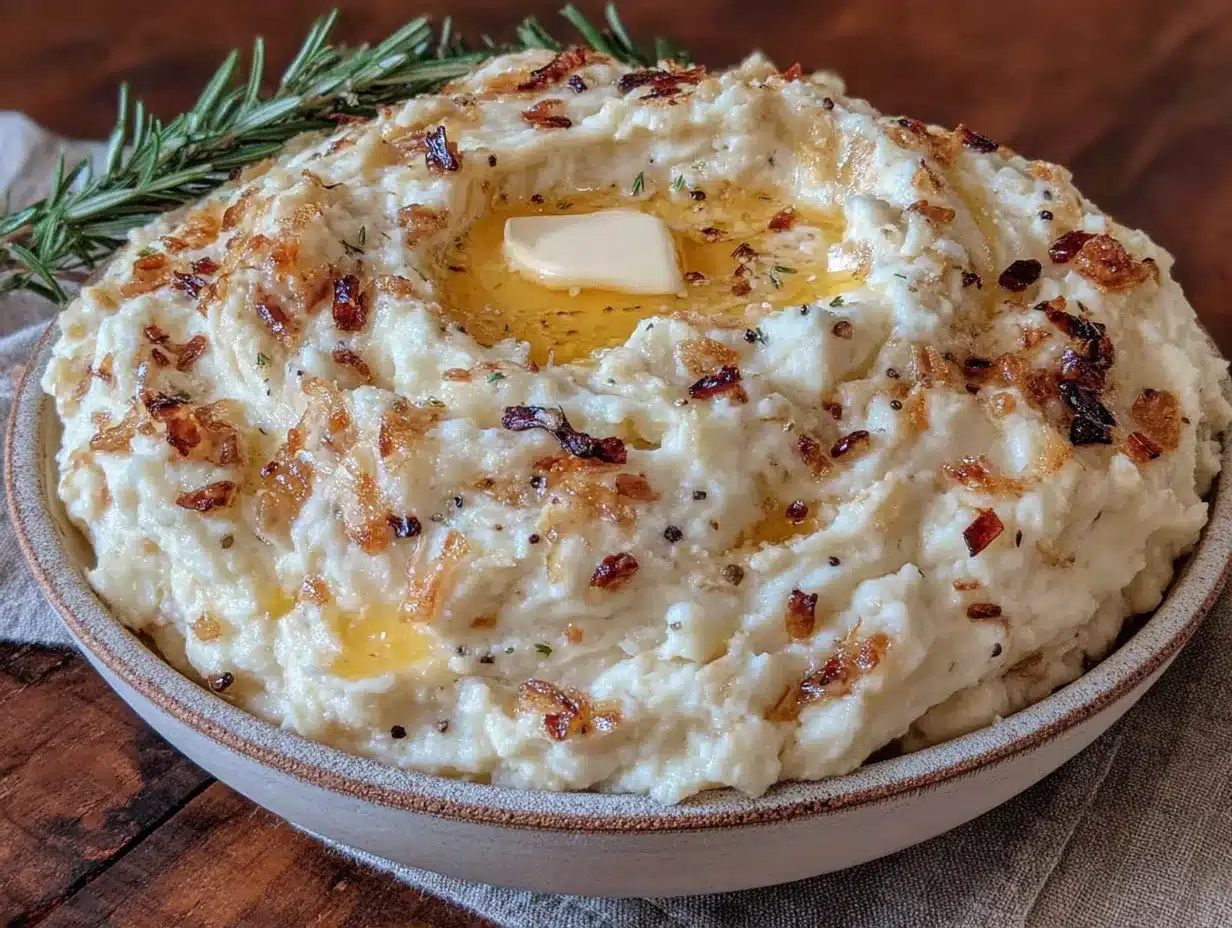
- 2 pounds Yukon Gold potatoes (about 6 medium potatoes)—these are my absolute favorite for mashing. They’re naturally buttery and creamy without needing tons of added fat. Russets work too, but they’re starchier and can get gluey if you over-mash them.
- 4 tablespoons unsalted butter (softened to room temperature—trust me on this, cold butter doesn’t incorporate as smoothly)
- ½ cup whole milk (warmed slightly; I’ve used 2% in a pinch and it’s fine, but whole milk gives that extra richness)
- ¼ cup sour cream (adds tanginess and creaminess—I recommend full-fat for best texture, but Greek yogurt works beautifully too)
- 1 teaspoon salt (plus more to taste—I use kosher salt for its clean flavor)
- ½ teaspoon black pepper (freshly ground is non-negotiable here, it makes a real difference)
- 2 tablespoons fresh chives or parsley (optional, but highly recommended for a pop of color and freshness)
Ingredient Tips from My Kitchen
I’ve learned a few things the hard way over the years. Like the time I used cold milk straight from the fridge and ended up with lumpy, sad potatoes. Warm your milk slightly—just 30 seconds in the microwave—and it’ll incorporate like a dream. Also, don’t skip the sour cream. It’s not just for tang; the acidity actually helps balance the richness of the butter and roasted garlic. If you’re dairy-free, swap the butter for a good vegan butter (I like Miyoko’s) and use unsweetened oat milk with a tablespoon of lemon juice for that sour cream effect.
Equipment Needed
You don’t need a fancy kitchen to make these potatoes shine. Here’s what I use:
- Baking sheet or small baking dish (for roasting the garlic)
- Aluminum foil (to wrap the garlic—keeps it steaming and soft)
- Large pot (4-quart or bigger—potatoes need room to boil without crowding)
- Colander (for draining the potatoes)
- Potato masher or ricer (I prefer a classic masher for that slightly rustic texture, but a ricer gives you ultra-smooth results if that’s your thing)
- Mixing bowl (if using a hand mixer, or you can mash right in the pot)
- Measuring cups and spoons
- Chef’s knife and cutting board
If you don’t have a potato ricer, don’t worry—I actually prefer the texture from a hand masher. It leaves a few small lumps that remind you you’re eating real food. And if you’re using a hand mixer, be careful not to over-beat the potatoes or they’ll turn into glue. I learned that one the hard way during a Thanksgiving disaster. Just mash gently until everything comes together.
Preparation Method
Step 1: Roast the Garlic
Preheat your oven to 400°F (200°C). Take your whole head of garlic and slice off the top quarter-inch to expose the tops of the cloves. Don’t peel it—just cut the top off. Place it on a piece of aluminum foil, drizzle with that teaspoon of olive oil, and sprinkle with a pinch of salt. Wrap the foil tightly around the garlic, creating a little packet. Roast for 35-40 minutes, until the cloves are soft and golden. You’ll know it’s done when you can easily pierce a clove with a knife. Let it cool for a few minutes—it’ll be hot enough to burn your fingers if you’re impatient like I was the first time.
Step 2: Boil the Potatoes
While the garlic roasts, peel your potatoes and cut them into uniform 2-inch chunks. This is important—if your pieces are different sizes, some will be mushy while others are still hard. Rinse the cut potatoes in cold water to remove excess starch (this helps prevent them from getting gummy). Place them in your large pot and cover with cold water by about an inch. Add a generous pinch of salt to the water. Bring to a boil over high heat, then reduce to a simmer and cook for 15-20 minutes, until the potatoes are fork-tender. You should be able to slide a knife through a chunk with zero resistance.
Step 3: Drain and Dry
Drain the potatoes in your colander, but here’s a trick I picked up from a chef friend—return them to the hot pot for about 30 seconds, shaking gently. This lets any excess steam escape and dries out the potatoes slightly, which means they’ll absorb the butter and milk better. Don’t skip this step! It makes a noticeable difference in the final texture.
Step 4: Mash the Potatoes
Now for the fun part. Add your softened butter to the hot potatoes and start mashing. I use a hand masher and work in a gentle, rocking motion—no aggressive pounding. Once the butter is mostly incorporated, squeeze the roasted garlic cloves out of their skins. They should slide right out like soft little gems. Mash them into the potatoes along with the butter. The smell at this point is absolutely intoxicating—sweet, nutty, and buttery all at once.
Step 5: Add the Liquid
Pour in your warmed milk and add the sour cream, salt, and pepper. Continue mashing until everything is combined and smooth. Taste and adjust seasoning—I usually add another pinch of salt at this point. If the potatoes seem too thick, add a splash more warm milk. If they’re too thin, let them sit for a minute; they’ll thicken as they cool. Fold in your chopped chives or parsley if using.
Step 6: Serve Immediately
These potatoes are best served hot, right after mashing. Transfer them to a serving bowl, make a few decorative swirls on top with the back of a spoon, and add an extra pat of butter if you’re feeling indulgent. Which, let’s be honest, you should be.
Cooking Tips & Techniques
I’ve made a lot of mashed potatoes in my time, and I’ve messed up plenty along the way. Here’s what I’ve learned so you don’t have to repeat my mistakes.
Don’t overwork the potatoes. This is the number one mistake people make. The more you mash, beat, or whip potatoes, the more starch you activate, and the more gluey they become. Mash just until everything comes together—a few small lumps are perfectly fine and actually add character.
Warm your dairy. Cold milk or butter hitting hot potatoes creates a shock that can leave you with lumpy, uneven texture. I microwave my milk for about 30 seconds and let my butter sit out for at least 20 minutes before starting. If I forget to soften the butter (which happens more often than I’d like to admit), I cut it into small cubes so it warms up faster.
Salt your water generously. You want the potatoes to be seasoned from the inside out. If you only add salt at the end, you end up needing way more to get the same flavor. I add about a teaspoon of salt to the boiling water—it makes a real difference.
Roast extra garlic while you’re at it. Seriously, roast two heads of garlic at once. The extra one keeps in the fridge for a week and is amazing spread on toast, stirred into pasta, or mixed into salad dressings. You’ll thank me later.
Timing is everything. The garlic takes about 35-40 minutes, and the potatoes take about 20 minutes to boil. Start the garlic first, then start your potatoes about 15 minutes later. Everything should finish around the same time, and you’ll have hot, fresh mashed potatoes ready to go.
Variations & Adaptations
One of the things I love about this recipe is how adaptable it is. Here are some ways I’ve tweaked it over the years:
- Vegan Version : Swap the butter for vegan butter, use unsweetened oat milk or almond milk, and replace the sour cream with a tablespoon of lemon juice mixed into the plant milk. It’s not exactly the same, but it’s surprisingly good.
- Herb-Infused : Add a handful of fresh rosemary or thyme sprigs to the milk as it warms, then strain them out before adding to the potatoes. It gives a subtle herbal note that pairs beautifully with the roasted garlic.
- Cheesy Twist : Stir in ½ cup of grated Parmesan or sharp cheddar after mashing. The cheese melts right in and adds a whole new layer of savory goodness. I did this once when I had leftover Parmesan and it was a game-changer.
- Spicy Kick : Add a pinch of cayenne pepper or a few dashes of hot sauce along with the salt and pepper. It sounds weird, but the heat cuts through the richness perfectly.
- Load ‘Em Up : Top with crispy bacon bits, shredded cheddar, and a dollop of sour cream for loaded mashed potatoes that could easily pass as a main dish.
I once made a version with roasted shallots alongside the garlic because I had some that were about to go bad. It was fantastic—the shallots added a slightly sweeter, more delicate flavor. Don’t be afraid to experiment with what you have on hand.
Serving & Storage Suggestions
These potatoes are incredibly versatile when it comes to serving. I love them alongside a juicy roast chicken, a seared steak, or even just a simple green salad for a lighter meal. They’re also amazing as a base for shepherd’s pie or as a topping for fish cakes. Honestly, I’ve eaten them straight from the bowl as a meal on more than one occasion and felt zero shame about it.
For storage, let the potatoes cool completely, then transfer them to an airtight container. They’ll keep in the refrigerator for up to 4 days. The flavors actually meld and deepen overnight, so leftovers are almost better than the original batch. To reheat, add a splash of milk or butter and warm gently on the stovetop or in the microwave, stirring occasionally. I prefer the stovetop method—it gives you more control and prevents the potatoes from drying out.
You can also freeze these potatoes for up to 3 months. Portion them into freezer-safe bags, flatten them out so they thaw evenly, and reheat directly from frozen. Just add a little extra milk when reheating to restore the creamy texture. I’ve done this for holiday prep and it’s a lifesaver—one less thing to worry about on the big day.
Nutritional Information & Benefits
While these potatoes are definitely a comfort food, they do offer some nutritional perks. Potatoes are a good source of vitamin C, potassium, and fiber (especially if you leave the skins on, though I peel mine for this recipe). Garlic is packed with antioxidants and has anti-inflammatory properties—roasting it actually makes these compounds more bioavailable. And the butter and milk provide calcium and vitamin D, which are essential for bone health.
Here’s an approximate breakdown per serving (based on 6 servings):
- Calories: 280
- Fat: 14g
- Carbohydrates: 34g
- Fiber: 3g
- Protein: 5g
- Sodium: 480mg
If you’re watching your intake, you can lighten things up by using less butter, swapping the sour cream for Greek yogurt, and using low-fat milk. But honestly? Sometimes you just need the real thing. I say enjoy these in moderation and savor every bite.
Conclusion
These Cozy Roasted Garlic Mashed Potatoes have become my go-to comfort food for a reason. They’re simple enough for a random Tuesday night, but special enough to grace your holiday table. The roasted garlic adds a depth of flavor that feels fancy without any extra effort, and the texture is exactly what you want from mashed potatoes—creamy, buttery, and perfectly smooth with just a little bit of rustic charm.
I hope you give these a try, and I’d love to hear how they turn out for you. Did you add your own twist? Serve them with something unexpected? Share your experience in the comments below—I read every single one and love seeing what you create. And if you’re looking for more cozy comfort food ideas, check out my creamy tuscan chicken or easy slow cooker beef stew for a complete comfort meal. Now go make some potatoes, light a candle, and give yourself the cozy night you deserve.
Frequently Asked Questions
Can I use Russet potatoes instead of Yukon Gold?
Absolutely, but there’s a catch. Russets are starchier, which means they can turn gluey if you over-mash them. If using Russets, be extra gentle and stop mashing as soon as everything comes together. Yukon Golds are more forgiving and naturally buttery, which is why I prefer them.
Do I have to roast the garlic, or can I use raw?
You can use raw garlic, but I really don’t recommend it. Raw garlic has a sharp, pungent bite that can overwhelm the delicate potato flavor. Roasting mellows the garlic into something sweet, nutty, and almost creamy—it’s a completely different experience. If you’re short on time, you can microwave the garlic (wrap it in a damp paper towel and microwave for 60-90 seconds), but roasted is best.
Can I make these potatoes ahead of time?
Yes! Make them up to 2 days in advance, store them in the fridge, and reheat gently on the stovetop with a splash of milk. They won’t be quite as fluffy as fresh-made, but they’ll still be delicious. For holiday prep, I often make them the day before and reheat in a slow cooker on low.
How do I fix mashed potatoes that are too thin?
Let them sit for a few minutes—they’ll thicken as they cool. If they’re still too thin, you can mash in a little instant potato flakes (just a tablespoon at a time) or cook them over low heat, stirring constantly, to evaporate some of the liquid. Don’t add more dry potatoes unless absolutely necessary, or you’ll change the flavor.
Can I make this recipe dairy-free?
Yes! Use vegan butter, unsweetened oat milk or almond milk, and replace the sour cream with a tablespoon of lemon juice mixed into your plant milk. The texture won’t be exactly the same, but it’s still creamy and delicious. I’ve made it this way for dairy-free friends and they always ask for seconds.
Pin This Recipe!
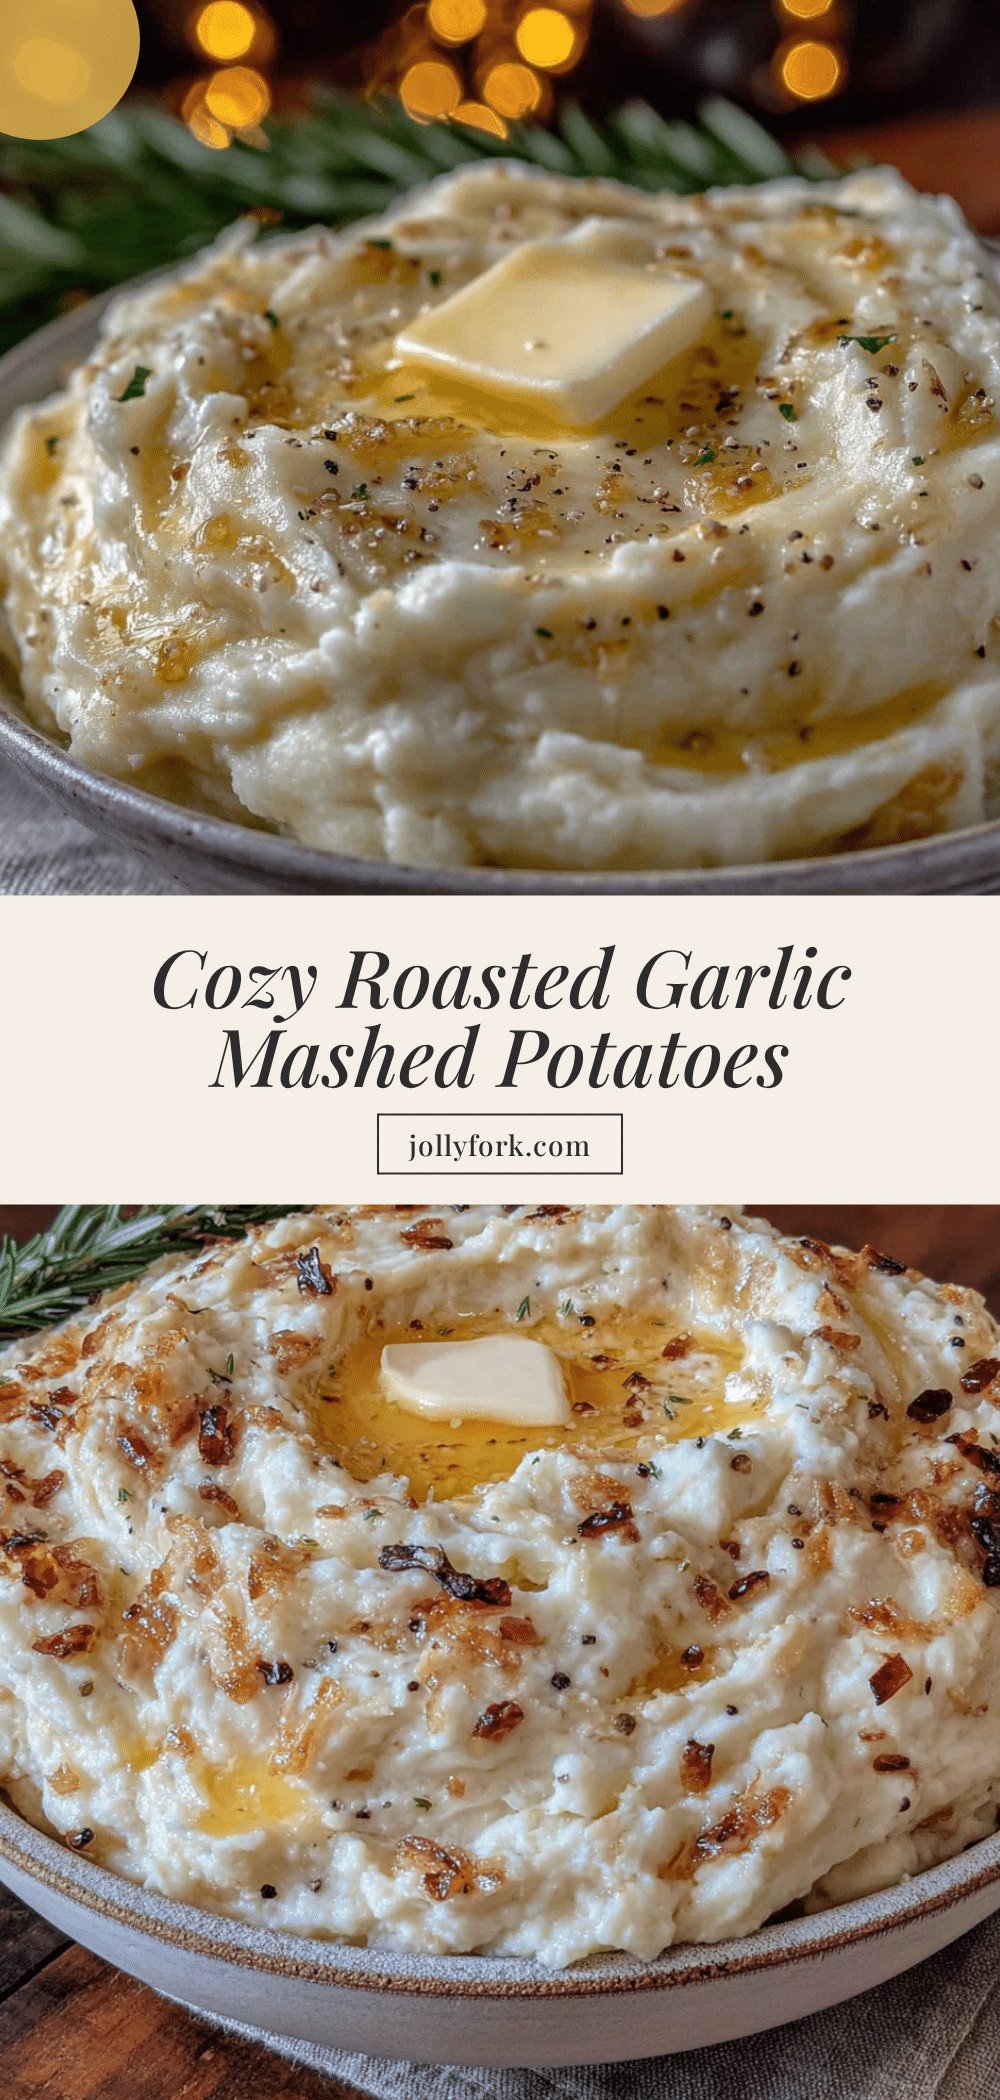
Cozy Roasted Garlic Mashed Potatoes

These creamy, buttery mashed potatoes feature sweet roasted garlic for a comforting side dish that’s perfect for cozy nights. Simple ingredients and easy steps make this a go-to recipe for any occasion.
- Prep Time: 15 minutes
- Cook Time: 40 minutes
- Total Time: 55 minutes
- Yield: 6 servings 1x
- Category: Side Dish
- Cuisine: American
Ingredients
- 1 whole head of garlic
- 1 teaspoon olive oil
- A pinch of salt
- 2 pounds Yukon Gold potatoes (about 6 medium)
- 4 tablespoons unsalted butter, softened
- ½ cup whole milk, warmed
- ¼ cup sour cream
- 1 teaspoon salt, plus more to taste
- ½ teaspoon black pepper, freshly ground
- 2 tablespoons fresh chives or parsley (optional)
Instructions
- Preheat oven to 400°F (200°C). Slice off the top quarter-inch of the garlic head to expose cloves. Place on foil, drizzle with olive oil, sprinkle with salt, and wrap tightly. Roast for 35-40 minutes until cloves are soft and golden. Let cool slightly.
- While garlic roasts, peel potatoes and cut into uniform 2-inch chunks. Rinse in cold water to remove excess starch. Place in a large pot, cover with cold water by an inch, and add a generous pinch of salt. Bring to a boil, then reduce to a simmer and cook for 15-20 minutes until fork-tender.
- Drain potatoes in a colander, then return them to the hot pot for about 30 seconds, shaking gently to let excess steam escape and dry them slightly.
- Add softened butter to the hot potatoes and mash with a hand masher in a gentle rocking motion. Squeeze roasted garlic cloves out of their skins and mash into the potatoes along with the butter.
- Pour in warmed milk and add sour cream, salt, and pepper. Continue mashing until combined and smooth. Taste and adjust seasoning. Fold in chopped chives or parsley if using.
- Serve immediately hot, transferred to a serving bowl. Optionally, top with an extra pat of butter.
Notes
Don’t overwork the potatoes to avoid gluey texture. Warm dairy before adding. Salt the boiling water generously. Roast extra garlic for later use. Start garlic first, then potatoes about 15 minutes later for perfect timing.
Nutrition
- Serving Size: 1 serving
- Calories: 280
- Sugar: 2
- Sodium: 480
- Fat: 14
- Saturated Fat: 8
- Carbohydrates: 34
- Fiber: 3
- Protein: 5
Keywords: mashed potatoes, roasted garlic, comfort food, side dish, easy, creamy, vegetarian


