My husband looked up from his plate on a random Tuesday night and said, “You know, this might be my favorite thing you’ve ever made.” And he wasn’t even done chewing. That’s the kind of reaction that stops you mid-bite. I’d thrown together a one-pan garlic butter chicken thighs with rice out of sheer desperation—late evening, no plan, and a fridge that was mostly condiments and hope. But the way he went back for seconds (and then scraped the pan) told me I’d accidentally stumbled onto something special.
Honestly, I almost didn’t make it. I was tired, the kitchen was a mess from the night before, and the idea of washing multiple pans felt like a personal insult. But I had chicken thighs in the fridge (they were about to go bad, let’s be real) and a bag of rice that was staring at me from the pantry. So I grabbed my biggest skillet, threw some butter in it, and crossed my fingers. What came out of that pan was pure comfort—juicy, golden-brown chicken sitting on a bed of fluffy, garlicky rice that had soaked up all the buttery juices. It was the kind of meal that makes you feel like you know what you’re doing, even when you’re absolutely winging it.
That night, I scribbled down what I’d done on a sticky note (butter, garlic, chicken, rice, chicken broth, a little paprika) and stuck it to the inside of a cabinet. I’ve made it at least a dozen times since, tweaking the ratios and the timing until it became something I could make with my eyes closed. And now, it’s the recipe I turn to when I need a guaranteed win—whether it’s a busy weeknight, a lazy Sunday, or a night when I just want to hear someone say “this is my favorite thing you’ve ever made” again. This one-pan dinner isn’t fancy. It’s just really, really good.
Why You’ll Love This Recipe
Let’s be honest—dinner doesn’t have to be complicated to be memorable. This one-pan garlic butter chicken thighs with rice proves that point beautifully. It’s the kind of meal that feels like a hug on a plate, but it comes together with minimal effort and maximum flavor. Here’s why it’s earned a permanent spot in my weekly rotation:
- One Pan, Minimal Mess : Everything cooks in a single skillet. That means less time scrubbing dishes and more time actually enjoying your meal. I’m all about efficiency, especially on a Tuesday night.
- Simple, Pantry-Friendly Ingredients : You probably have most of these ingredients already. Chicken thighs, rice, garlic, butter, chicken broth—nothing fancy, nothing hard to find. It’s comfort food made from what you’ve got.
- Juicy Chicken + Perfect Rice : The chicken thighs stay incredibly moist and tender because they cook right on top of the rice, letting all those buttery juices drip down and flavor every single grain. The rice comes out fluffy and fragrant, not mushy or dry.
- Bold Garlic Butter Flavor : We’re not shy with the garlic here. It infuses the butter, the chicken, and the rice, creating a rich, savory depth that makes this dish feel way more indulgent than it actually is.
- Perfect for Busy Weeknights or Cozy Dinners : It’s quick enough for a rushed evening but impressive enough to serve to guests. I’ve made it for my in-laws and for a quiet dinner with just us—it works every time.
- Family-Approved : Even picky eaters tend to love this one. The rice is mild and buttery, the chicken is tender, and there’s nothing weird or intimidating about it. My kids ask for it by name now.
I’ve tested this recipe more times than I can count, tweaking the liquid ratios and the cooking time until the rice was perfectly cooked and the chicken skin was crackling-crisp. It’s not just another chicken and rice recipe—it’s the version that actually works. The one you’ll come back to again and again.
What Ingredients You Will Need
This recipe relies on a handful of simple, wholesome ingredients that work together to create something truly satisfying. No weird specialty items, no last-minute grocery store runs. Here’s what you’ll need:
- Chicken Thighs (bone-in, skin-on) : I strongly recommend bone-in, skin-on thighs for this recipe. The bone keeps the meat juicy during cooking, and the skin gets beautifully crispy when seared. You can use boneless, skinless thighs in a pinch, but you’ll lose some flavor and moisture. I usually buy a pack of 4-6 thighs, depending on how many people I’m feeding.
- Unsalted Butter : We use a generous amount here—about 4 tablespoons. Unsalted gives you control over the salt level. It melts into the pan, browns slightly, and carries the garlic flavor throughout the dish.
- Garlic (fresh, minced) : Don’t skimp on this. You’ll need about 6-8 cloves, maybe more if you’re a garlic lover like me. Fresh garlic is non-negotiable here—the jarred stuff won’t give you the same punch. I like to mince it finely so it melts into the butter.
- Long-Grain White Rice : Basmati or jasmine work beautifully. They cook up light and fluffy, with distinct grains that don’t clump together. Avoid short-grain or sticky rice here—you want something that absorbs the broth without turning into a gluey mess.
- Chicken Broth : Use a good-quality broth or stock. It’s the liquid that cooks the rice and carries all the flavor. Low-sodium is a good idea so you can control the salt. Homemade is lovely, but store-bought works perfectly fine.
- Onion (yellow or sweet) : One medium onion, finely diced. It adds a subtle sweetness and depth to the rice. Sauté it in the butter before adding the garlic and rice—it’s a small step that makes a big difference.
- Paprika (smoked or sweet) : A teaspoon of paprika adds a warm, slightly smoky flavor to the chicken. Smoked paprika is my personal favorite—it gives the dish a little extra depth. You could also use a pinch of cayenne if you want heat.
- Dried Thyme (or fresh) : A teaspoon of dried thyme (or a few sprigs of fresh) adds an earthy, herbal note that pairs perfectly with the garlic butter. If you’re using fresh, add it with the broth.
- Salt and Black Pepper : Season generously. The chicken needs it, and the rice needs it too. I always taste the broth before adding the rice to make sure it’s well-seasoned.
- Fresh Parsley (for garnish) : Optional but nice. A sprinkle of fresh parsley at the end adds a pop of color and a fresh, clean finish. It’s not essential, but it makes the dish look prettier.
Ingredient Tips: For the best texture, I recommend using a brand like Lundberg or Royal basmati rice. If you’re dairy-free, you can substitute the butter with a good-quality vegan butter or olive oil—the flavor will change slightly, but it will still be delicious. And if you don’t have chicken broth, vegetable broth works in a pinch, though you’ll lose a little richness.
Equipment Needed
You don’t need a lot of fancy tools for this one-pan wonder. Here’s what you’ll need:
- Large, Heavy-Bottomed Skillet or Dutch Oven : A 12-inch skillet with a lid is ideal. Cast iron is my go-to—it holds heat beautifully and gives the chicken a gorgeous sear. A stainless steel or non-stick skillet will also work, just make sure it’s oven-safe if you plan to finish it in the oven (though this recipe is entirely stovetop).
- Sharp Chef’s Knife : For mincing garlic, dicing onion, and trimming any excess fat from the chicken thighs. A good knife makes prep faster and safer.
- Cutting Board : Preferably a large one so you have room to work.
- Measuring Cups and Spoons : For accuracy. I’ve made this recipe enough times that I can eyeball it, but measuring helps when you’re making it for the first time.
- Wooden Spoon or Spatula : For stirring the rice and scraping up any browned bits from the bottom of the pan. Those bits are pure flavor.
- Tongs : For flipping the chicken thighs without piercing the skin. Tongs give you better control than a fork.
- Lid for the Skillet : You need a tight-fitting lid to trap the steam and cook the rice properly. If your skillet doesn’t have a lid, you can use a sheet of aluminum foil crimped tightly around the edges.
I’ve made this recipe in a cast-iron skillet for years, and I love how evenly it cooks. If you don’t have one, don’t stress—a good-quality stainless steel pan works just as well. The key is using a pan that’s wide enough to hold the chicken in a single layer without crowding.
Preparation Method
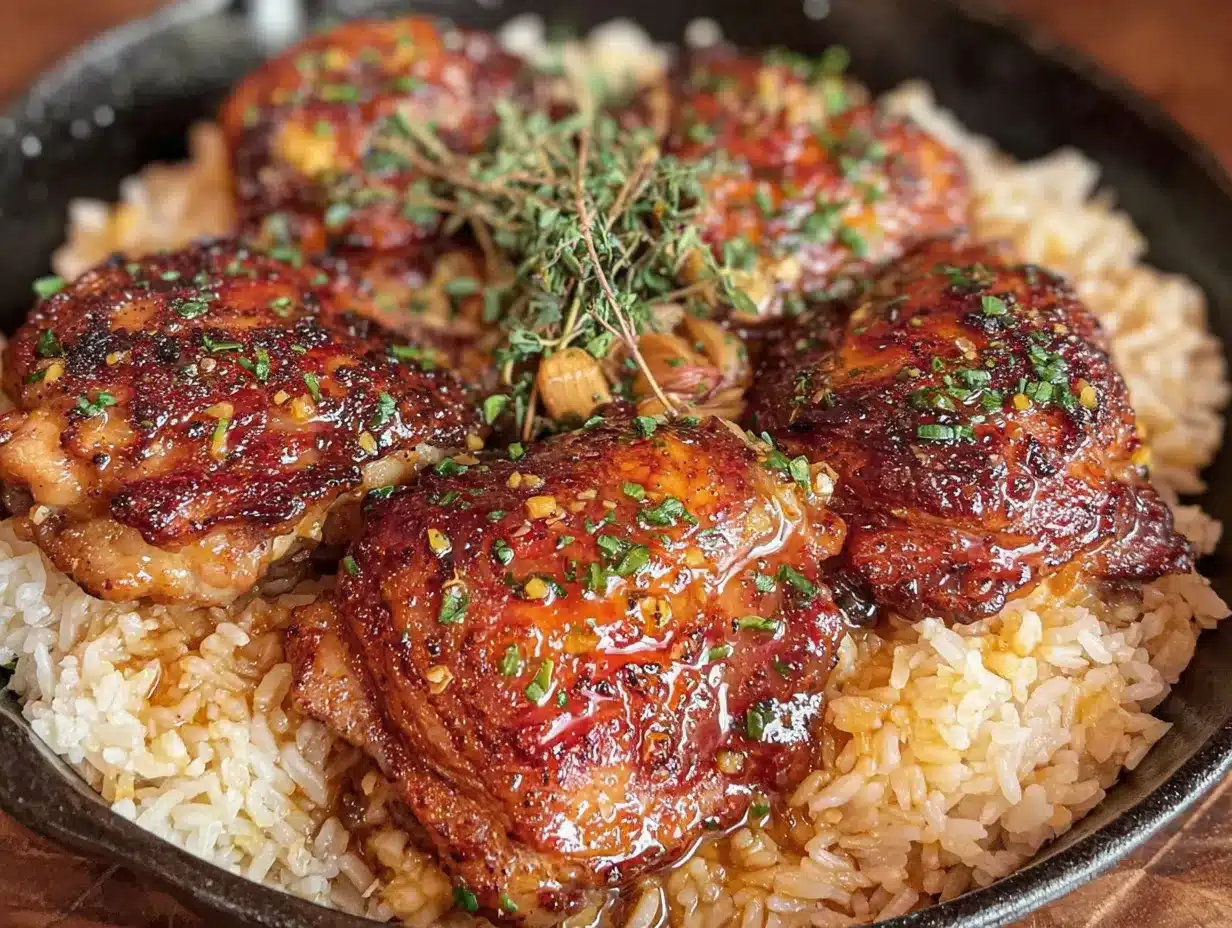
This one-pan garlic butter chicken thighs with rice comes together in about 45 minutes, and most of that time is hands-off. Here’s how to do it:
- Prep the Chicken : Pat the chicken thighs dry with paper towels. This is crucial for crispy skin. Season generously on both sides with salt, pepper, and a teaspoon of paprika. Let them sit at room temperature for about 10 minutes while you prep the other ingredients.
- Sear the Chicken : Heat 2 tablespoons of the butter in your large skillet over medium-high heat. Once the butter is melted and sizzling (but not burning), place the chicken thighs skin-side down in a single layer. Don’t overcrowd the pan—if you have more than 4-5 thighs, do it in batches. Cook for 5-6 minutes without moving them, until the skin is deep golden brown and crispy. Flip and cook for another 3-4 minutes on the other side. Transfer the chicken to a plate and set aside. Don’t wipe out the pan—you want all those browned bits.
- Sauté the Aromatics : Reduce the heat to medium. Add the remaining 2 tablespoons of butter to the pan. Once it melts, add the diced onion and cook for 3-4 minutes, stirring occasionally, until it’s soft and translucent. Add the minced garlic and cook for about 30 seconds, just until fragrant. Stir constantly so the garlic doesn’t burn.
- Toast the Rice : Add the rice to the pan and stir to coat it in the buttery onion-garlic mixture. Cook for 1-2 minutes, stirring frequently, until the rice is lightly toasted and smells nutty. This step adds so much flavor to the final dish.
- Add the Liquid : Pour in the chicken broth and add the dried thyme (if using fresh, add the sprigs now). Stir everything together, scraping up any browned bits from the bottom of the pan with your wooden spoon. Bring the liquid to a gentle simmer.
- Return the Chicken : Nestle the seared chicken thighs back into the pan, skin-side up, on top of the rice. They should be sitting partially above the liquid—this keeps the skin crispy while the rice cooks below. If the liquid doesn’t quite cover the rice, that’s okay; the steam will cook it.
- Cover and Cook : Reduce the heat to low, cover the skillet with a tight-fitting lid, and let it cook undisturbed for 20-25 minutes. Do not lift the lid during this time—the steam is what cooks the rice evenly. Set a timer and walk away.
- Check and Rest : After 20 minutes, remove the lid carefully (watch out for the steam). The rice should be tender and the liquid should be absorbed. If the rice is still a little firm, cover and cook for another 3-5 minutes. Once done, remove the pan from the heat and let it rest, covered, for 5 minutes. This resting time allows the rice to finish absorbing any remaining moisture and fluff up.
- Garnish and Serve : Sprinkle with fresh chopped parsley if you like. Fluff the rice gently with a fork before serving. The chicken should be tender and juicy, with a crispy skin that’s still intact. Serve straight from the pan—it’s part of the charm.
Pro Tip: If you notice the rice is browning too quickly on the bottom before it’s fully cooked, your heat might be too high. Next time, turn it down a notch and make sure your lid is sealed tight.
Cooking Tips & Techniques
After making this one-pan garlic butter chicken thighs with rice more times than I can count, I’ve picked up a few tricks that make the difference between good and unforgettable. Here’s what I’ve learned:
- Dry the Chicken Thoroughly : This is non-negotiable for crispy skin. Use paper towels and pat until the skin feels tacky, not wet. Moisture is the enemy of a good sear.
- Don’t Skip the Toasting Step : Toasting the rice in the butter and aromatics before adding the liquid is a game-changer. It adds a nutty flavor and helps the grains stay separate during cooking. It only takes two minutes, but it makes the rice taste like you spent way more effort than you did.
- Use a Tight-Fitting Lid : Steam is your best friend here. If your lid doesn’t fit snugly, the liquid will evaporate too quickly and the rice will be undercooked. I’ve used foil in a pinch, and it works, but a proper lid is better.
- Resist the Urge to Stir : Once you cover the pan, leave it alone. Stirring the rice during cooking releases starch and makes it gummy. Trust the process—the steam will do the work.
- Let It Rest : That 5-minute rest at the end is crucial. It lets the rice finish absorbing the last bit of liquid and fluffs up beautifully. I know it’s hard to wait, but it’s worth it.
- Watch the Heat : Cooking on too high a heat can burn the rice on the bottom before the rest is done. Medium-low to low is the sweet spot. If you hear a lot of sizzling, turn it down.
I once rushed the searing step and ended up with pale, rubbery chicken skin. It still tasted fine, but it wasn’t the same. Patience at the stove pays off here.
Variations & Adaptations
This recipe is incredibly versatile. Here are a few ways I’ve adapted it over the years:
- Make It Dairy-Free : Swap the butter for a good-quality vegan butter or use olive oil. The flavor will be a little different, but it’s still delicious. I’ve used avocado oil too, and it works well.
- Add Vegetables : Toss in some sliced mushrooms, bell peppers, or green beans along with the onion. They add color, texture, and nutrients. I’ve also added a handful of frozen peas at the end—they warm through in the residual heat.
- Spice It Up : Add a pinch of red pepper flakes or a diced jalapeño with the garlic for some heat. Or use a teaspoon of smoked paprika and a pinch of cayenne for a smoky-spicy kick.
- Use Different Herbs : Rosemary, oregano, or even a bay leaf work beautifully instead of thyme. Fresh herbs are best, but dried work in a pinch. I’ve used a sprig of fresh rosemary before, and it was lovely.
- Try Brown Rice : You can use brown rice, but you’ll need to adjust the liquid and cooking time. Use about 1 ½ cups of broth and cook for 40-45 minutes, covered. Check for doneness and add a splash more broth if needed.
- Chicken Drumsticks or Breasts : Bone-in, skin-on drumsticks work the same way. Boneless, skinless chicken breasts will cook faster (about 15-18 minutes), but they won’t be as juicy. Adjust the timing accordingly.
I once made a version with lemon zest and fresh dill instead of thyme, and it was bright and summery. Don’t be afraid to experiment—it’s hard to go wrong with garlic butter and chicken.
Serving & Storage Suggestions
This dish is best served fresh from the pan, but leftovers are still pretty great. Here’s how to handle both:
- Serving Temperature : Serve hot, straight from the skillet. The chicken skin will be crispiest right after cooking. I like to fluff the rice with a fork just before serving to separate the grains.
- Presentation : Garnish with fresh parsley and maybe a squeeze of lemon juice for brightness. A side of steamed green beans or a simple green salad balances the richness nicely. For a heartier meal, serve with crusty bread to soak up any remaining buttery juices.
- Complementary Dishes : This pairs beautifully with a side of roasted vegetables, like the cozy roasted butternut squash and apple fall salad for a seasonal touch. Or keep it simple with a side of steamed broccoli. If you’re in the mood for soup, a bowl of creamy tomato basil soup with easy grilled cheese croutons would be a comforting starter.
- Storage : Store leftovers in an airtight container in the refrigerator for up to 3 days. The rice might absorb some moisture and soften, but the flavor will still be great. I recommend removing the chicken from the bone before storing to make reheating easier.
- Reheating : The best way to reheat is in a skillet over medium-low heat with a splash of chicken broth or water to add moisture. Cover and heat for 5-7 minutes, stirring occasionally. You can also use the microwave, but the rice might get a little mushy. For crispy skin, reheat the chicken separately in a hot oven or air fryer at 375°F for 5-7 minutes.
- Freezing : You can freeze the cooked dish for up to 3 months. Let it cool completely, then transfer to a freezer-safe container. Thaw overnight in the fridge before reheating. The texture of the rice will change slightly after freezing, but it’s still a solid meal prep option.
The flavors actually deepen a little after a day in the fridge. It’s one of those rare dishes that might be even better the next day—if there’s any left.
Nutritional Information & Benefits
This one-pan dinner is hearty and satisfying, but it also offers some nutritional perks. Here’s a rough estimate per serving (based on 4 servings):
- Calories : Approximately 550-600 calories per serving (chicken thigh + rice)
- Protein : 35-40 grams (thanks to the chicken thighs)
- Carbohydrates : 45-50 grams (mostly from the rice)
- Fat : 25-30 grams (from the chicken skin and butter)
- Fiber : 1-2 grams
- Iron : 10-15% of the daily value
Health Highlights: Chicken thighs are a great source of protein, iron, and B vitamins, which support energy metabolism. Garlic is known for its immune-boosting properties (I’ve even made homemade elderberry syrup for the same reason). Rice provides quick energy, and using bone-in, skin-on chicken adds collagen to the dish, which is great for joints and skin.
Dietary Considerations: This recipe is naturally gluten-free (just double-check your chicken broth). For a lower-carb version, you can swap the rice for cauliflower rice—just cook it separately and serve the chicken on top. It’s not a one-pan meal that way, but it works. If you’re watching your sodium, use low-sodium broth and go easy on the added salt.
I’m not a nutritionist, but I like knowing that a meal this comforting also has some real nutritional value. It’s balance, not perfection.
Conclusion
This one-pan garlic butter chicken thighs with rice has become my go-to for so many reasons. It’s the recipe I make when I’m tired, when I’m busy, and when I want to feel like I’ve got dinner handled without breaking a sweat. The chicken comes out juicy and golden, the rice is fluffy and infused with garlic butter flavor, and the whole thing comes together in a single pan. No piles of dishes, no complicated techniques—just honest, delicious food.
I hope you give this recipe a try and make it your own. Maybe you’ll add a little extra garlic (I always do) or throw in some vegetables you have lying around. Maybe you’ll serve it to your family on a random Tuesday and watch someone scrape the pan clean. That’s the beauty of a recipe like this—it’s simple enough to become a staple, but flexible enough to adapt to whatever you need.
If you make it, I’d love to hear how it turned out. Drop a comment below and tell me about your version. Did you add anything? Change anything? Burn anything? (We’ve all been there.) And if you’re looking for another cozy one-pan meal, check out this cozy poor man’s beef stew with potatoes and carrots—it’s another weeknight hero. Happy cooking!
Frequently Asked Questions
Can I use boneless, skinless chicken thighs?
Yes, you can. The cooking time will be shorter (about 15-18 minutes covered), and you’ll lose some of the crispy skin texture. The chicken will still be juicy, but it won’t have that same golden crust. If you go this route, consider searing the thighs well on both sides before adding them back to the pan.
Why is my rice mushy or undercooked?
Mushy rice usually means too much liquid or the heat was too high. Undercooked rice means not enough liquid or the lid wasn’t tight enough. Stick to the ratio of 1 cup rice to 1 ½ cups broth, and make sure your lid seals well. If the rice is still hard after 20 minutes, add a splash of broth and cook for another 5 minutes.
Can I make this in the oven instead of on the stovetop?
Absolutely. Sear the chicken and sauté the aromatics in an oven-safe skillet, then add the rice and broth. Cover and bake at 375°F for 25-30 minutes, or until the rice is tender and the liquid is absorbed. The oven method is great if you want a more hands-off approach.
How do I get the chicken skin extra crispy?
Pat the chicken thighs very dry before seasoning. Sear them skin-side down in hot butter without moving them for a full 5-6 minutes. Don’t rush this step. Also, make sure the chicken sits above the liquid when you add it back to the pan—if the skin is submerged, it will steam and get soft.
Can I use brown rice or wild rice?
Yes, but you’ll need to adjust the liquid and cooking time. For brown rice, use 1 ½ cups of broth and cook for 40-45 minutes. For wild rice, use 2 cups of broth and cook for 45-50 minutes. Check for doneness and add a little extra broth if the rice is still firm.
Pin This Recipe!
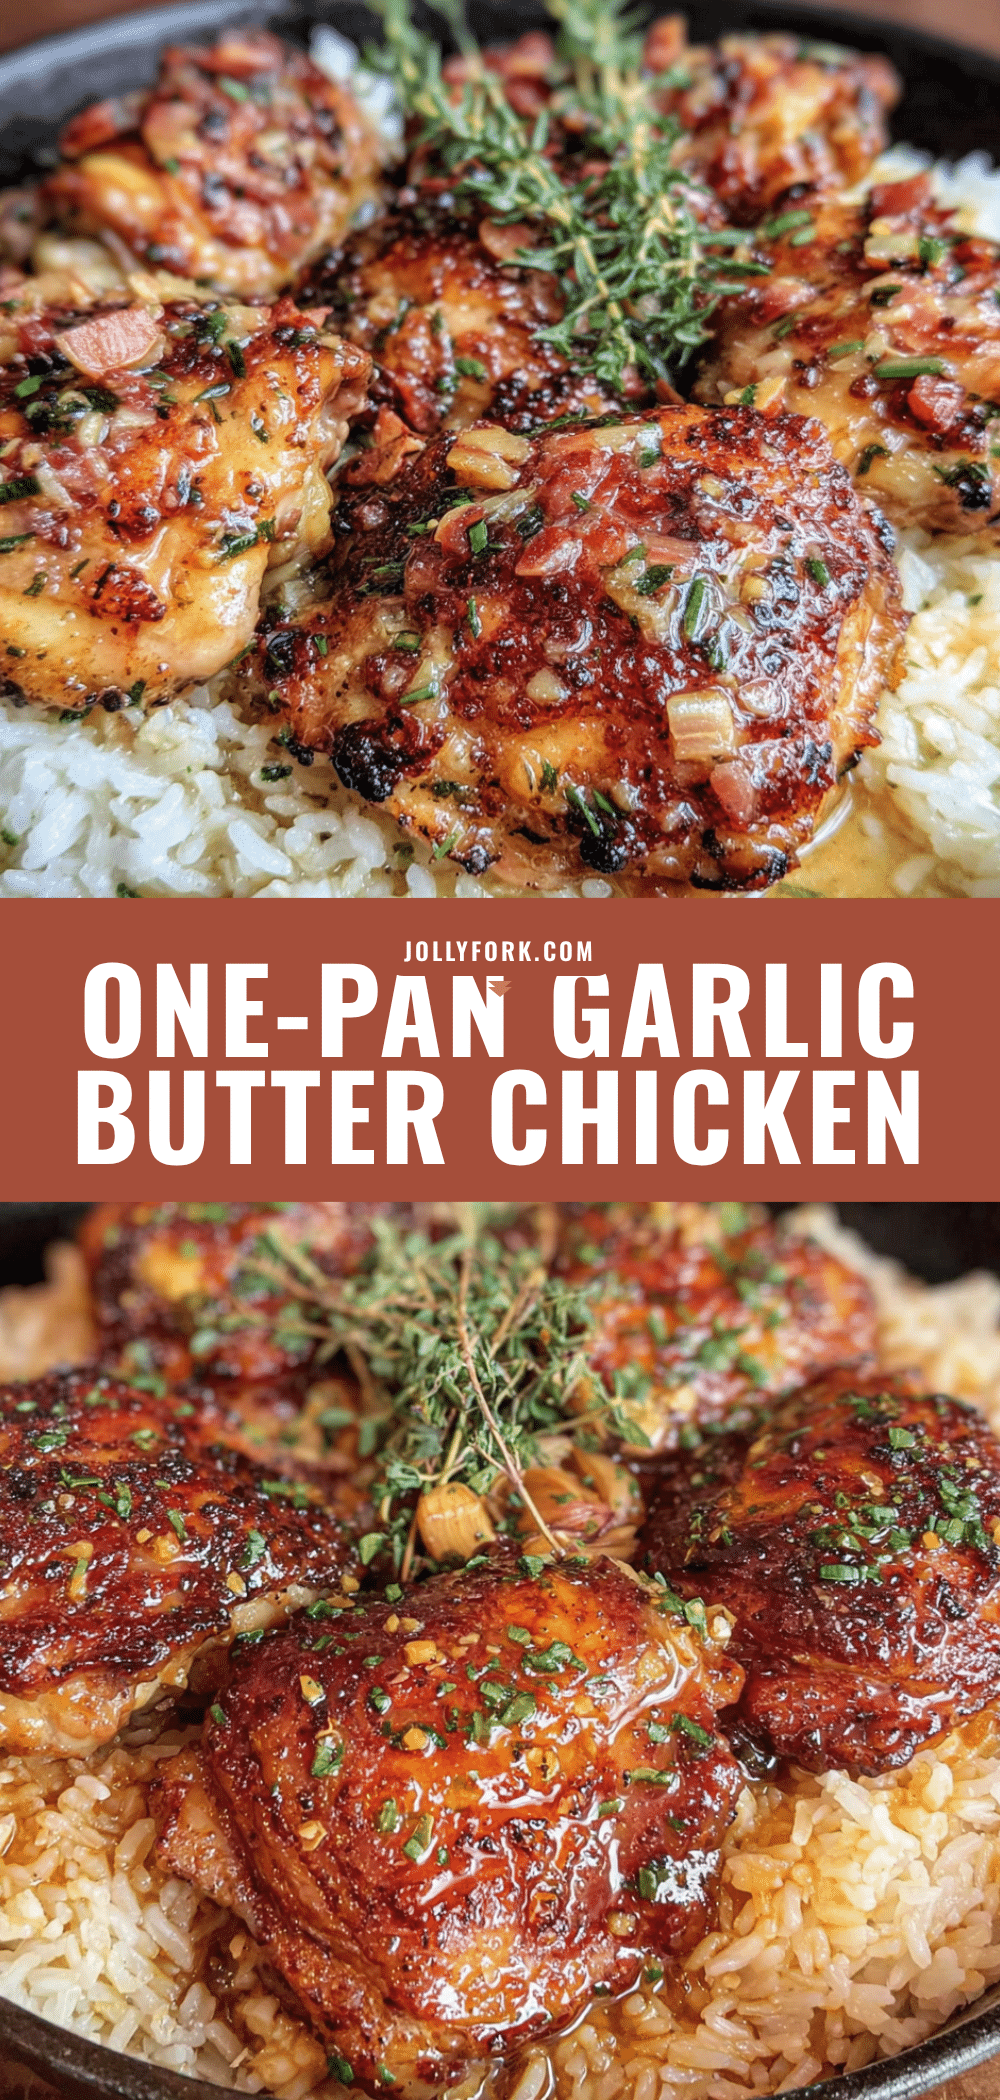
Perfect One-Pan Garlic Butter Chicken Thighs with Rice

Juicy, golden-brown chicken thighs on a bed of fluffy, garlicky rice, all cooked in a single skillet for minimal mess and maximum flavor. This easy weeknight dinner is pure comfort food that feels like a hug on a plate.
- Prep Time: 15 minutes
- Cook Time: 30 minutes
- Total Time: 45 minutes
- Yield: 4 servings 1x
- Category: Main Course
- Cuisine: American
Ingredients
- 4–6 bone-in, skin-on chicken thighs
- 4 tablespoons unsalted butter, divided
- 6–8 cloves garlic, minced
- 1 cup long-grain white rice (basmati or jasmine)
- 1 ½ cups chicken broth (low-sodium preferred)
- 1 medium yellow or sweet onion, finely diced
- 1 teaspoon smoked or sweet paprika
- 1 teaspoon dried thyme (or a few sprigs fresh)
- Salt and black pepper, to taste
- Fresh parsley, chopped (for garnish)
Instructions
- Pat the chicken thighs dry with paper towels. Season generously on both sides with salt, pepper, and paprika. Let sit at room temperature for 10 minutes.
- Heat 2 tablespoons of butter in a large skillet over medium-high heat. Place chicken thighs skin-side down in a single layer. Cook 5-6 minutes without moving, until skin is deep golden brown and crispy. Flip and cook 3-4 minutes more. Transfer chicken to a plate; do not wipe out the pan.
- Reduce heat to medium. Add remaining 2 tablespoons butter. Add diced onion and cook 3-4 minutes until soft and translucent. Add minced garlic and cook 30 seconds, stirring constantly.
- Add rice to the pan and stir to coat in the butter mixture. Cook 1-2 minutes, stirring frequently, until rice is lightly toasted and smells nutty.
- Pour in chicken broth and add dried thyme (or fresh sprigs). Stir, scraping up any browned bits from the bottom. Bring to a gentle simmer.
- Nestle the seared chicken thighs back into the pan, skin-side up, on top of the rice. They should sit partially above the liquid.
- Reduce heat to low, cover the skillet with a tight-fitting lid, and cook undisturbed for 20-25 minutes. Do not lift the lid during this time.
- After 20 minutes, remove lid carefully. Rice should be tender and liquid absorbed. If rice is still firm, cover and cook 3-5 minutes more. Remove from heat and let rest, covered, for 5 minutes.
- Garnish with fresh parsley. Fluff rice gently with a fork before serving. Serve straight from the pan.
Notes
For extra crispy skin, pat chicken very dry before seasoning. Do not lift the lid while rice is cooking. Let the dish rest 5 minutes before serving for best texture. If rice browns too quickly, reduce heat.
Nutrition
- Serving Size: 1 chicken thigh with
- Calories: 575
- Sugar: 2
- Sodium: 650
- Fat: 28
- Saturated Fat: 12
- Carbohydrates: 48
- Fiber: 1
- Protein: 38
Keywords: one-pan chicken, garlic butter chicken, chicken thighs with rice, easy weeknight dinner, one skillet meal


